


In a continuation of the Basics Series, we explore the importance of selecting the right firewall for your organization and discuss various types of firewalls, including open-source solutions like pfSense and OPNsense, as well as commercial offerings from Cisco and Palo Alto Networks. After building upon that foundation, this post will dive deeper into OPNsense, a powerful and flexible open-source firewall.
If you have not already done so, consider picking up my book, Cybersecurity Architect's Handbook. The book will allow you to expand on the Basics Series to improve your security and skillset.
We'll provide a detailed, step-by-step guide on how to install and configure OPNsense, empowering you to set up a robust security solution for your network or lab. Whether you're a seasoned IT professional or just starting your journey into network security, this guide will walk you through the process, from initial installation to advanced configuration options. By the end of this post, you'll have a solid understanding of how to deploy and customize OPNsense to meet your organization's specific security needs. So, let's get started and unlock the full potential of this impressive open-source firewall solution.
Selecting the Right Firewall
In today's digital landscape, securing your network is more crucial than ever. One of the most effective ways to protect your network from unauthorized access, malicious attacks, and data breaches is by implementing a robust firewall solution. However, with numerous options available, selecting the right firewall can be a daunting task. In this article, we'll explore the different types of firewalls and provide guidance on how and why to choose the best one for your organization.
Types of Firewalls:
- Packet-Filtering Firewalls: These firewalls examine each packet passing through the network and decide whether to allow or block it based on predefined rules. They operate at the network layer (Layer 3) of the OSI model and are generally less resource-intensive than other types of firewalls. Examples include iptables and Windows Firewall.
- Stateful Inspection Firewalls: These firewalls not only examine individual packets but also keep track of the state of network connections. They operate at the transport layer (Layer 4) and can detect and prevent more sophisticated attacks. Cisco ASA (Adaptive Security Appliance) is a popular example of a stateful inspection firewall.
- Application-Layer Firewalls: Also known as web application firewalls (WAFs), these firewalls operate at the application layer (Layer 7) and can inspect the content of packets, providing granular control over application-specific traffic. They can protect against SQL injection, cross-site scripting (XSS), and other application-layer attacks. Examples include ModSecurity and Cloudflare WAF.
- Next-Generation Firewalls (NGFWs): NGFWs combine the features of traditional firewalls with advanced security functions such as intrusion prevention systems (IPS), deep packet inspection (DPI), and application awareness. They provide a comprehensive security solution and can protect against a wide range of threats. Palo Alto Networks and Fortinet FortiGate are well-known NGFW solutions.
Choosing the Right Firewall:
- Identify Your Security Requirements: Before selecting a firewall, assess your organization's security needs. Consider factors such as the size of your network, the sensitivity of your data, compliance requirements, and the types of threats you face.
- Evaluate Firewall Features: Look for a firewall that offers the features and capabilities that align with your security requirements. Consider factors such as the firewall's ability to handle your network traffic, its ease of management, and its integration with other security tools.
- Consider Scalability and Performance: As your organization grows, your firewall should be able to scale accordingly. Choose a firewall that can handle your current and future network traffic demands without compromising performance.
- Look for User-Friendly Management: Managing a firewall can be complex, so look for a solution with a user-friendly interface and comprehensive reporting capabilities. This will make it easier for your IT team to configure, monitor, and troubleshoot the firewall.
- Evaluate Total Cost of Ownership (TCO): Consider not only the initial purchase price but also the ongoing costs associated with the firewall, such as licensing, support, and maintenance. Open-source solutions like pfSense and OPNsense can be cost-effective alternatives to commercial firewalls.
Examples of Firewall Solutions:
- pfSense: pfSense (https://www.pfsense.org/) is a popular open-source firewall based on FreeBSD. It offers a wide range of features, including stateful inspection, VPN support, and web content filtering. pfSense is known for its stability, flexibility, and cost-effectiveness.
- OPNsense: OPNsense (https://opnsense.org/) is another open-source firewall solution that forked from pfSense. It provides a user-friendly web interface, advanced security features, and regular security updates. OPNsense is highly customizable and can be tailored to meet specific security needs.
- Cisco ASA: Cisco ASA (https://www.cisco.com/c/en/us/products/security/asa-firepower-services/index.html) is a widely deployed commercial stateful inspection firewall. It offers a comprehensive set of security features, including VPN, intrusion prevention, and malware protection. Cisco ASA is known for its reliability, performance, and integration with other Cisco security products.
- Palo Alto Networks: Palo Alto Networks (https://www.paloaltonetworks.com/) offers a range of NGFW solutions that provide advanced threat prevention, application visibility and control, and user-based policies. Their firewalls are known for their high performance, scalability, and automation capabilities.
In conclusion, selecting the right firewall is crucial for protecting your network from cyber threats. By understanding the different types of firewalls, evaluating your security requirements, and considering factors such as performance, manageability, and cost, you can choose a firewall solution that best fits your organization's needs. Whether you opt for an open-source solution like pfSense or OPNsense, or a commercial offering from Cisco or Palo Alto Networks, implementing a robust firewall is an essential step in securing your network.
pfSense vs. OPNsense
When setting up a home lab environment, it is important to evaluate the possible free or opens-source options. In this case, we will explore and compare two firewall solutions. pfSense and OPNsense are two popular open-source options that often come to mind. These firewalls provide a robust set of features and capabilities, making them suitable for various network scenarios. In this lab setup, we'll dive into a detailed comparison between pfSense and OPNsense, examining their codebases, user interfaces, security features, performance, community support, and extensibility. By understanding the strengths and differences of each firewall, you'll be better equipped to make an informed decision on which one aligns best with your lab requirements and learning objectives. Whether you're a network administrator, security enthusiast, or student, this comparison will provide valuable insights into the capabilities of pfSense and OPNsense, empowering you to select the most suitable firewall solution for your lab environment.
When it comes to choosing between pfSense and OPNsense, both open-source firewall solutions offer robust features and capabilities. However, there are some differences that may make one more suitable for your specific needs. Let's compare pfSense and OPNsense in detail and explore the reasons why you might select one over the other.
Codebase and Development:
- pfSense: Based on the FreeBSD operating system and has a long-standing history in the open-source firewall community. It has a well-established codebase and a large user community.
- OPNsense: Forked from pfSense in 2014, aiming to provide a more modern and flexible firewall solution. It has a newer codebase and focuses on regular updates and innovations.
User Interface and Management:
- pfSense: Offers a classic web-based interface that is functional and straightforward. It provides a wide range of configuration options and a comprehensive set of features.
- OPNsense: Boasts a more modern and intuitive web interface with a responsive design. It focuses on user-friendliness and ease of management, making it more accessible to users with varying skill levels.
Security Features:
- pfSense: Provides a solid set of security features, including stateful inspection, VPN support, intrusion detection and prevention (IDS/IPS), and web content filtering.
- OPNsense: Offers similar security features to pfSense but also includes additional advanced features such as two-factor authentication, built-in proxy server support, a plugin capability, and a more granular control over security rules.
Performance and Scalability:
- pfSense: Known for its stability and performance, pfSense can handle high traffic loads and is suitable for networks of various sizes.
- OPNsense: Built with a focus on performance and scalability, OPNsense is designed to handle high-throughput networks and can scale well as your network grows.
Community and Support:
- pfSense: Has a large and active community of users and developers, providing extensive documentation, forums, and resources for support and troubleshooting.
- OPNsense: Has a growing community and offers active support through forums, documentation, and a responsive development team. However, the community is relatively smaller compared to pfSense.
Extensibility and Customization:
- pfSense: Offers a wide range of packages and extensions that can be easily installed to extend its functionality. It provides flexibility in customizing the firewall to meet specific requirements.
- OPNsense: Provides a plugin system that allows users to extend its features and capabilities. It focuses on a modular architecture, making it easier to customize and integrate with other tools.
Reasons to Choose pfSense:
- If you have experience with pfSense and are comfortable with its interface and configuration options.
- If you require a firewall solution with a large community and extensive support resources.
- If you have a well-established network and prefer a firewall with a long-standing track record.
Reasons to Choose OPNsense:
- If you prefer a more modern and intuitive web interface for managing your firewall.
- If you require advanced security features and granular control over security rules. (the granularity of rules is similar to pfSense, but includes additional plugins that can expand the capability)
- If you have a growing network and need a firewall that can scale easily.
- If you value regular updates and a focus on innovation.
Ultimately, the choice between pfSense and OPNsense depends on your specific requirements, familiarity with the platforms, and personal preferences. Both firewalls are capable of providing robust security for your network, and the decision often comes down to factors such as ease of use, community support, and the specific features that align with your needs.
It's worth noting that both pfSense and OPNsense are actively developed and continuously improve over time. It's recommended to evaluate the latest versions and updates of each firewall to ensure you have access to the most recent features and security enhancements.
Installing OPNsense For Your Lab
When setting up a lab environment to explore and compare various technologies and various security scenarios it is important to establishing a firewall in the environment, making the lab suitable for those various scenarios.
OPNsense, a powerful and flexible open-source firewall, has gained popularity among network administrators and security enthusiasts for its robust features and user-friendly interface. If you're looking to set up a secure and reliable firewall solution in your network environment, OPNsense is an excellent choice. In this guide, we'll walk you through the step-by-step process of installing OPNsense, from preparing your hardware and downloading the software to performing the initial configuration and securing your network. Whether you're a seasoned IT professional or just starting your journey into network security, this comprehensive guide will provide you with the knowledge and confidence to deploy OPNsense successfully. By following these steps, you'll be well on your way to establishing a strong security foundation for your network. So, let's dive in and discover how to harness the power of OPNsense to protect your digital assets.
NOTE: While this is focused on getting you started in a home lab and using OPNsense, it will not make you an OPNsense expert. If you want to dig deeper into OPNsense and go from beginner to professional, I would recommend the book OPNsense Beginner to Professional: Protect networks and build next-generation firewalls easily with OPNsense by Julio Cesar Bueno de Camargo. It is a great book and have it in my own library as a reference when needed.
Install OPNsense
Now that you have the start of your lab with a hypervisor and a client, let's start securing it by adding a firewall. If you created the Ventoy USB disk, the you only need to add the OPNsense ISO to the drive and you can start you the installation.
You can refer back to the Basics Series - #2 post if you need a refresher or need to setup a bootable USB drive.
As stated in the Basic Series - #1, the hypervisor or lab environment will dictate whether you are using a physical appliance or virtual machine (VM). Either way, the installation instructions will follow the same process.
NOTE: If you choose pfSense rather than OPNsense for your lab firewall, that is OK, and the installations steps will be very similar so you should be able to follow this guide up to the initial configuration, after that the steps will divert.
Hardware/System Requirements
Before installing OPNsense, ensure that your hardware or more specifically the VM meets the minimum requirements:
- CPU: 1 GHz or higher (multi-core CPU recommended for better performance)
- RAM: 1 GB or more (2 GB or higher recommended for optimal performance)
- Storage: 4 GB or larger (SSD recommended for faster boot and operation)
- Network Interface Cards (NICs): At least two NICs (one for LAN and one for WAN)
Download OPNsense
- Visit the official OPNsense website: https://opnsense.org/
- Navigate to the "Download" section.
- Select the appropriate Architecture of OPNsense based on your hardware architecture (e.g., AMD-64).
- Download the installation image (ISO file), which should be "DVD" under Installation Type from the drop down.
- Select the Location Mirror closest to your geographical region from the drop down and download to your computer.
Prepare Boot Media
- Download and install a USB bootable media creation tool, based on the Basics Series - #2 post.
- If your using a hypervisor, attach the OPNsense ISO file to the VM.
Boot from the USB Drive
- Connect the USB drive containing the OPNsense installation image to the target machine.
- Power on the machine and enter the BIOS/UEFI settings.
- Change the boot order to prioritize booting from the USB drive.
- Save the changes and exit the BIOS/UEFI settings.
- Restart the system
Boot VM from ISO file
- Make sure the OPNsense installation image is attached to the virtual CD of the target VM.
- Power on the VM
Begin the Installation
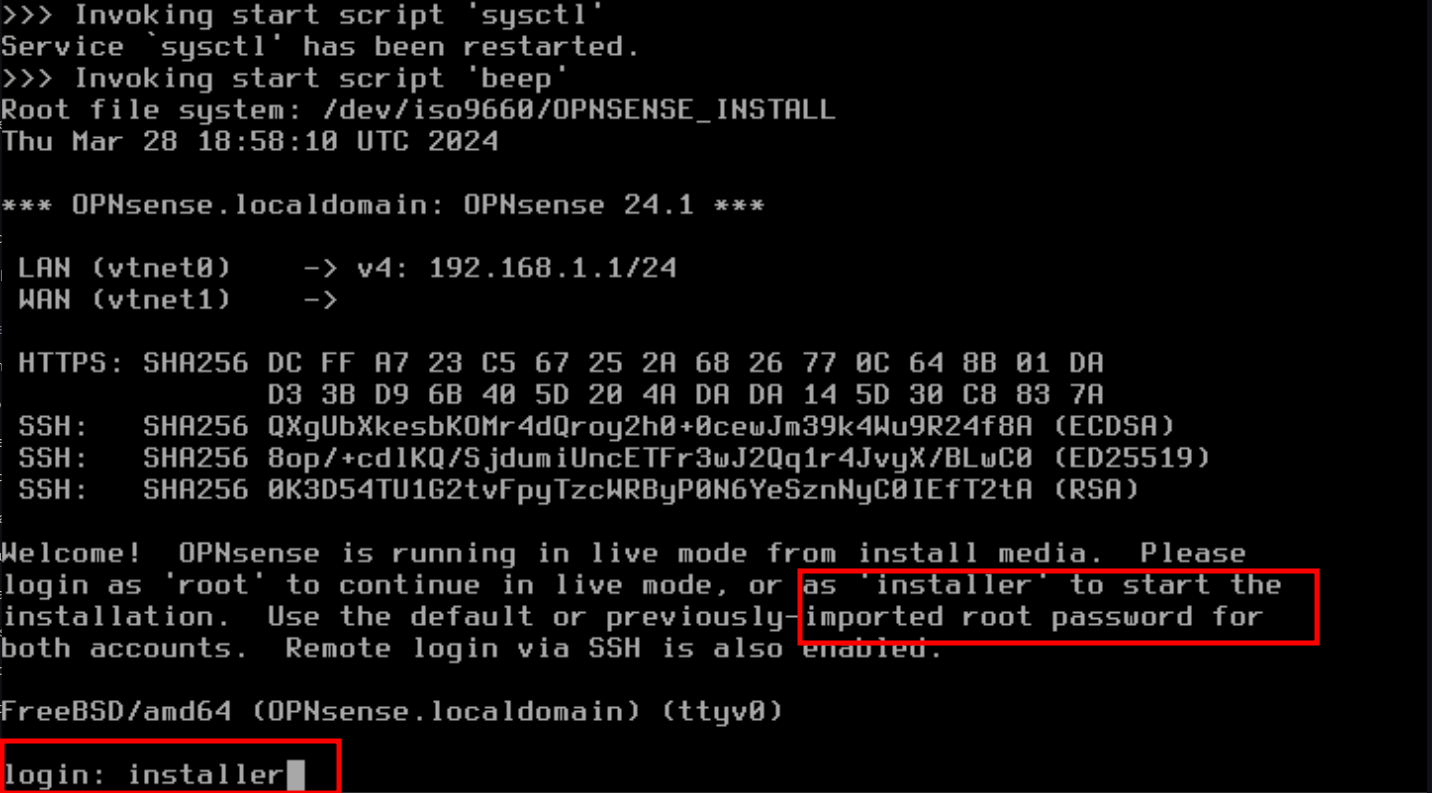
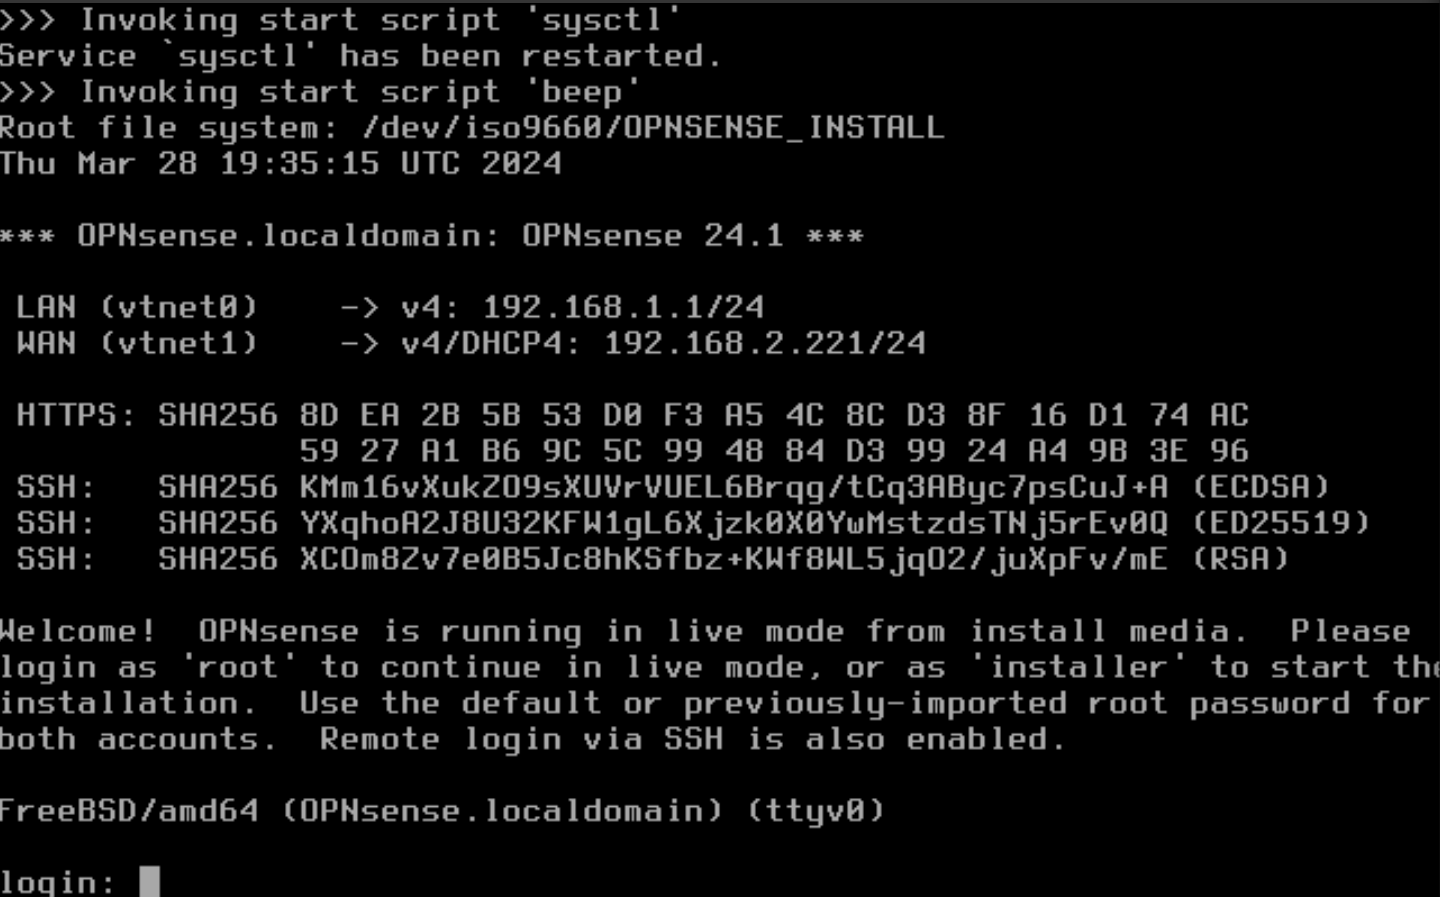
- The OPNsense installer will boot
- To install, type "installer" at the login prompt to start the installation.
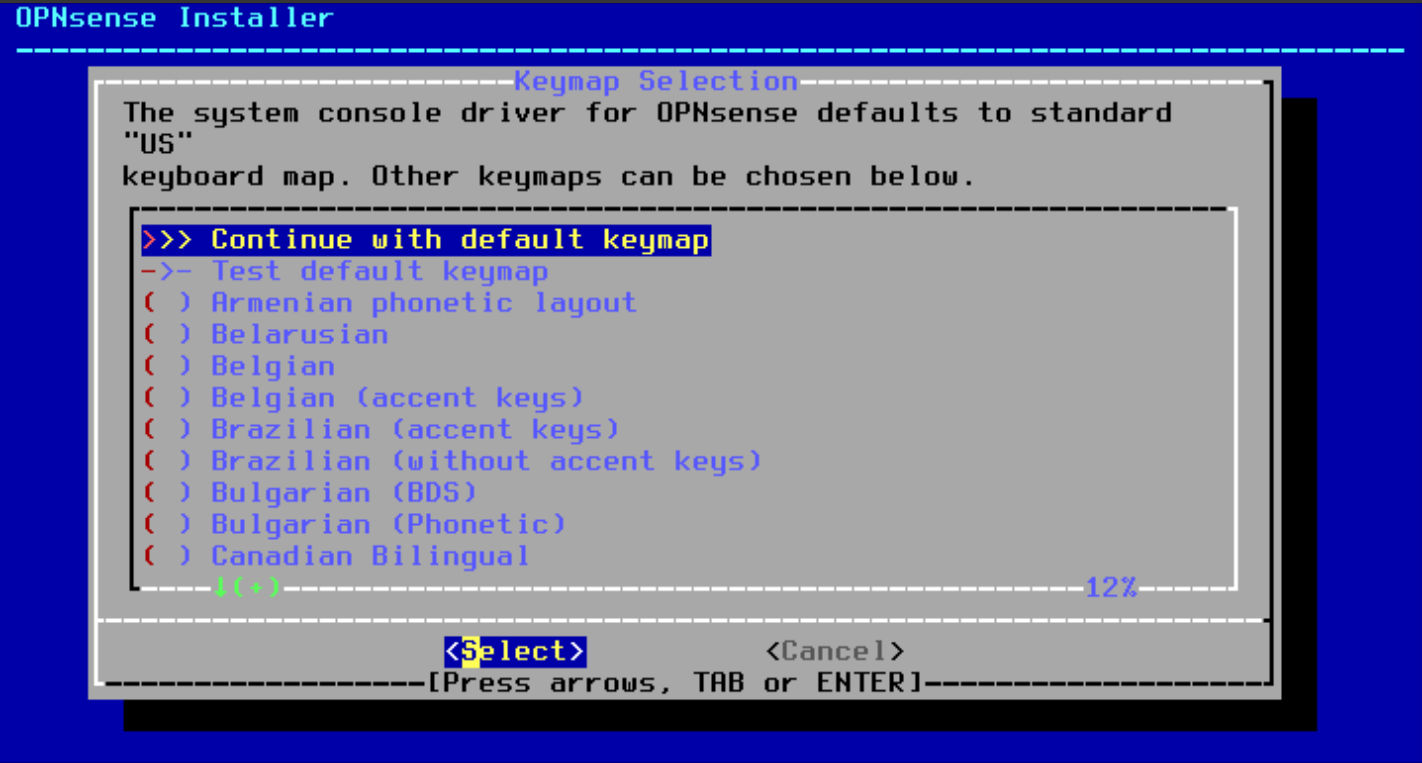
- Choose your desired keymap (keyboard layout) and press Enter.
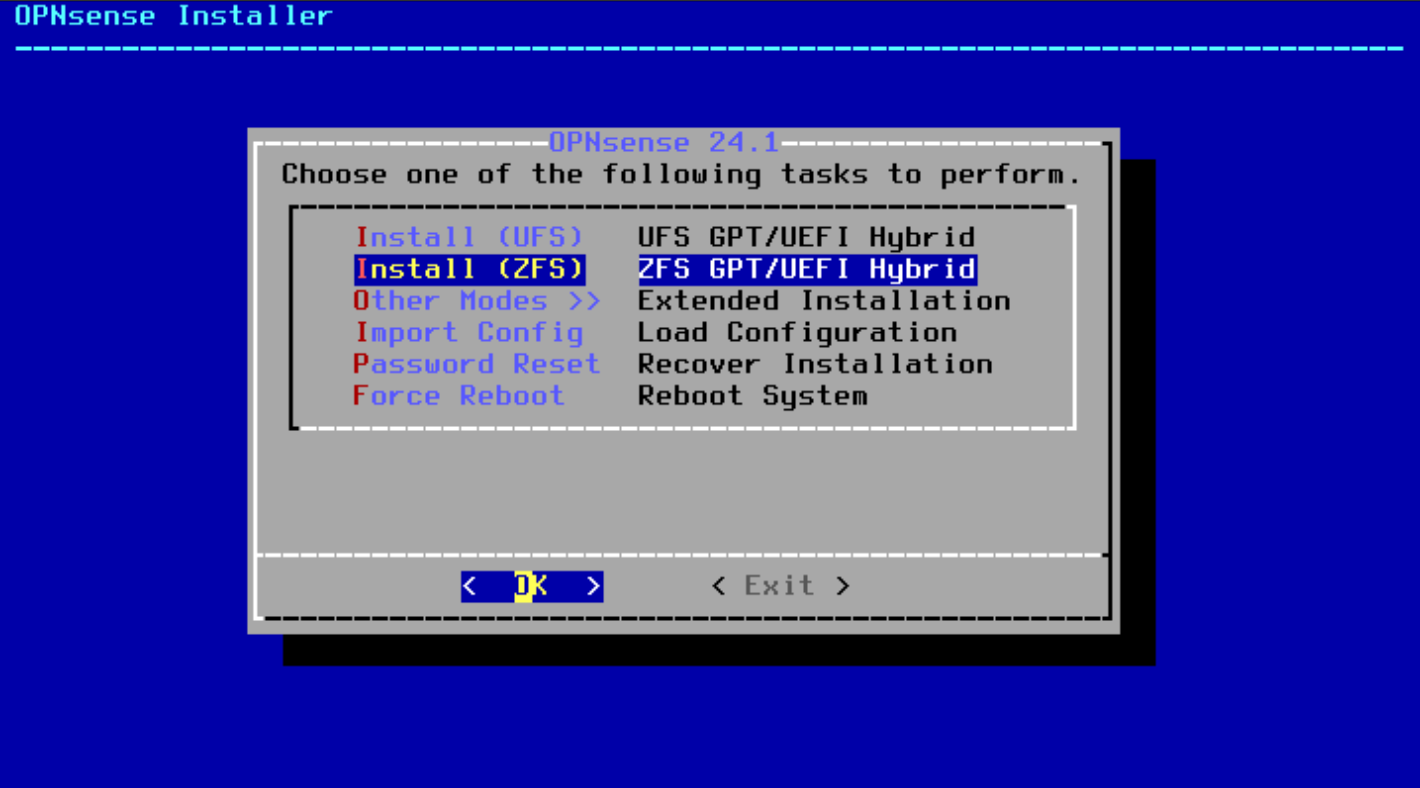
- Select the "Install (ZFS)" option and press Enter.
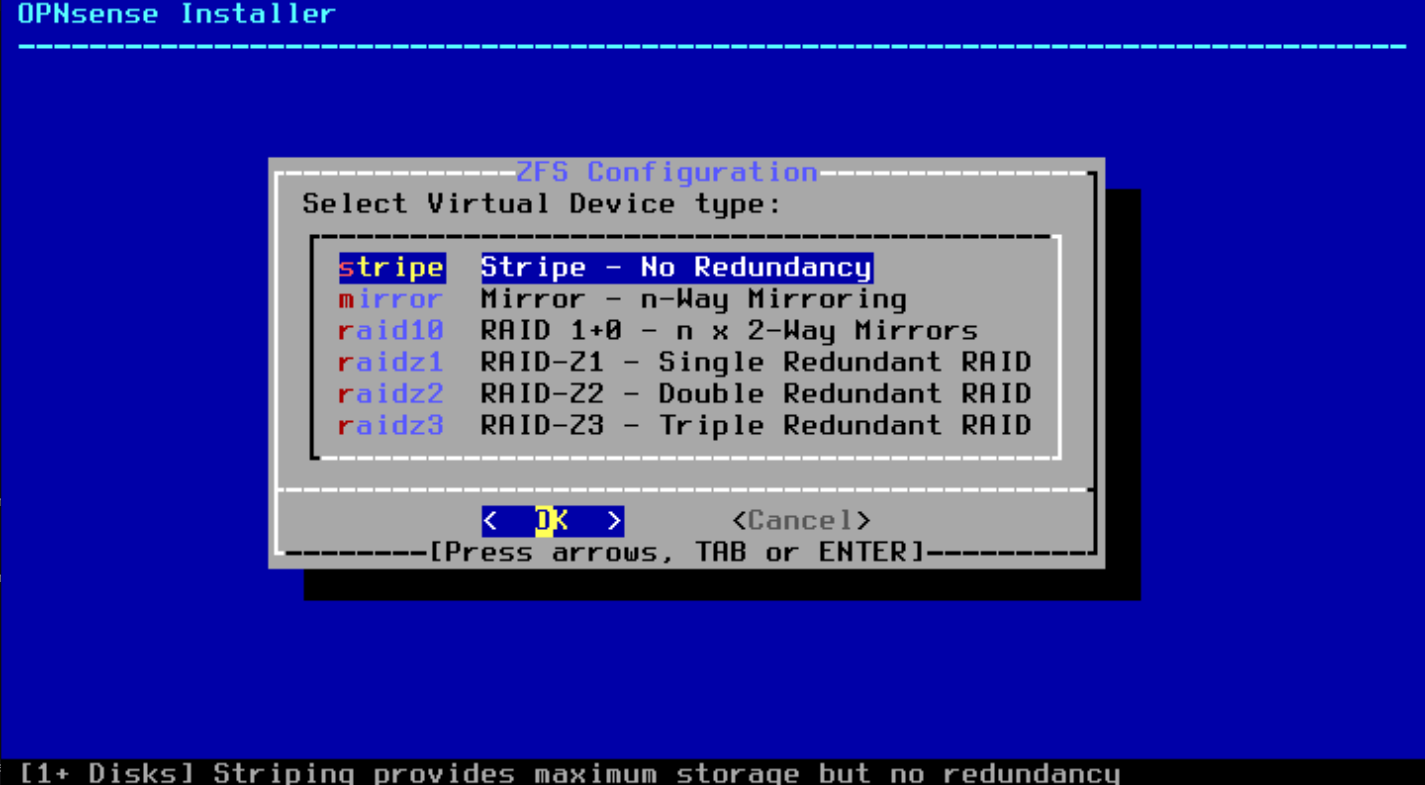
- Select the Virtual Device Type (Stripe)
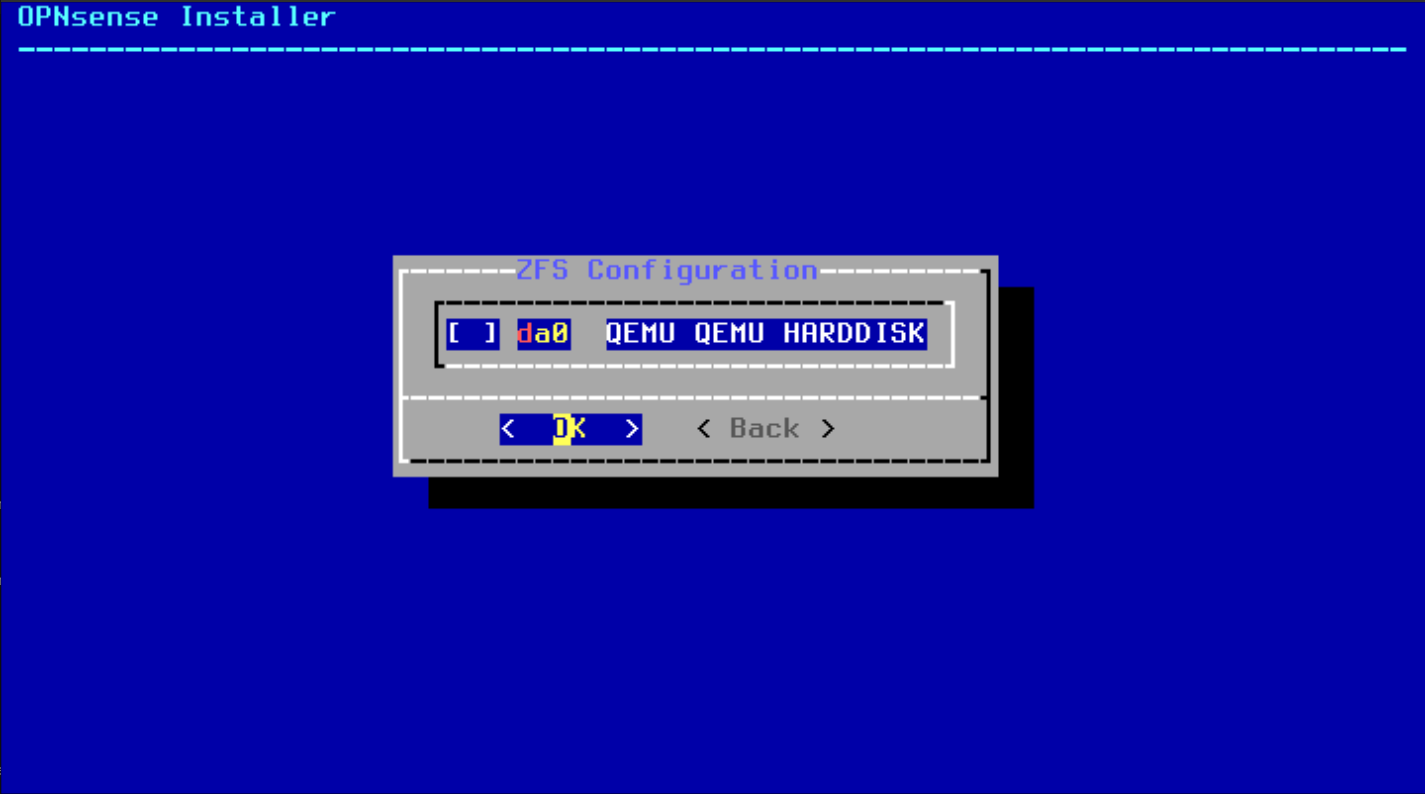
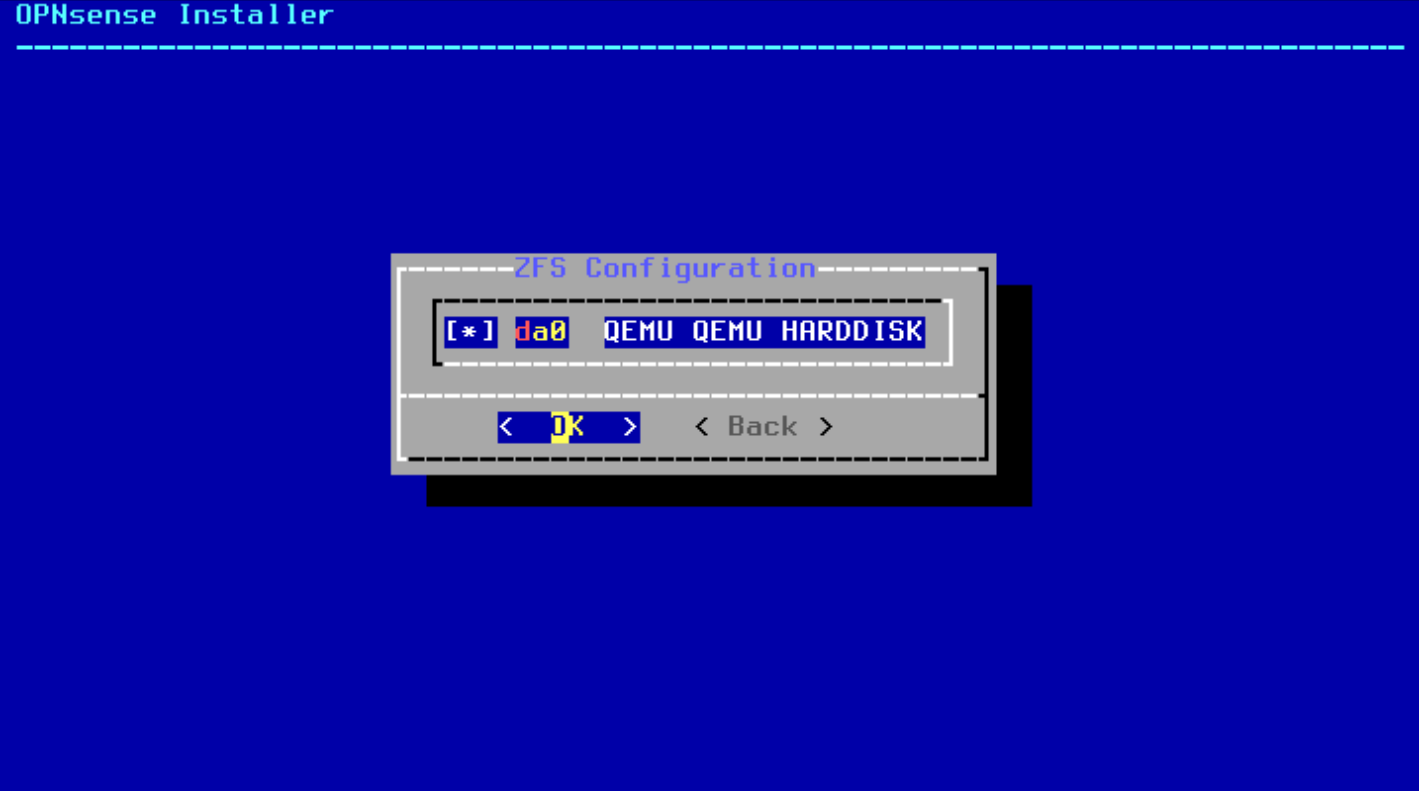
- Select the installation drive (e.g., da0) where you want to install OPNsense by pressing the spacebar and press Enter.
After selecting the drive, you should note an asterisk now showing selection of the drive.
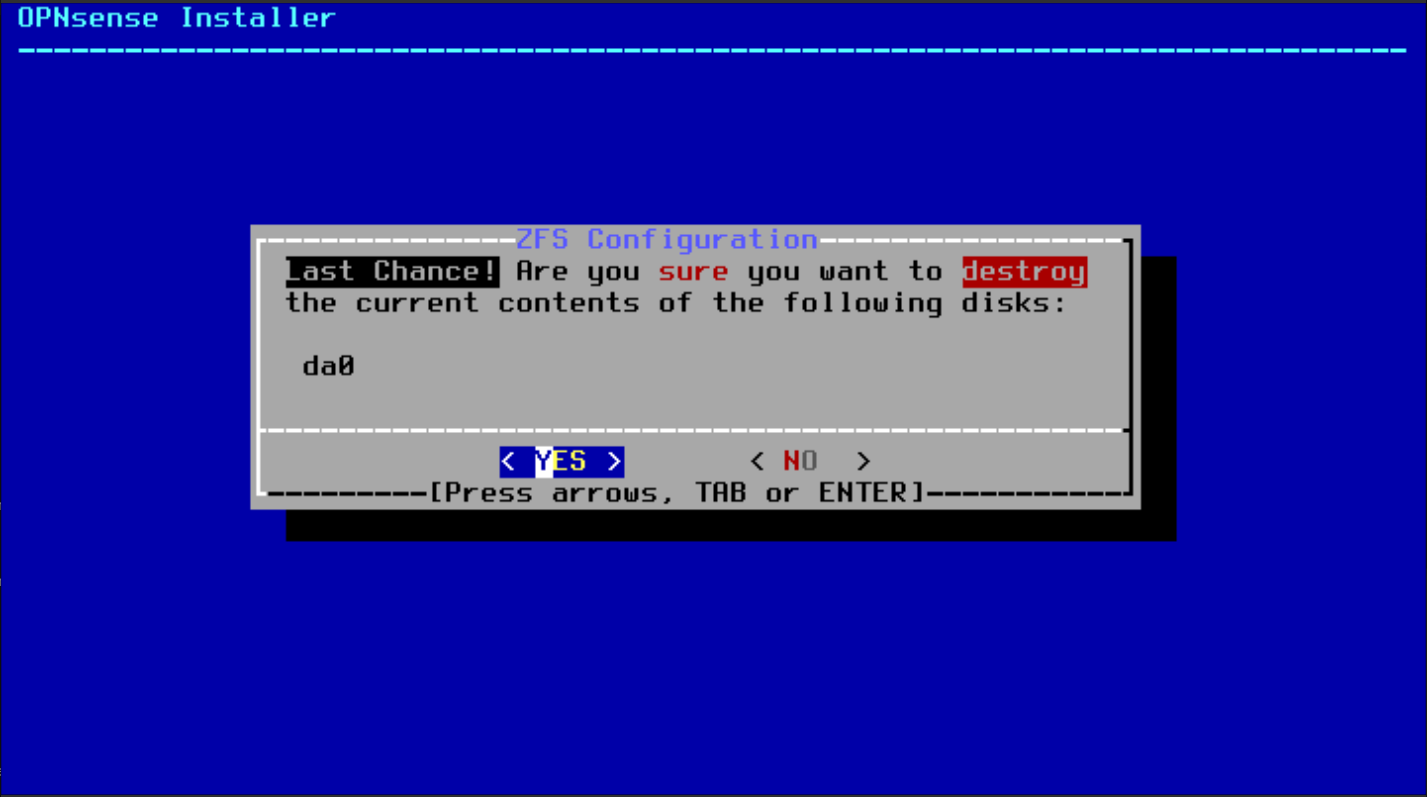
- Confirm the selected drive by typing "YES" and pressing Enter.
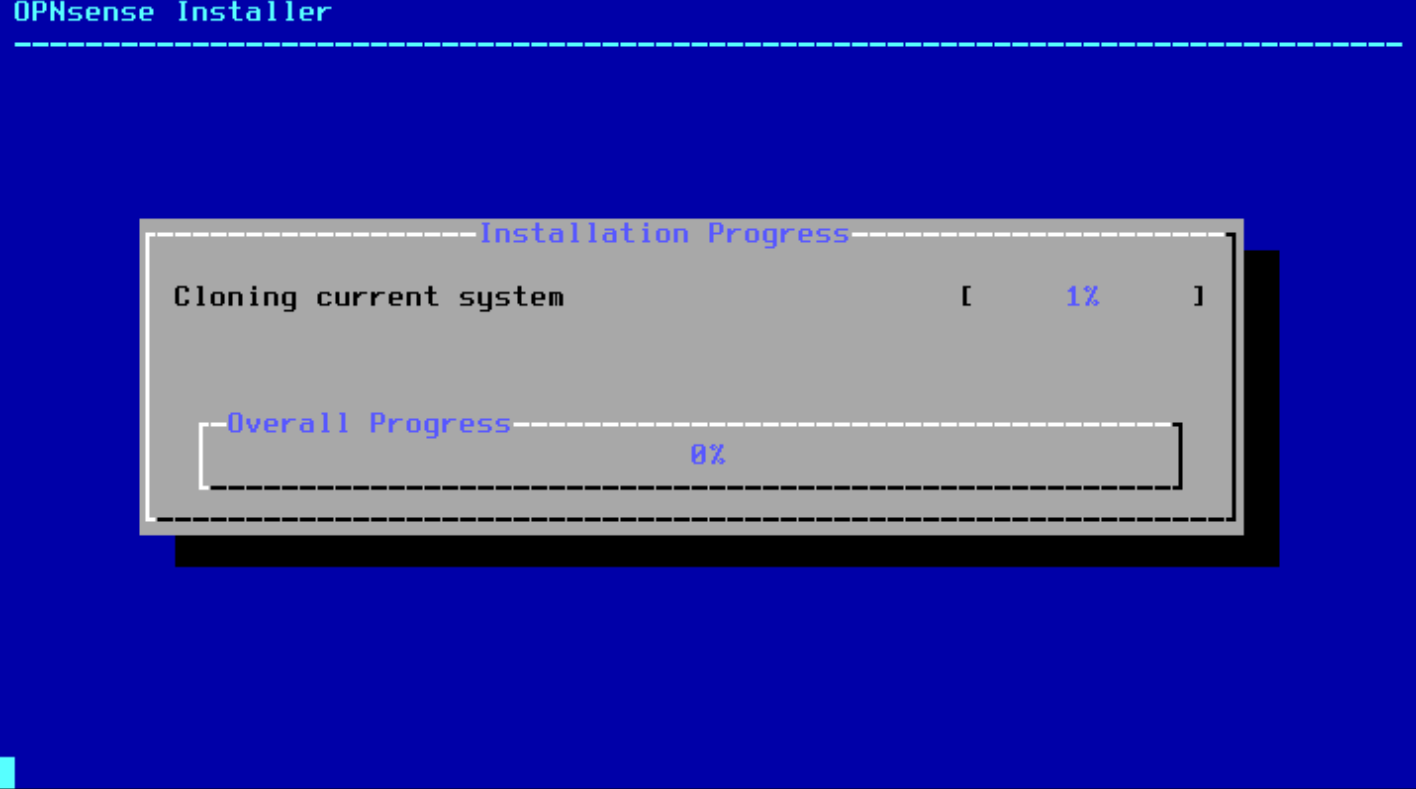
The installation will begin and the progress will show on the progress bar.
- Set Up the Root Password
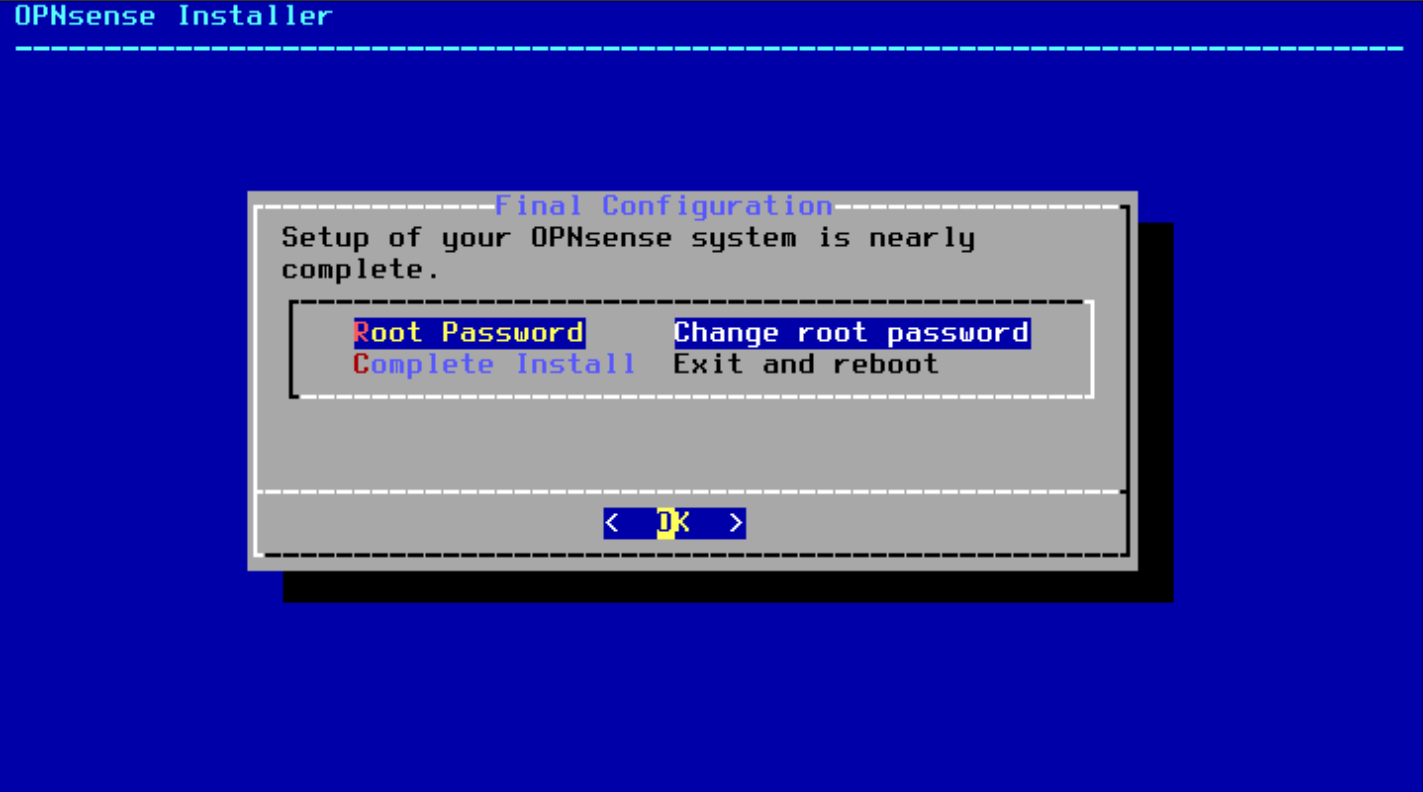
Enter a strong password for the root user and press Enter.
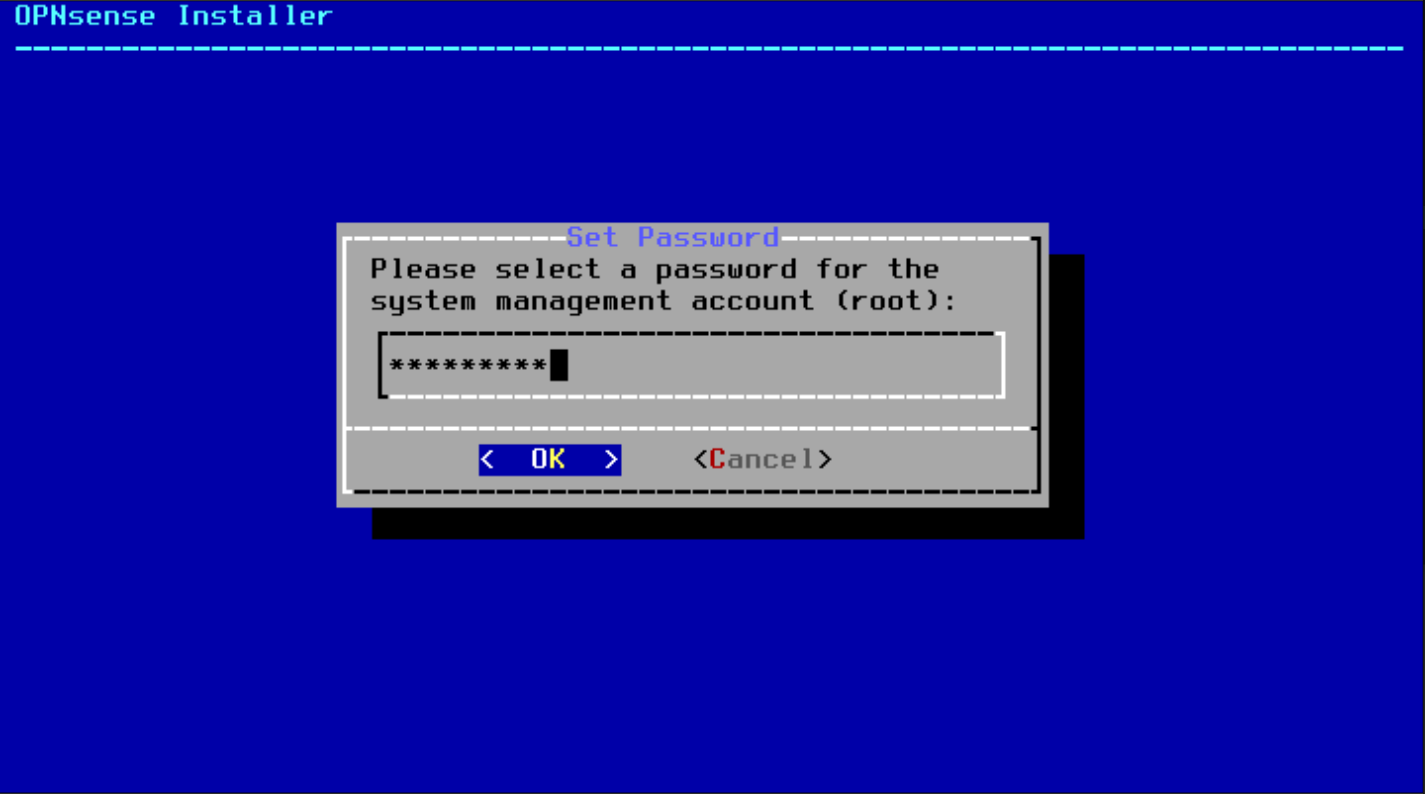
Confirm the root password by entering it again and pressing Enter.

- Complete the Installation. Select "Complete Install" and press Enter.
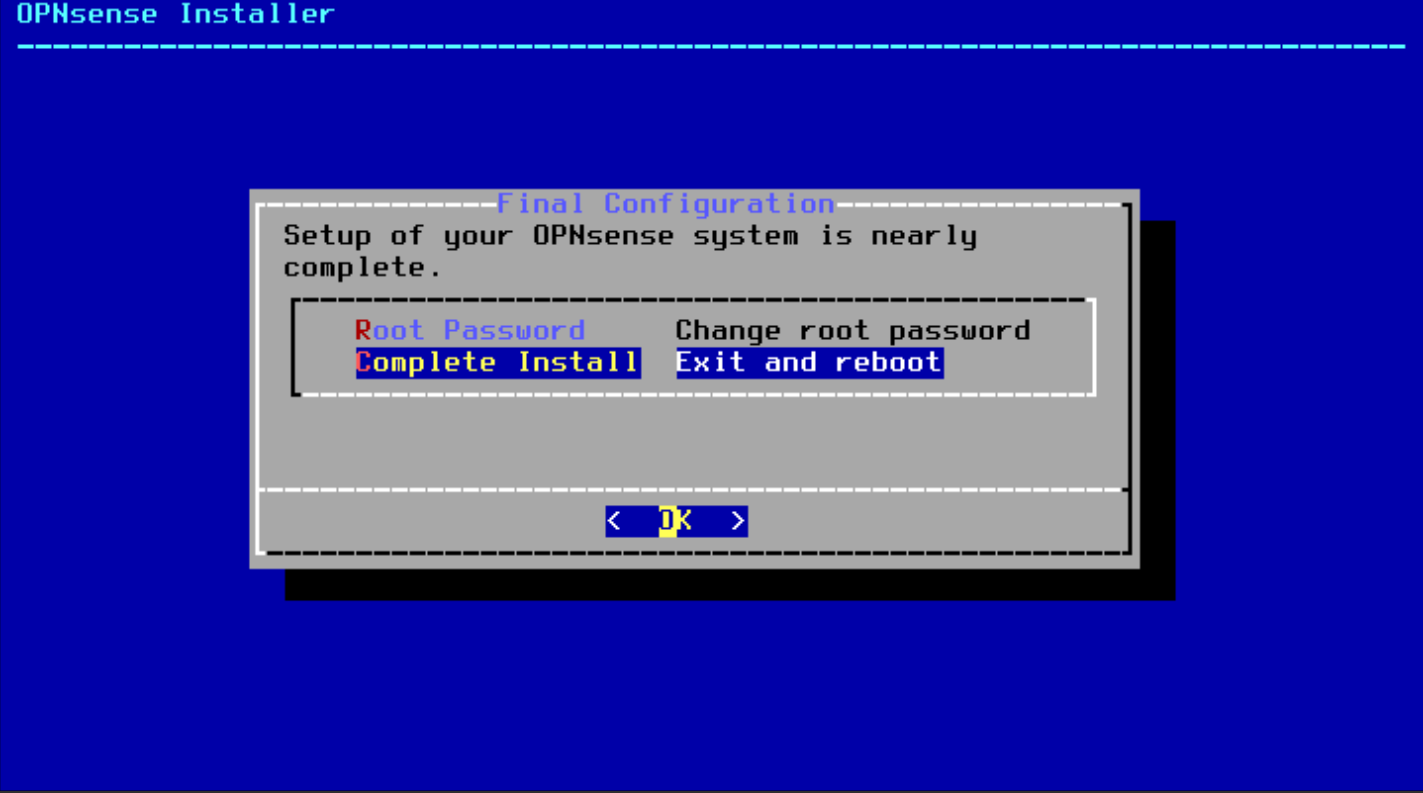
Choose "Reboot" to restart the system and boot into the installed OPNsense.
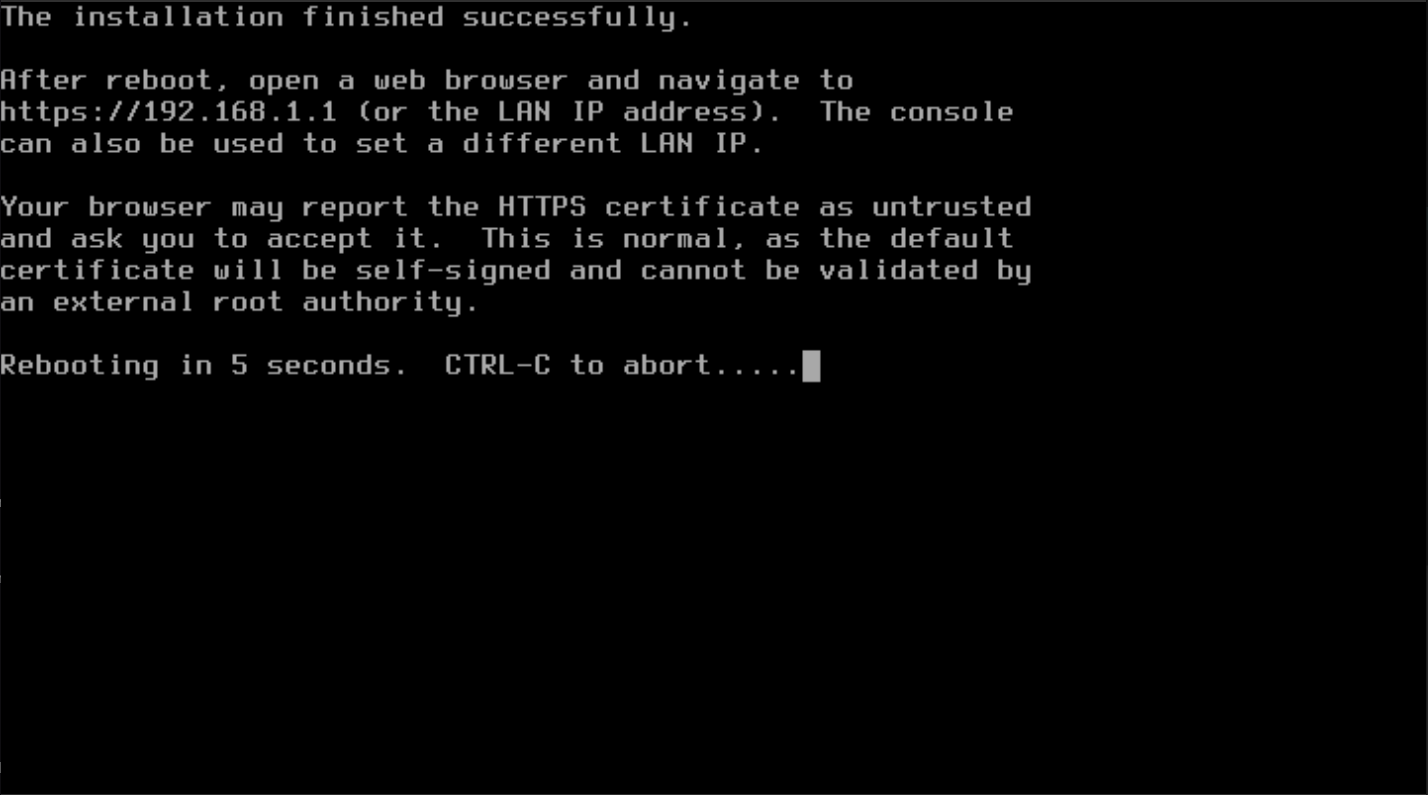
- Initial Configuration. After the reboot, OPNsense will start the initial configuration wizard.
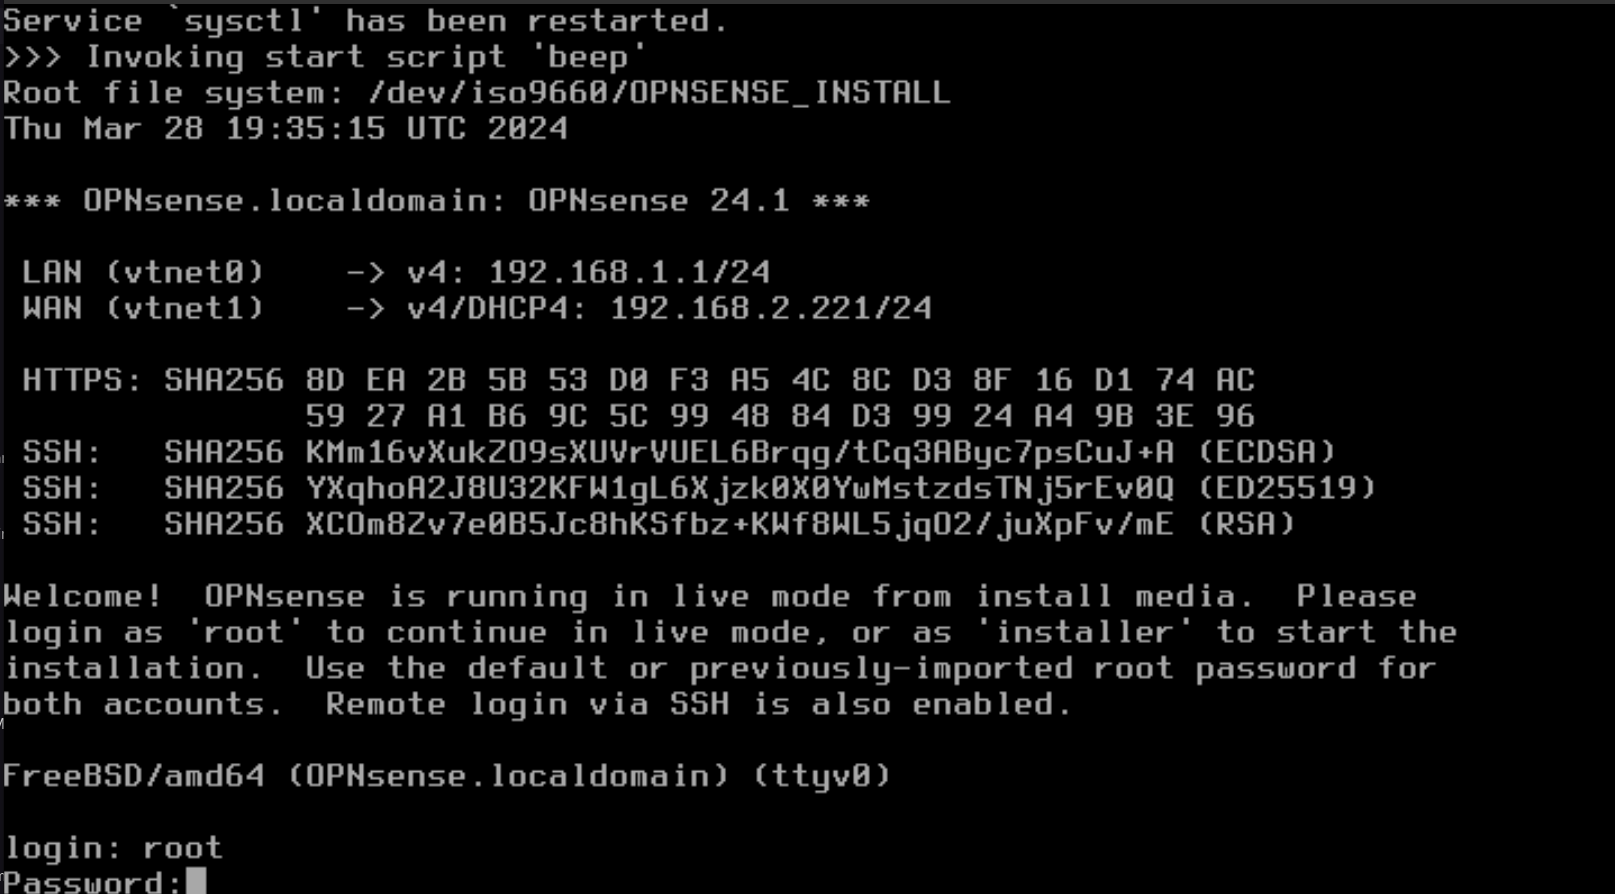
Log in with the newly created "root" user password.
- Select the appropriate Option to configure or manage through the CLI.
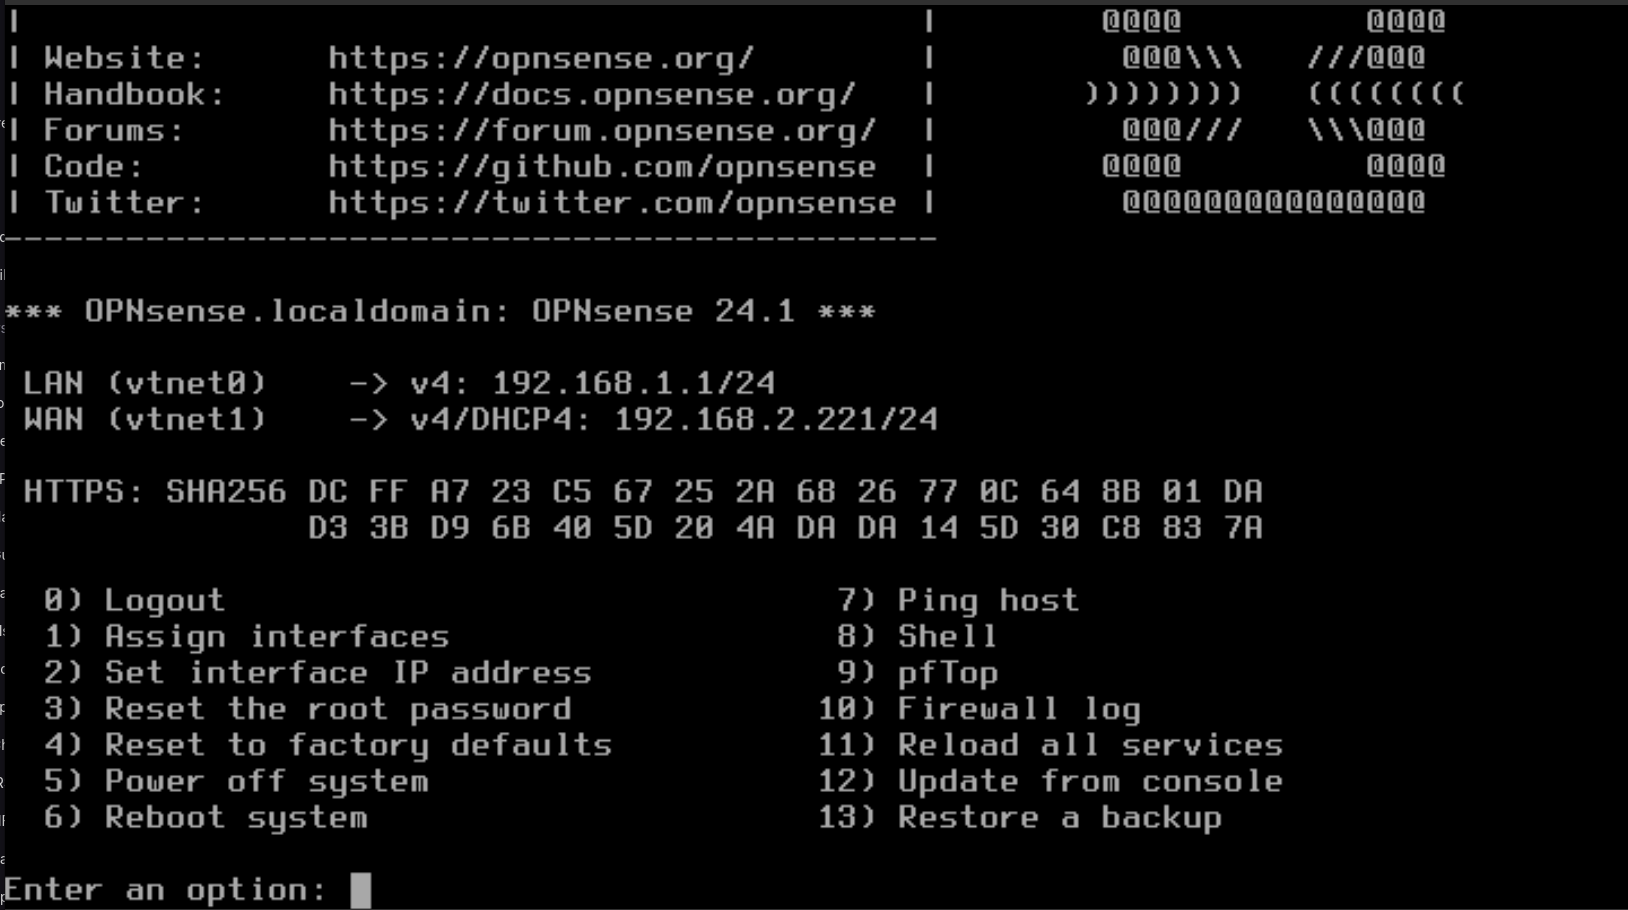
- Select Option "2" and press Enter to configure the LAN and WAN interfaces.
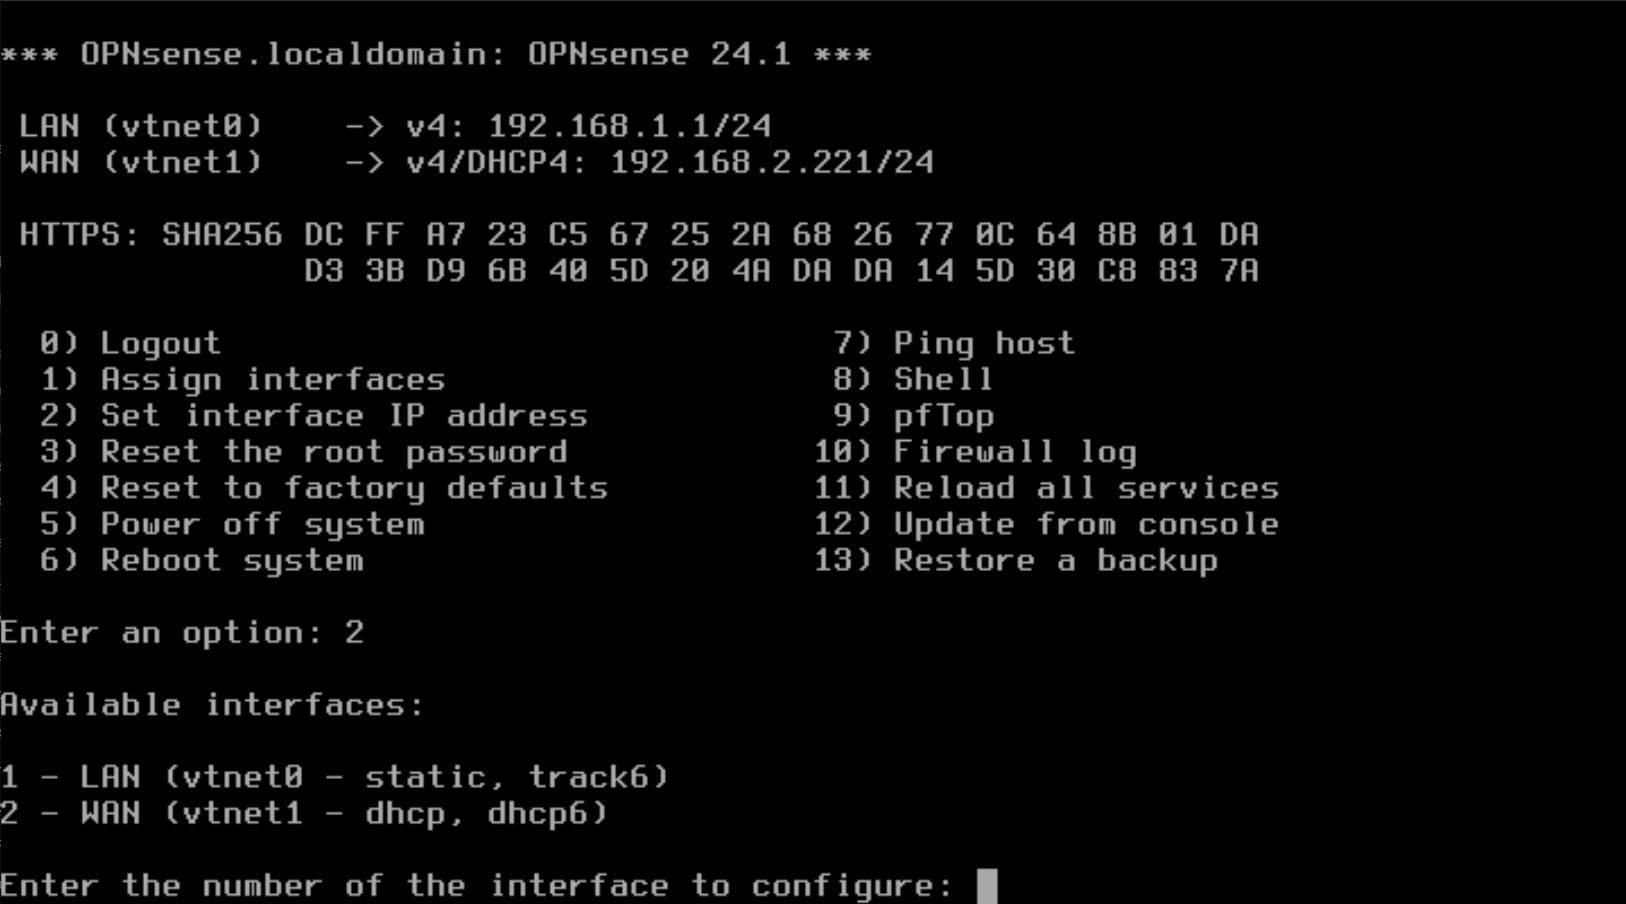
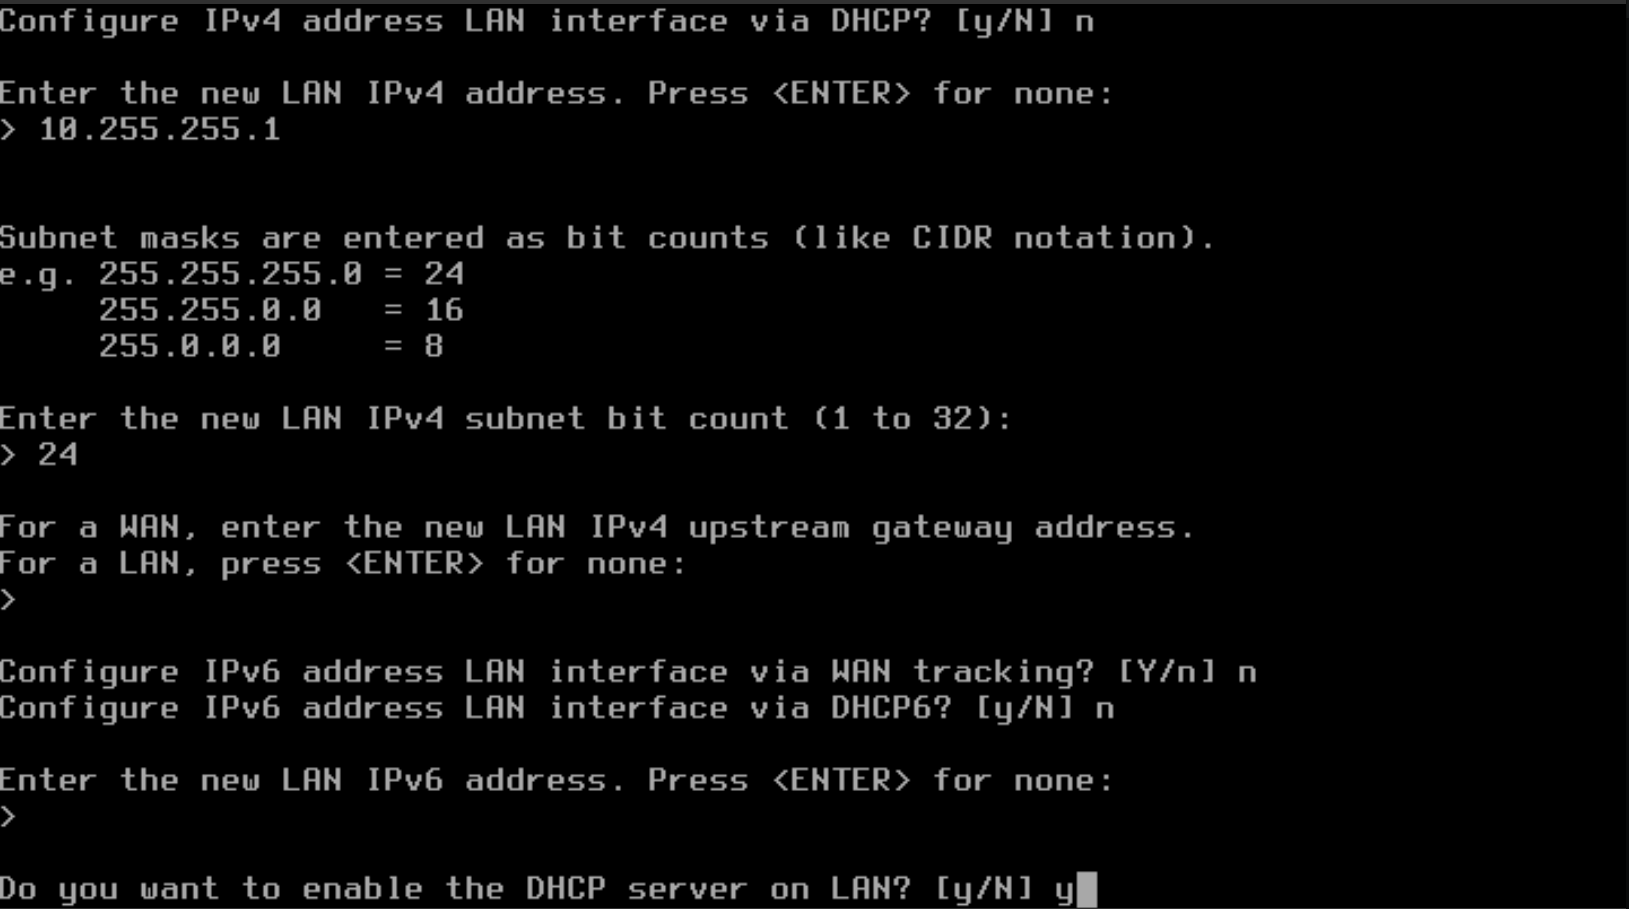
- Select Option "1" and Press Enter. Then type "n" to NOT configure the LAN interface via DHCP.
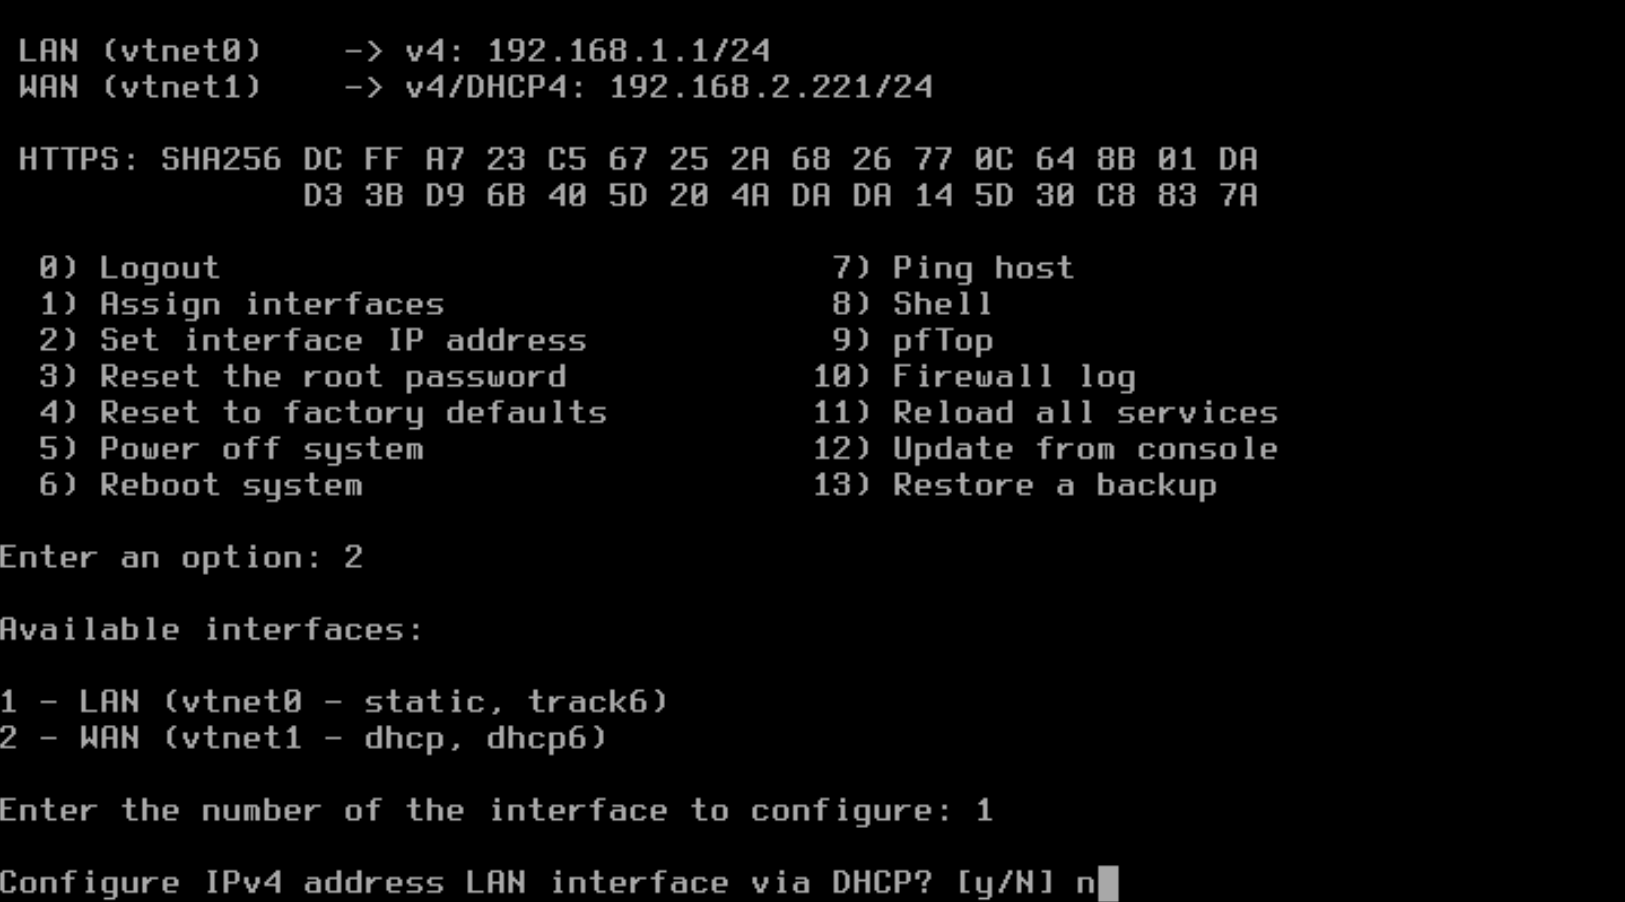
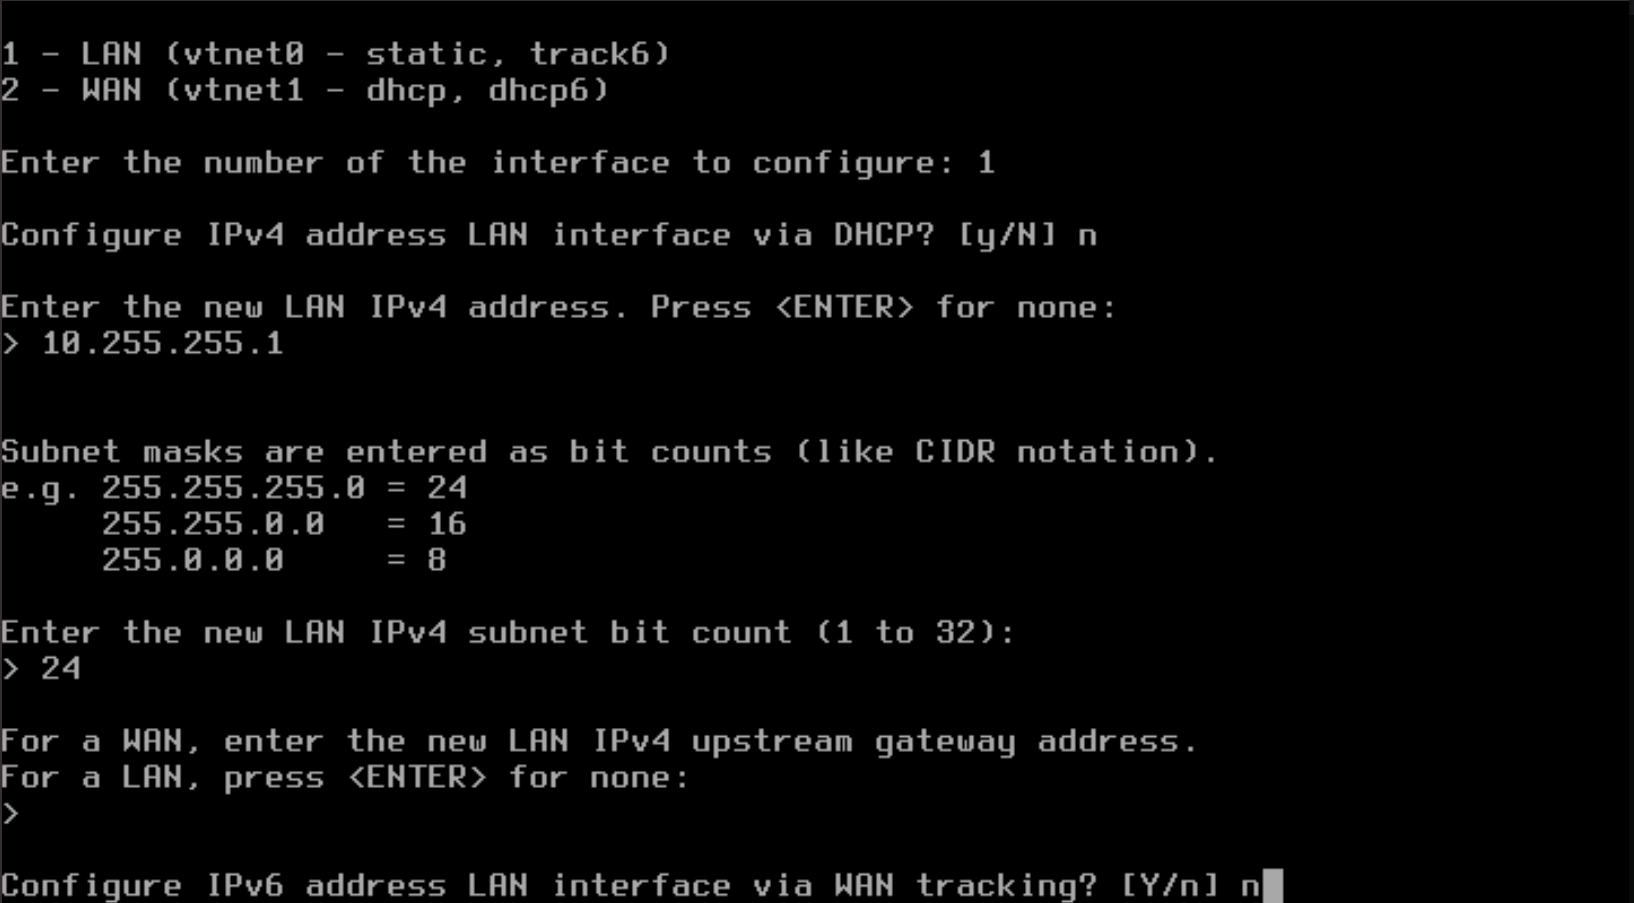
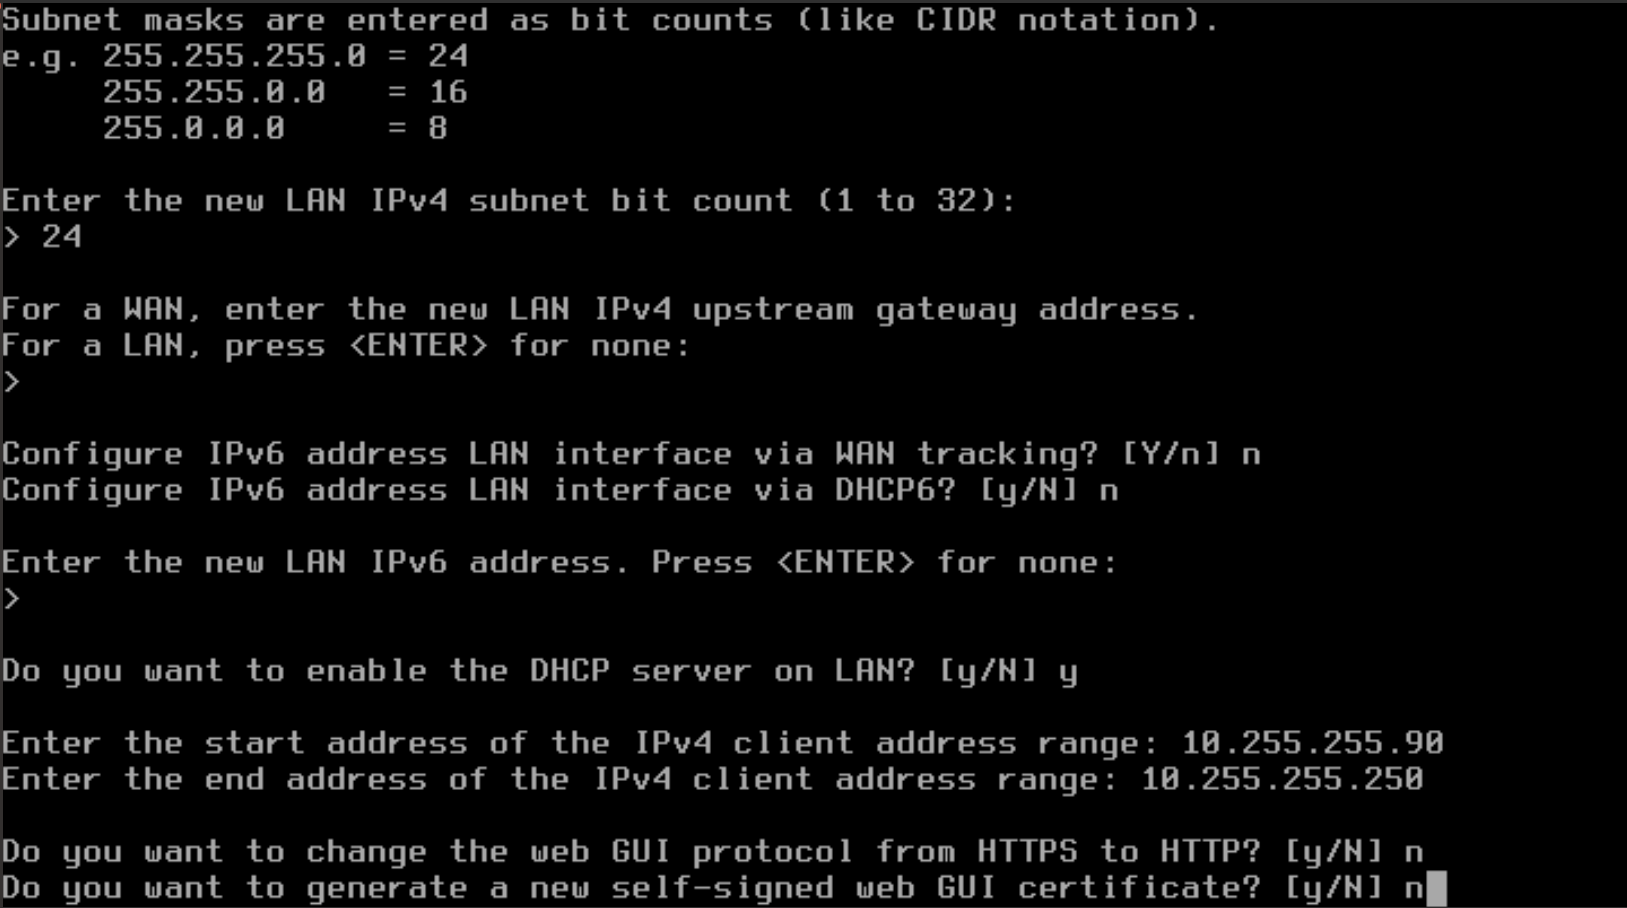
- Specify the RFC 1918 IPv4 address for the LAN interface. The example in the image shows 10.255.255.1.

- Specify the CIDR (subnet mask) for the network interface. In the example, a CIDR of 24 is entered, but you can define the CIDR based on your needs.

- You should not need an upstream gateway, so you can press Enter to continue, but if you do an to specify the upstream gateway, this is where you would enter the IPv4 address.

- Type "n" to NOT configure the LAN interface with IPv6 with WAN tracking and press Enter.
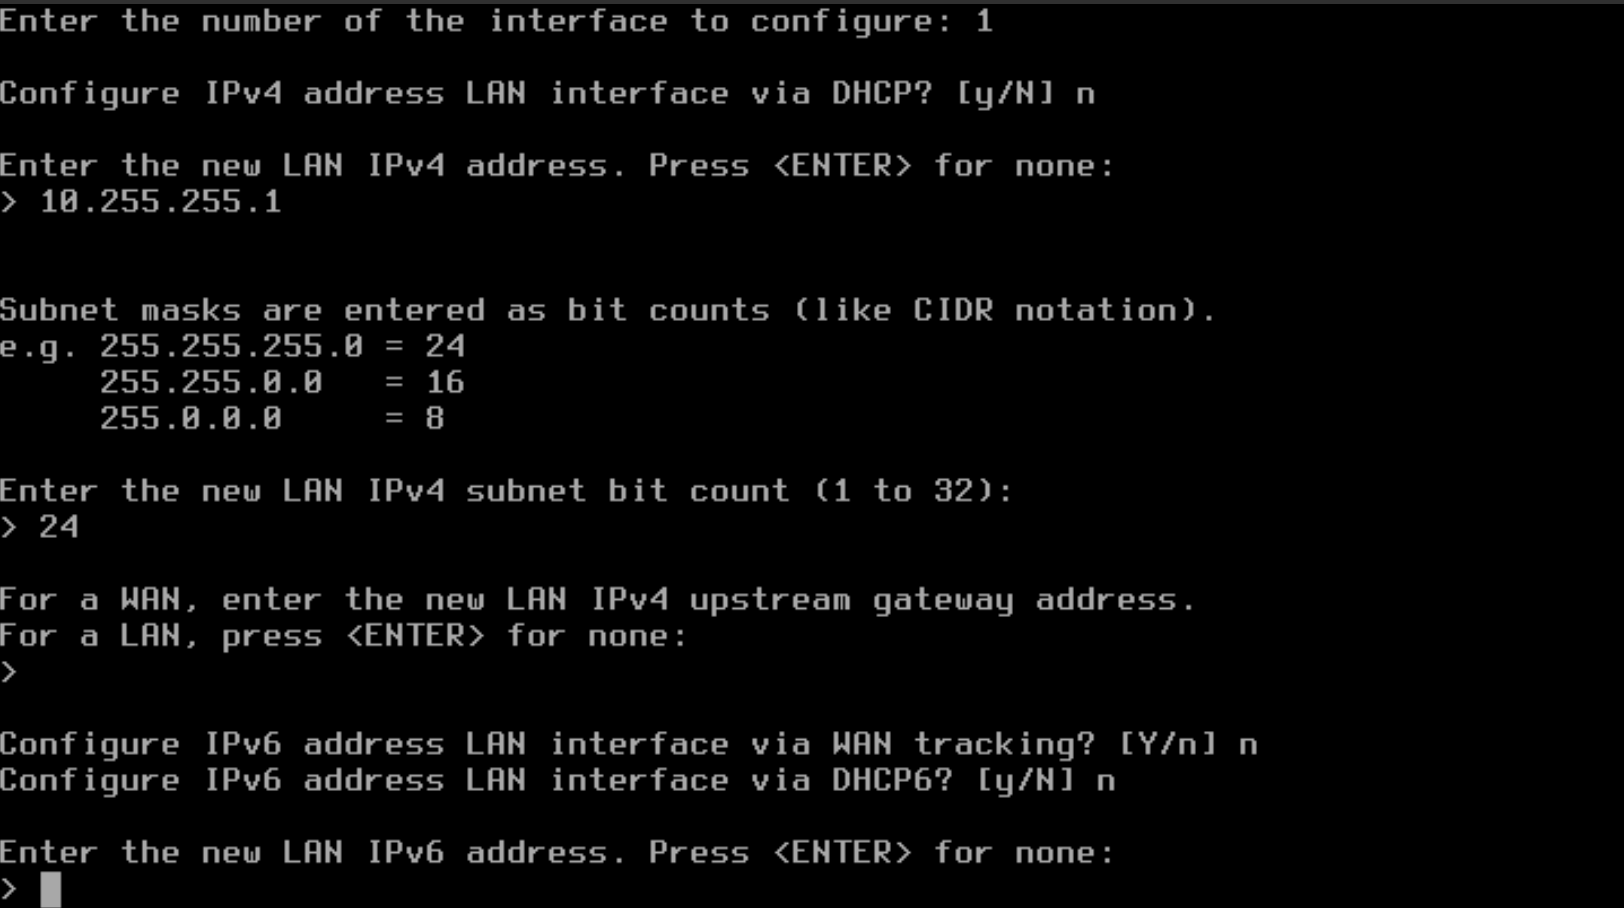
- Type "n" to NOT configure the LAN interface with IPv6 with DHCP and press Enter.
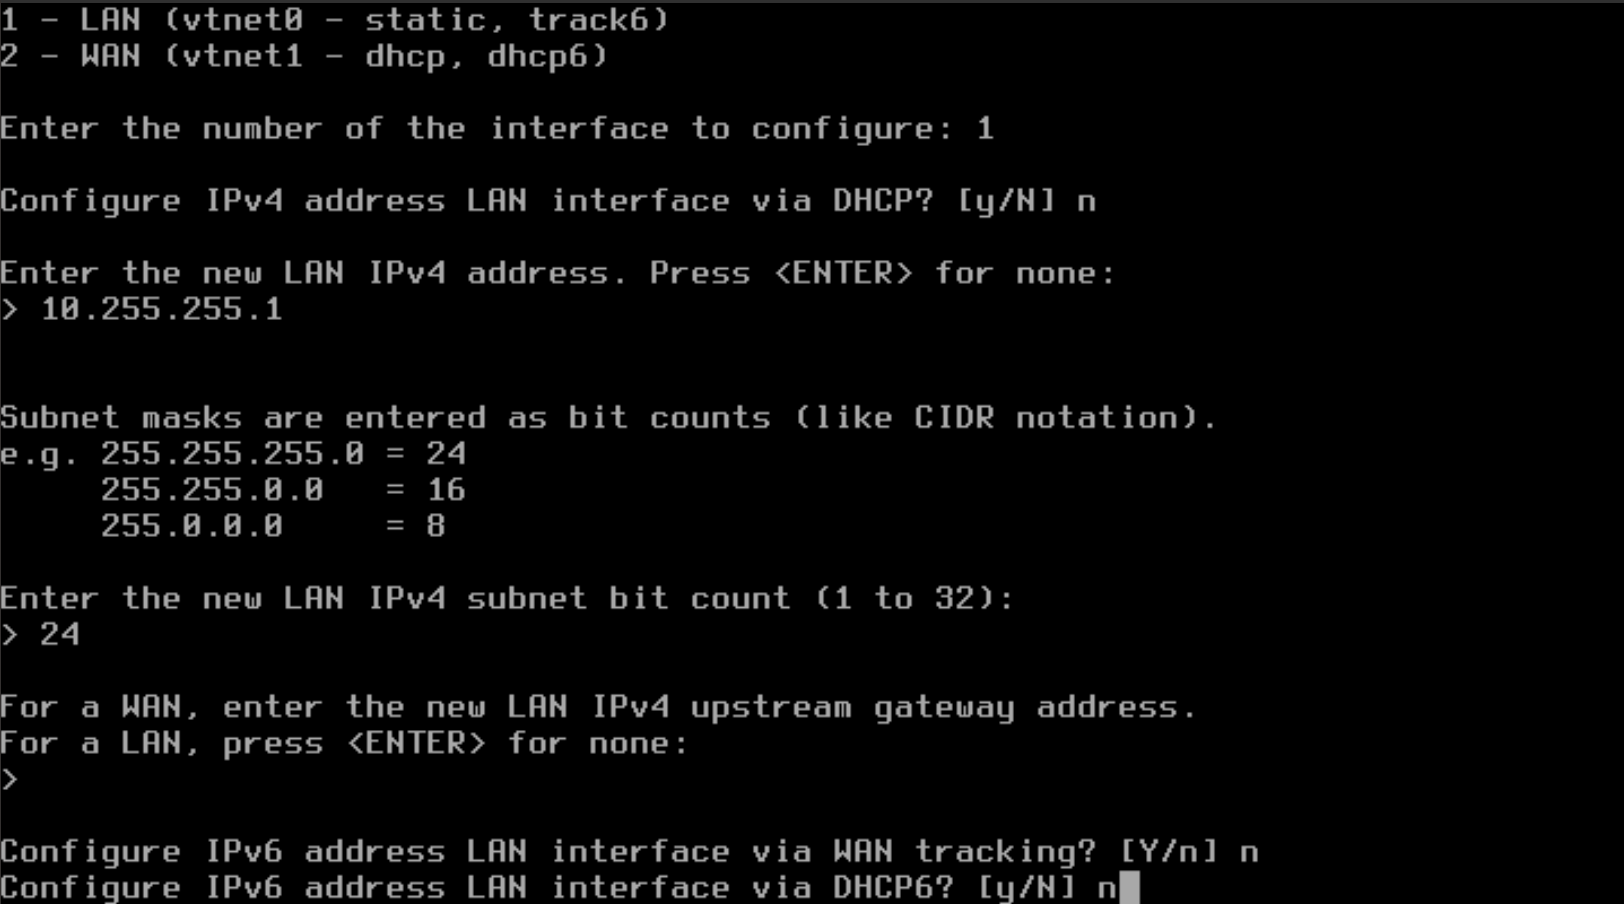
- You do not need IPv6, so you can press Enter to continue.
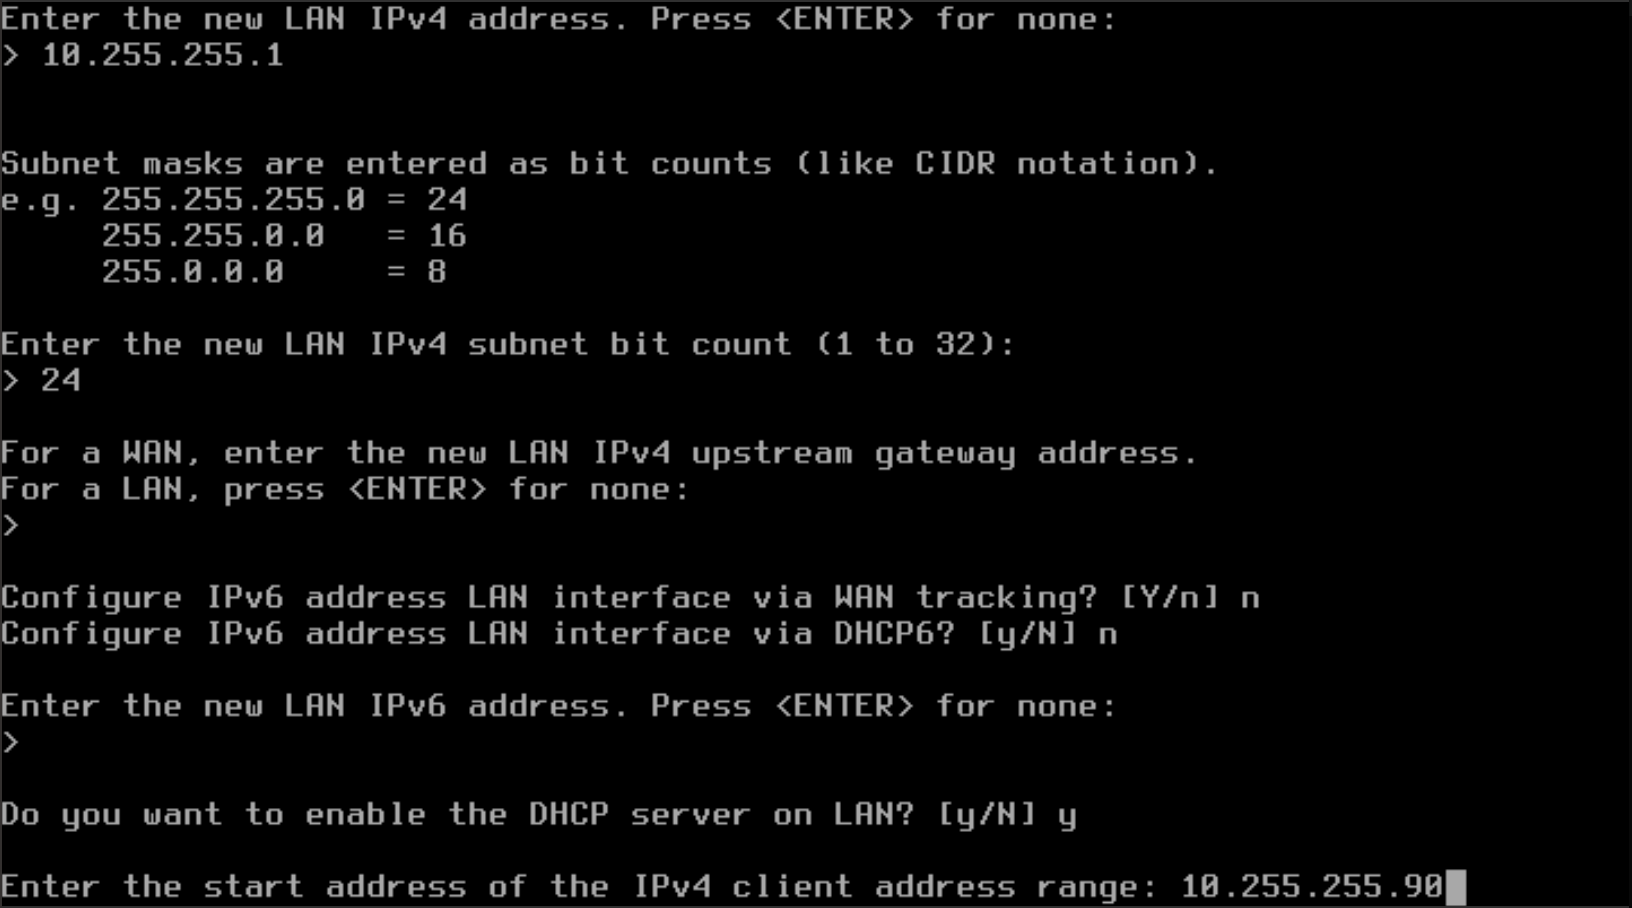
- To configure DHCP for your LAN, type "y" to configure the LAN with DHCP and press Enter. (This will allow automatic IP addressing for any clients that attach to the LAN connected to the OPNsense firewall)
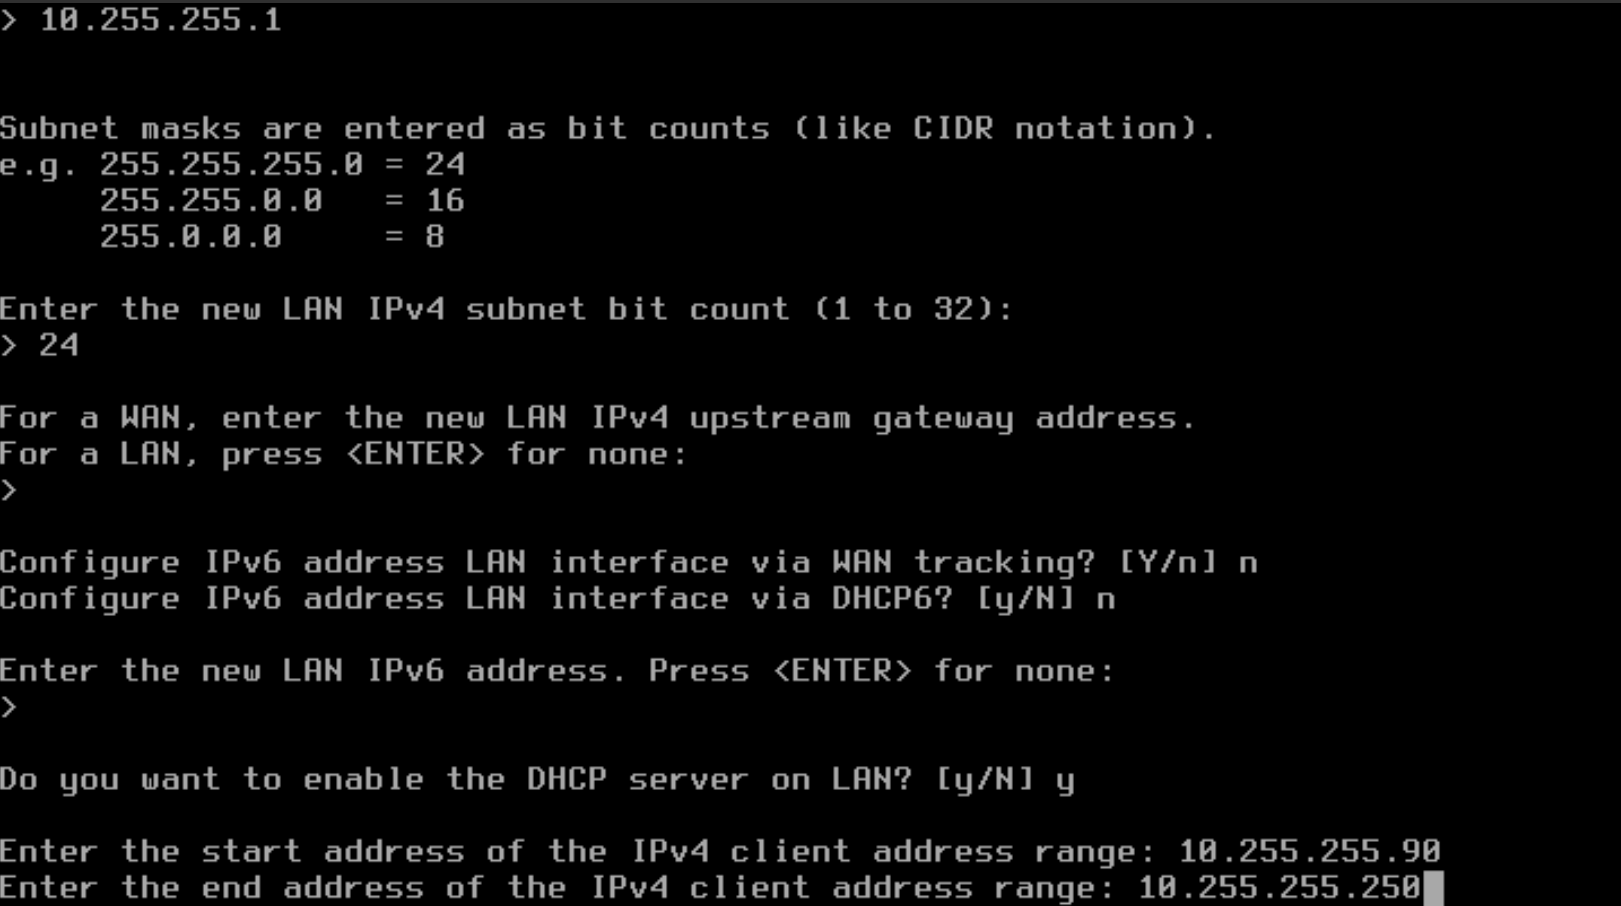
- Now that the DHCP server is enabled, define the starting IPv4 address for the DHCP scope range for the clients. In the example below, 10.255.255.90 is defined as the starting address.
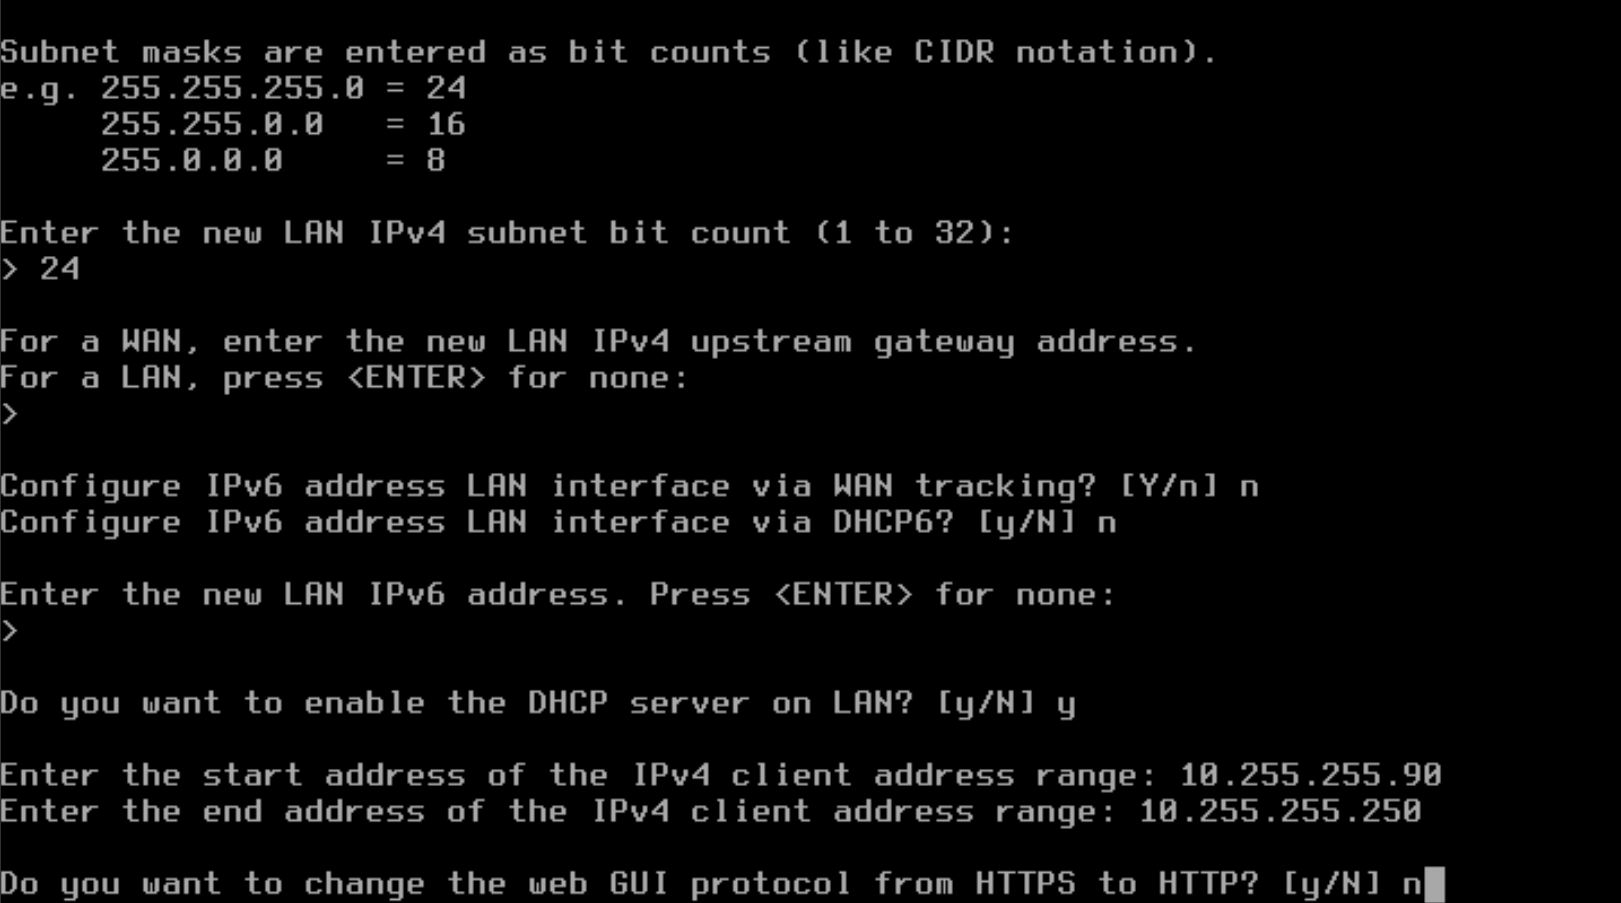
- Define the ending IPv4 address for the DHCP scope range for the clients. In the example below, 10.255.255.250 is defined as the starting address. This will now provide a total of 160 IPv4 addresses through DHCP.
- Type "n" to NOT change the web GUI protocol to HTTP and press Enter.
- Type "n" to NOT generate a new self-signed certificate and press Enter.
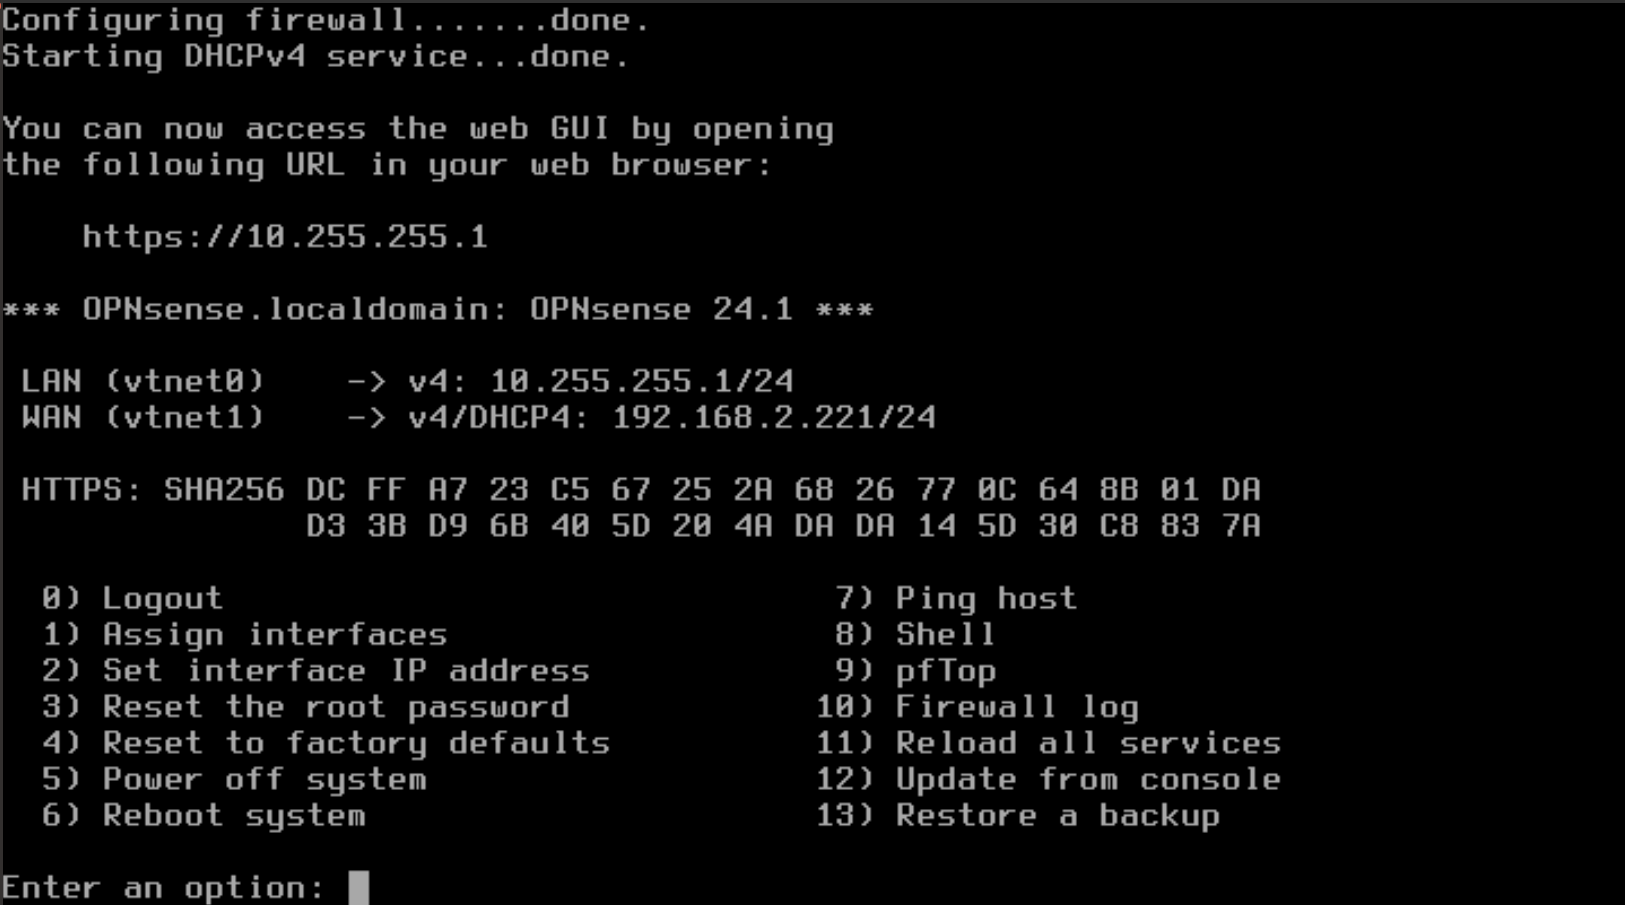
- Type "n" to NOT restore the web GUI defaults and press Enter.

Now that you have finished the initial configuration, you are returned to the administrative CLI interface and are given the URL for the the web admin interface. The example below provides the URL https://10.255.255.1.
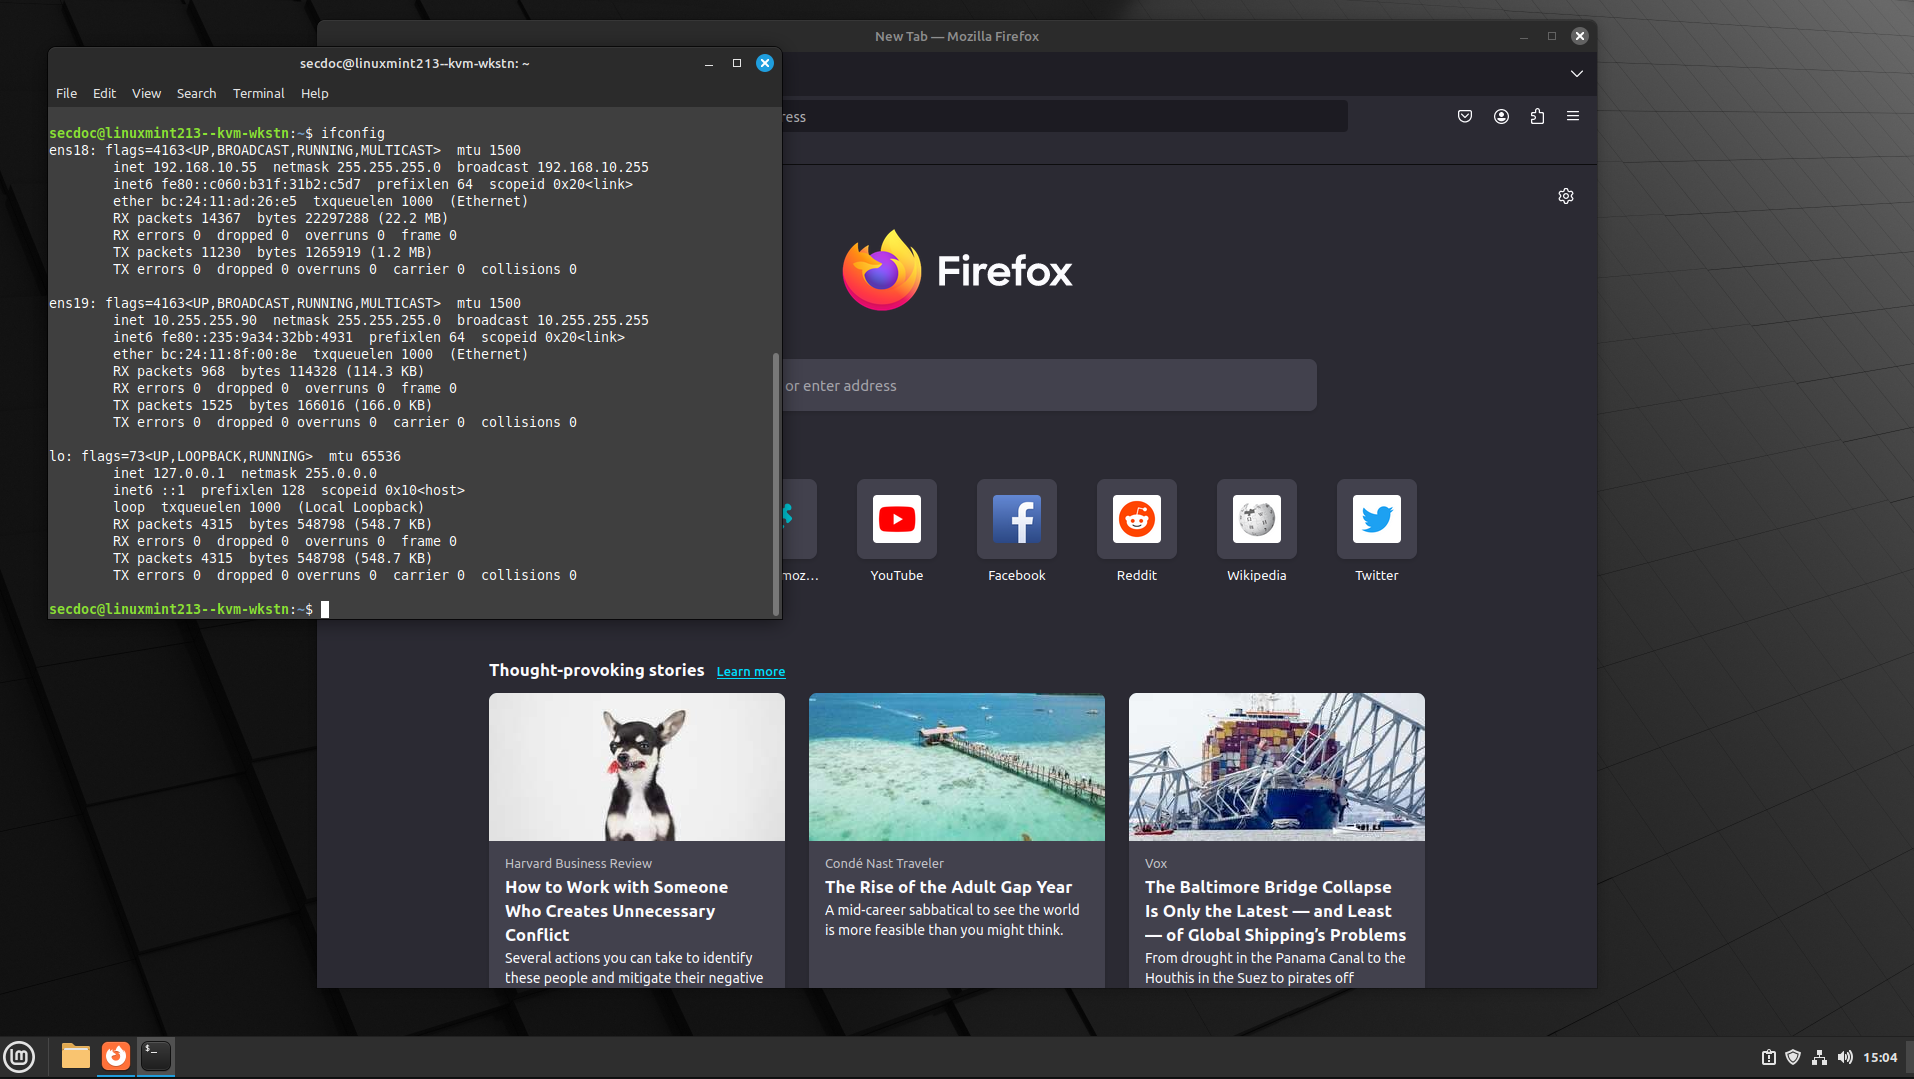
It is now possible to start a virtual machine with an interface attached to the same network as the OPNsense LAN and connect the web GUI. This the screenshot below you can see that the Linux Mint VM has an interface ens19 that has been given an IP address of 10.255.255.90 by the firewall.
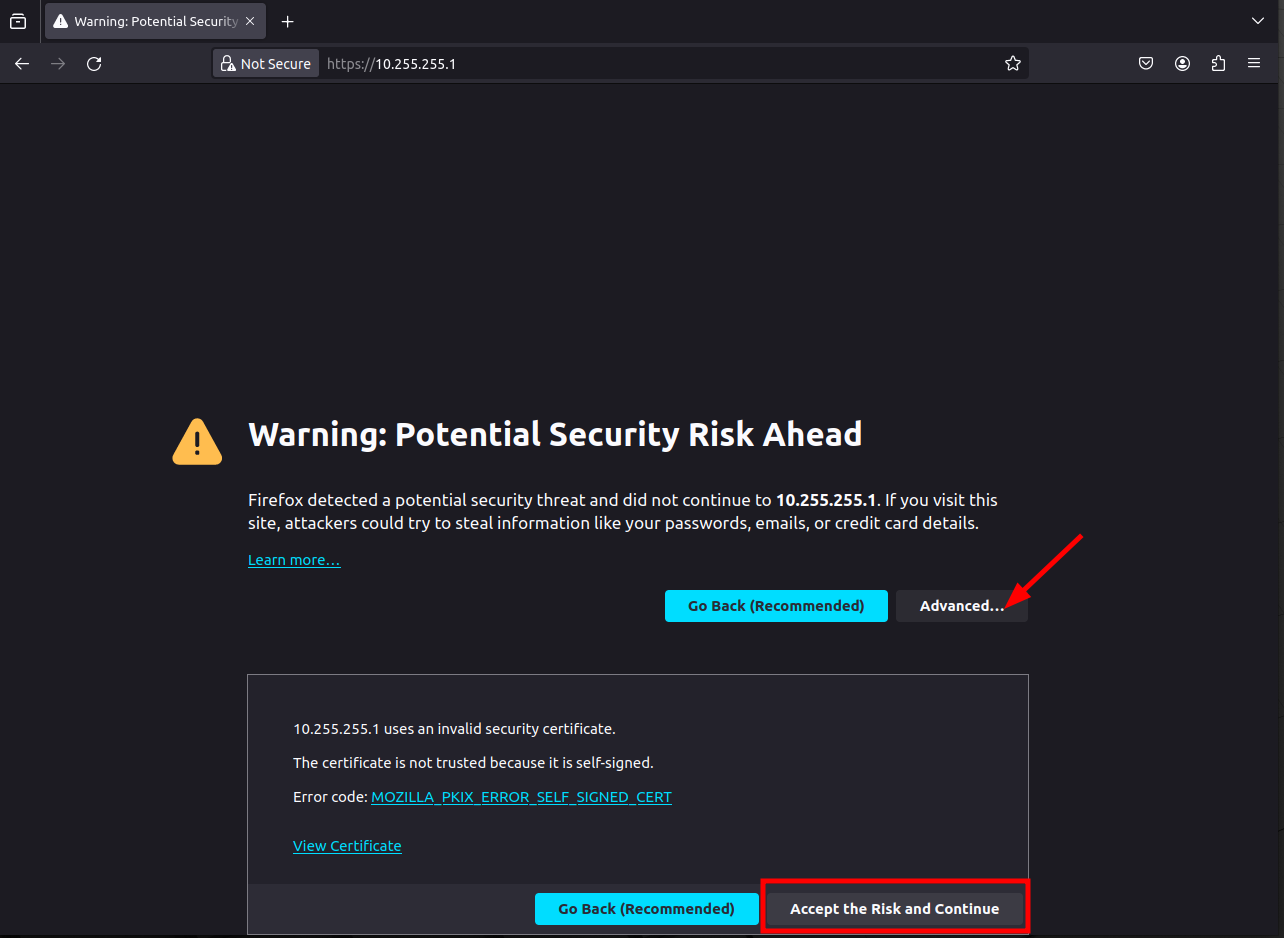
- With a device connected to the LAN segment of the firewall, you can now connect to the web administration interface of the OPNsense firewall. connect using the URL referenced in the previous step. In this, case it is https://10.255.255.1. When you initially connect, you may see the "Warning Message", noting the self-signed certificate.

You can bypass the message by clicking Advanced and the Accept the Risk and Continue. This can be done because you know the source of the certificate and the system itself.
If this were another site or service that you did not configure, you would want to avoid doing this.
- You can now log in with the root password that you defined during installation and click Login.

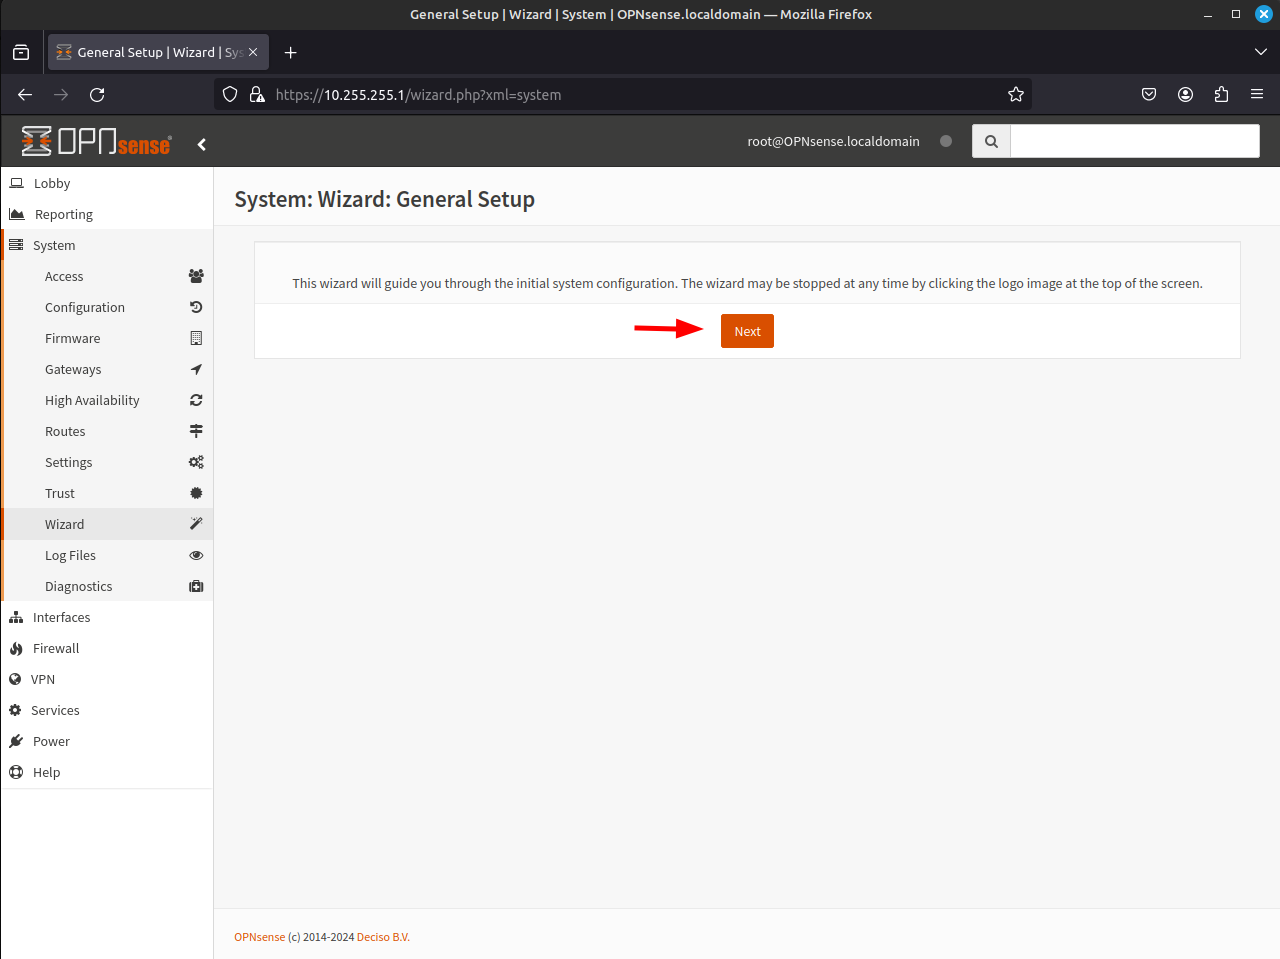
- Once logged in, you will be placed in the System Setup Wizard. Click Next.
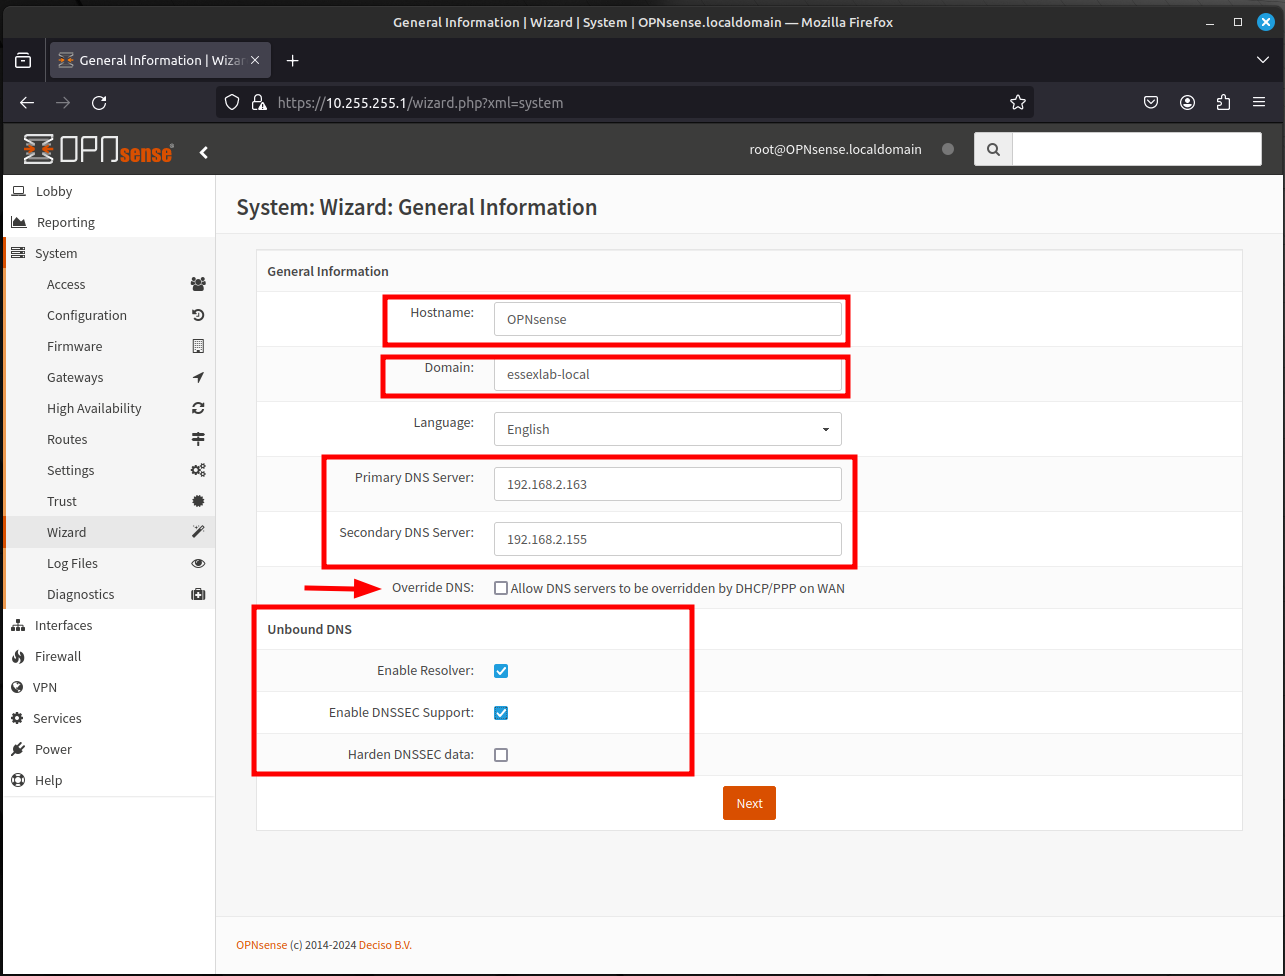
- In the next screen, you can update the Hostname, Domain, Primary and Secondary DNS Servers, and if you have internal DNS, you can choose to override the WAN DHCP DNS setting. OPNsense also provides an Unbound DNS daemon. Once you have made any and all changes, click Next.
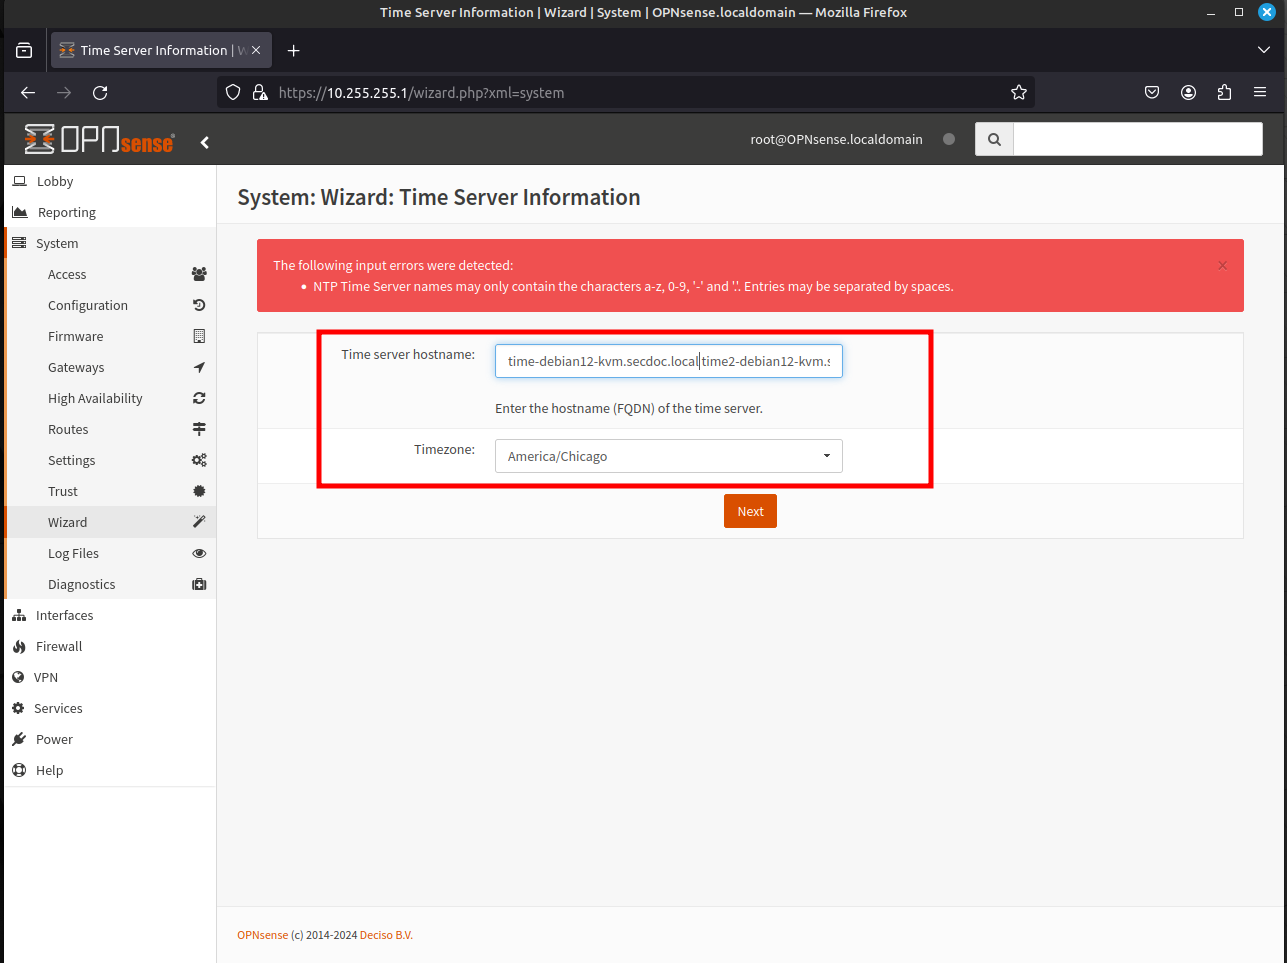
- The next page, provides the ability to make changes or configure the Network Time settings. Once complete, click Next.
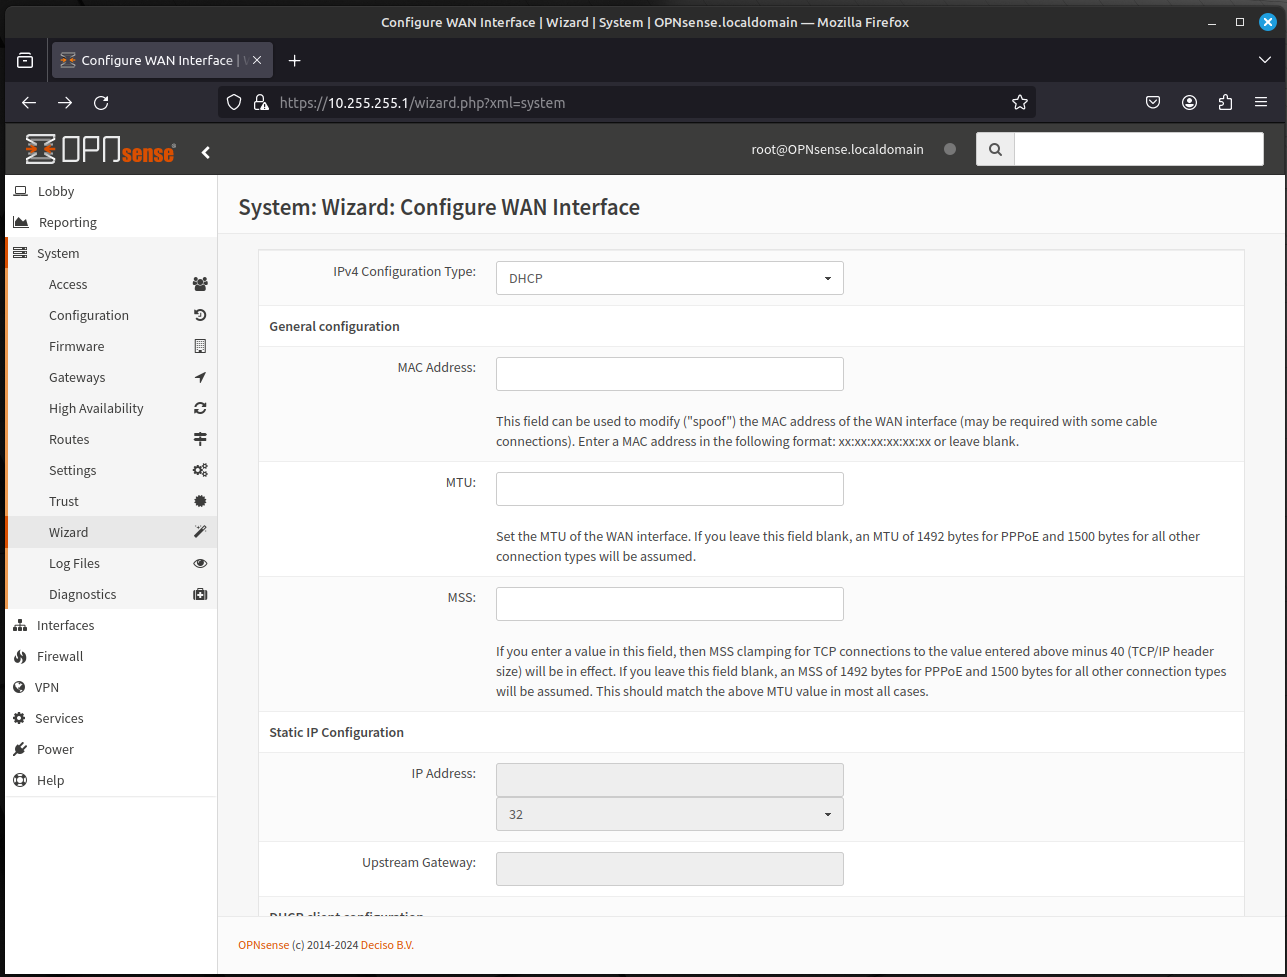
- The next page allows you to change the WAN Interface configuration that was originally made after installation. Since this was initially already configured through the CLI, scroll down to the bottom of the page and click Next.
- Like the previous page, this page allows you to change the LAN Interface configuration. Likewise, since this was initially already configured through the CLI, click Next.
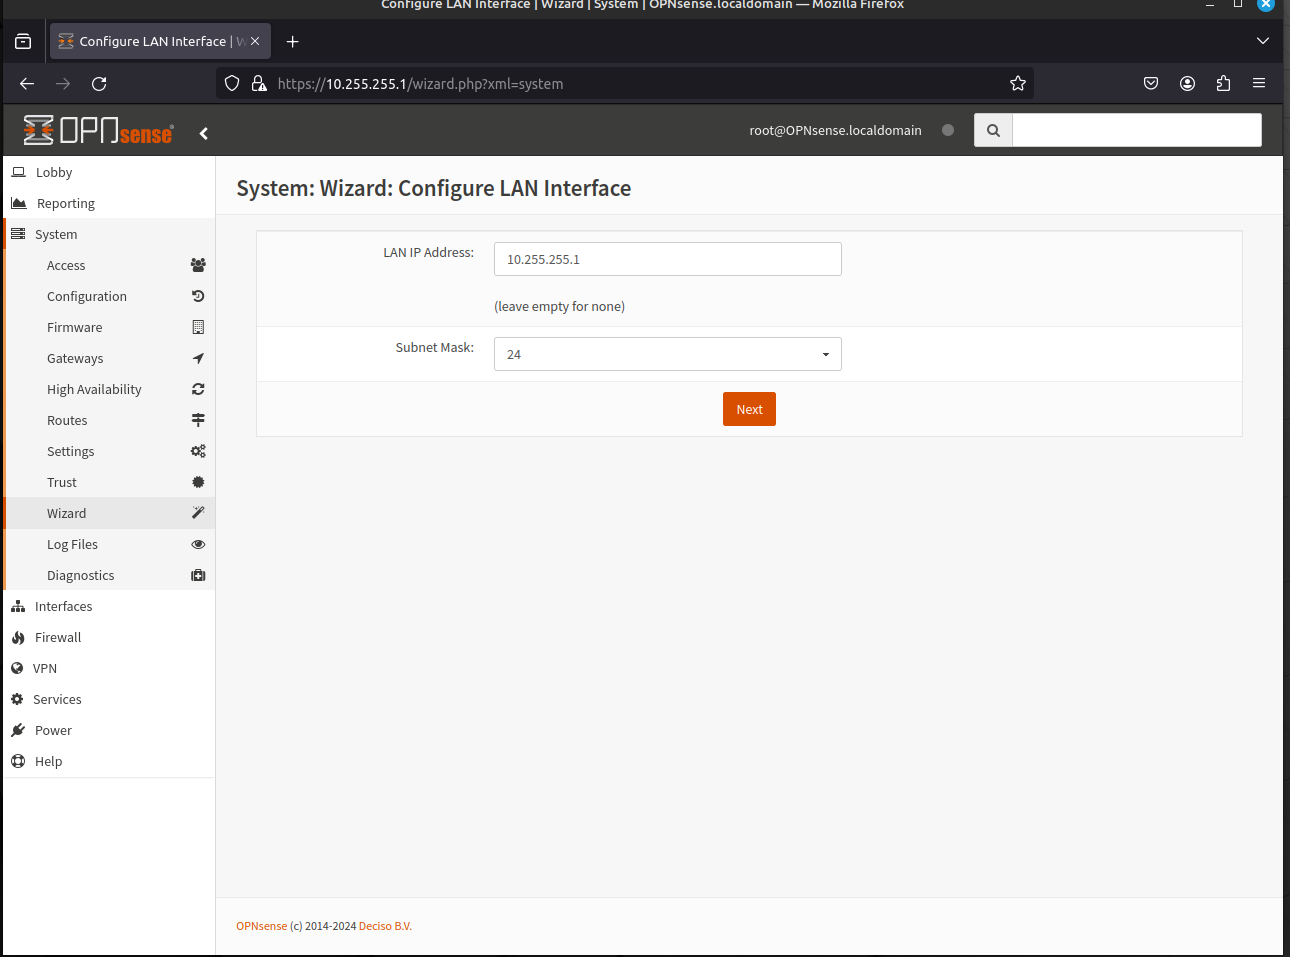
- This page allows you to change the Root Password. During final steps of the installation, the root password was defined. If you did not set the password at installation, this allows you to make that change. Click Next.
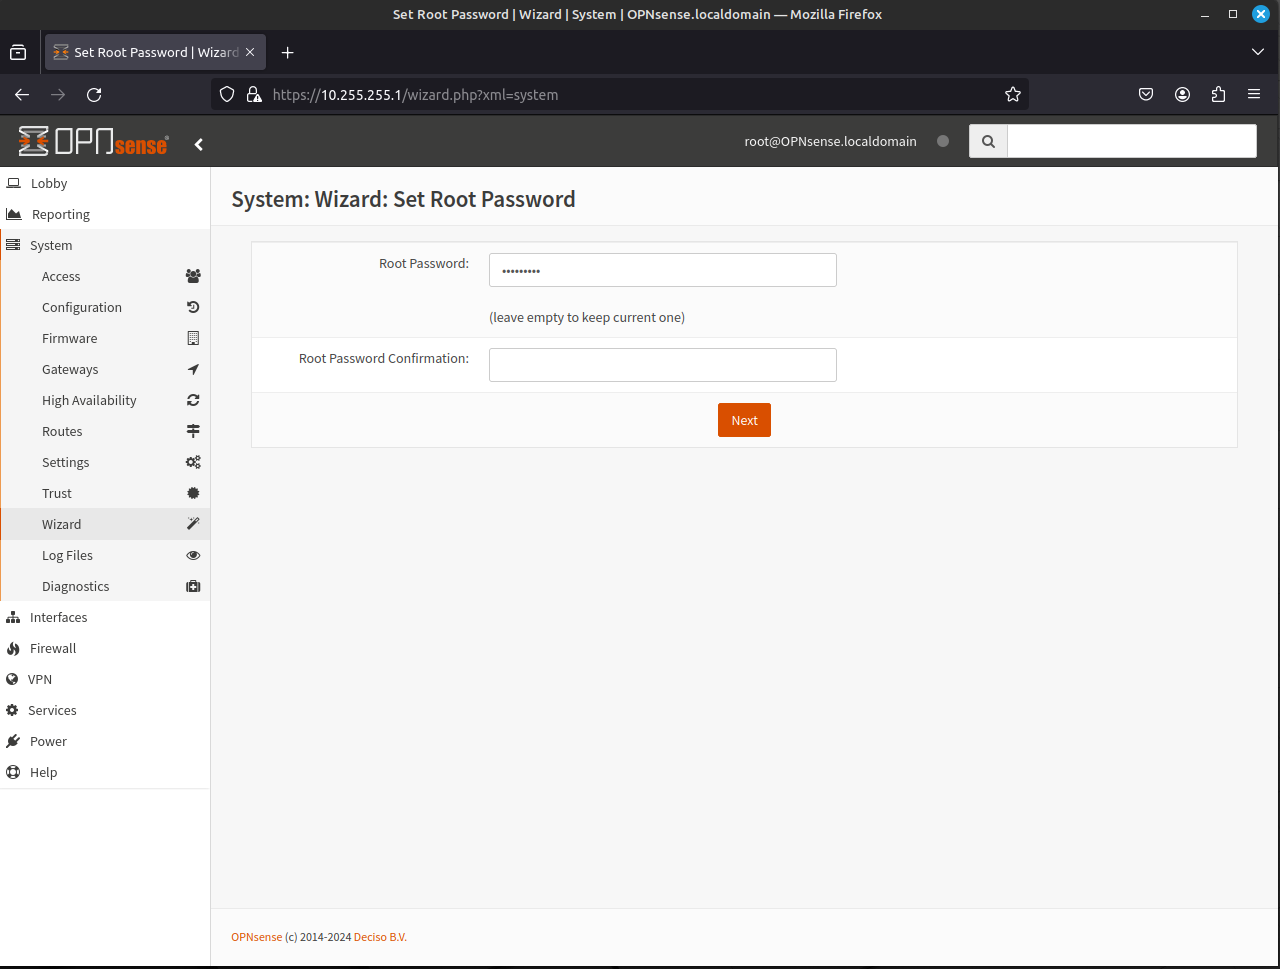
- The final page will Reload the Configuration. Click Reload.
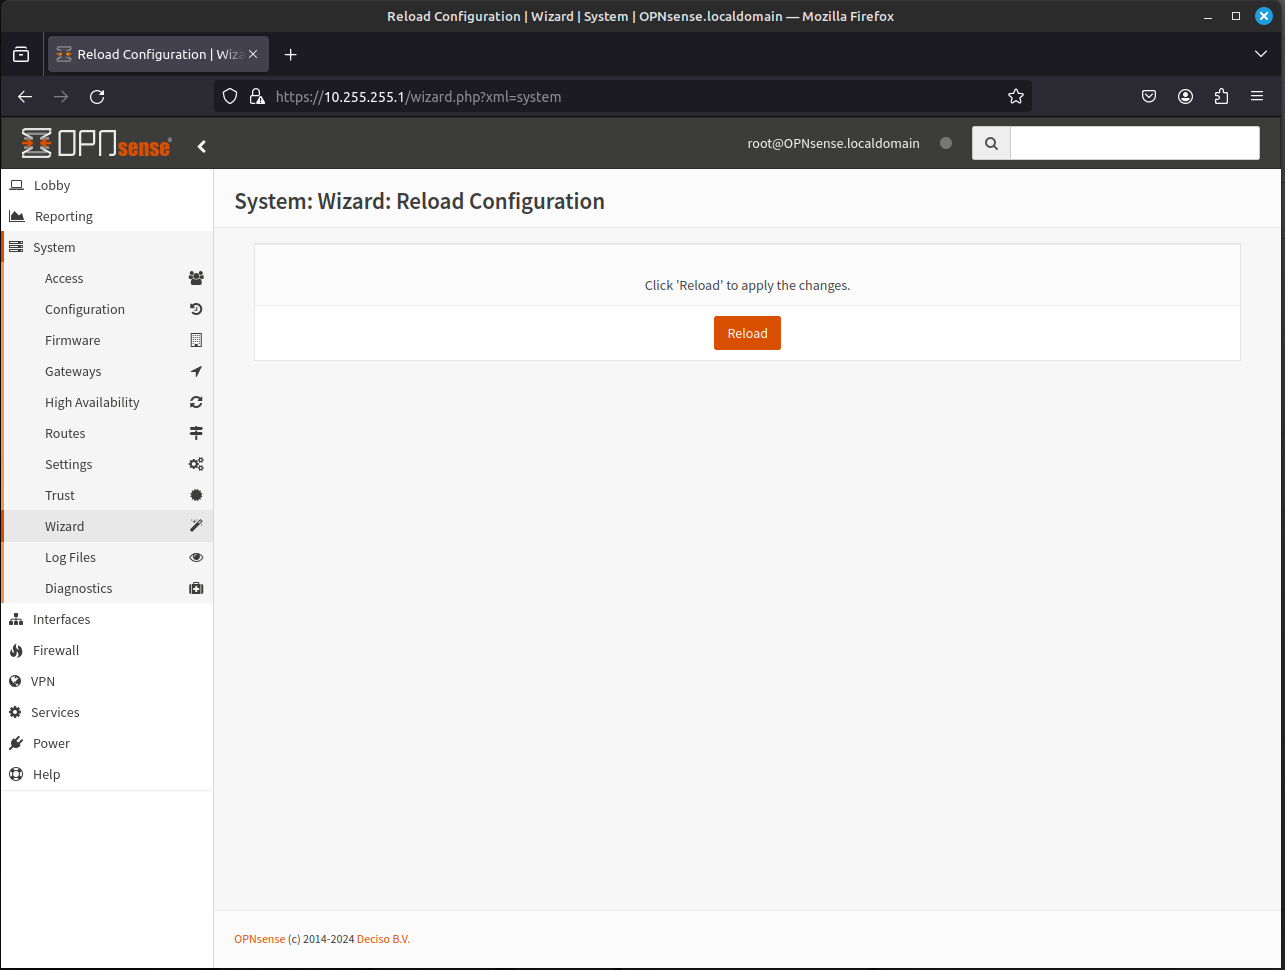
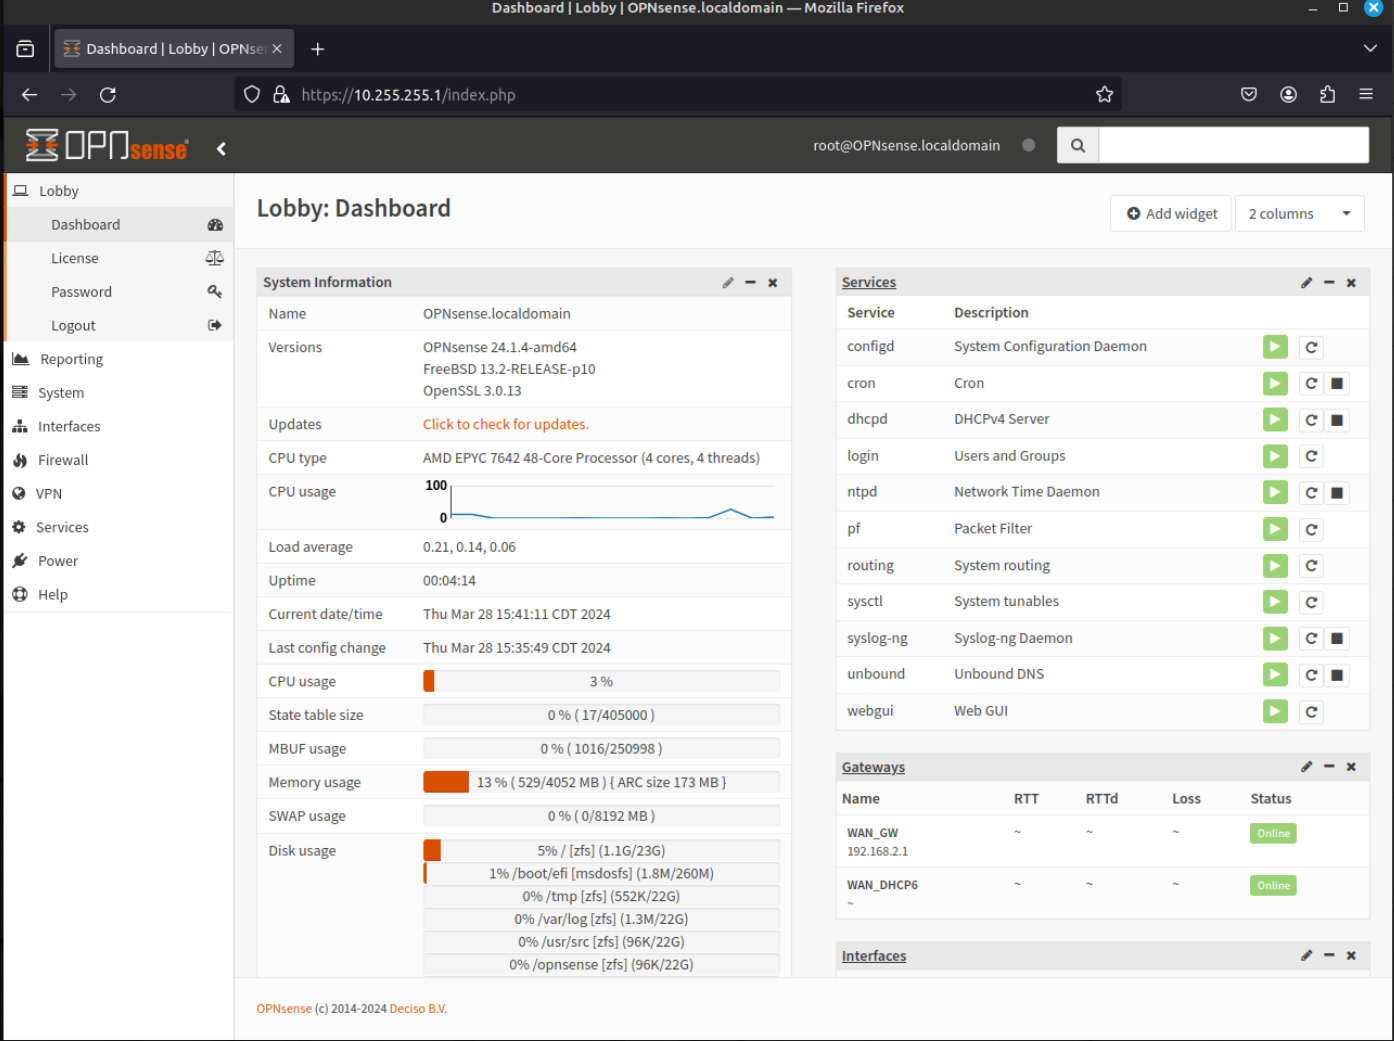
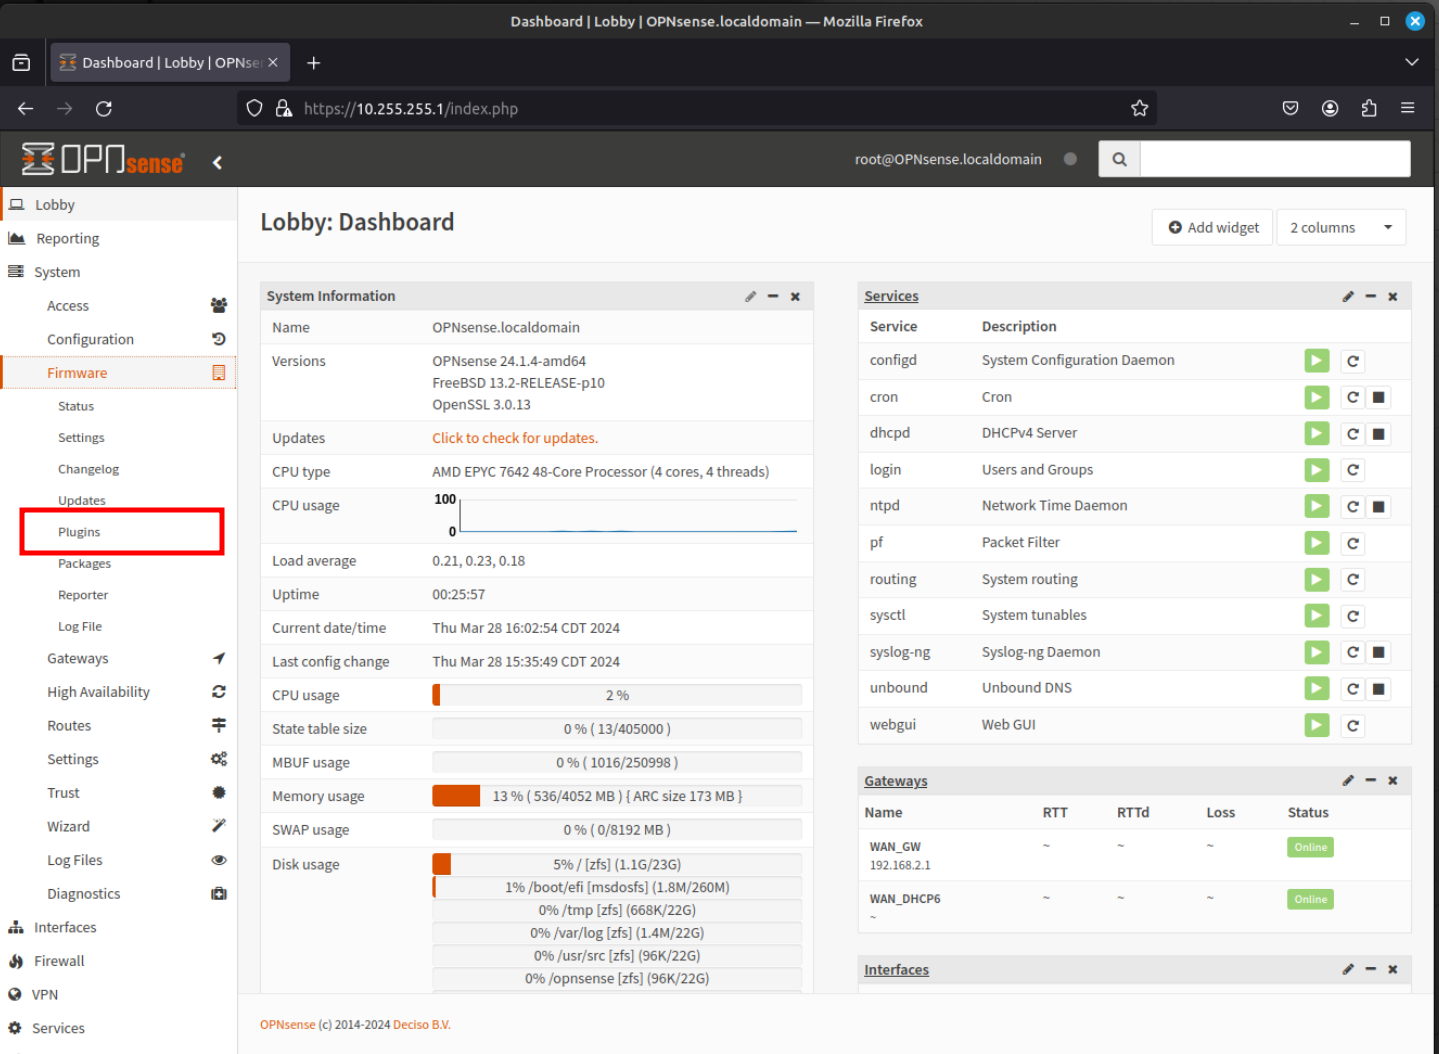
Once the configuration is reloaded the page shown below will be presented. From here you can select Lobby and Dashboard from the menu at the left of the page.
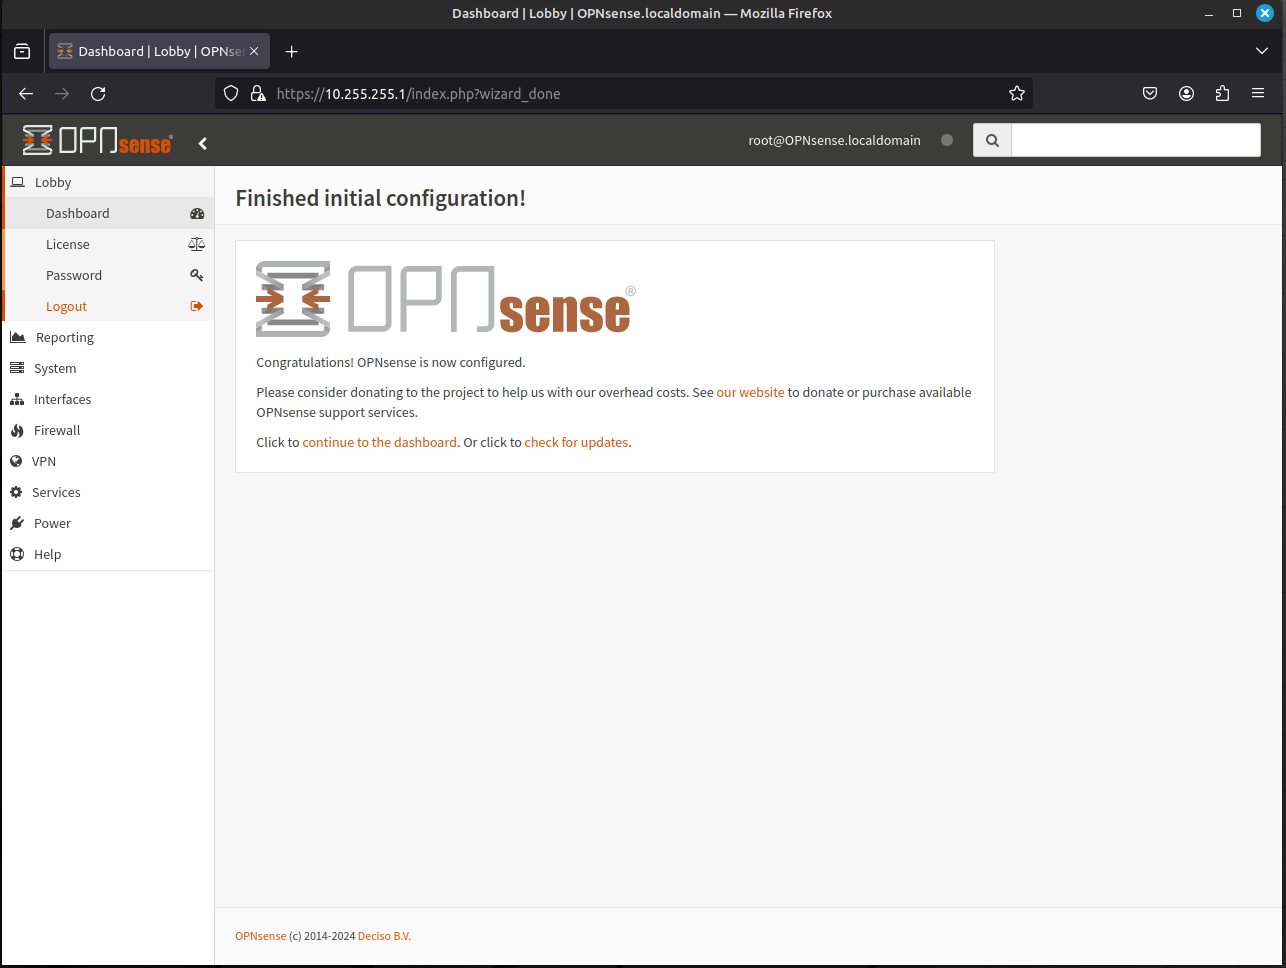
- When you are at the Dashboard, you can click "Click to check for updates" to check for updates.

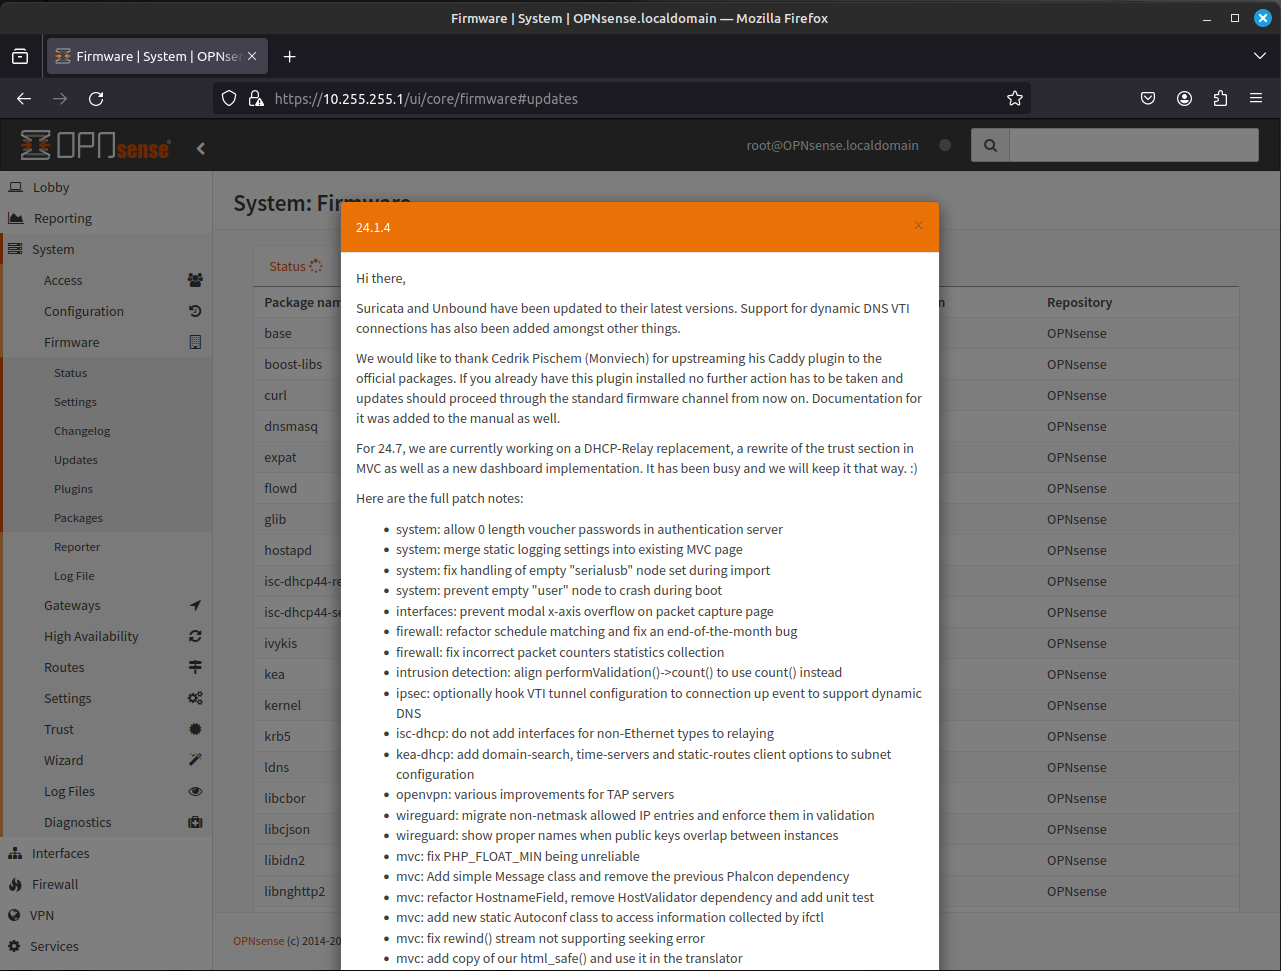
- By clicking to check for updates, it takes you to the System - Firmware - Updates page. Click "Check for Updates." Assuming you have a valid, Internet connection on the WAN, the system will run a query for any new updates (this will also pull down the plugin list as well). If you have updates, it will present you will a patch notes dialogue box, showing all the available updates. You will then click through the dialogue box to update the firewall. If there were no updates, a dialogue box will appear stating, There are no updates available on the selected mirror.
Beware you may need to reboot the firewall depending on the updates applied.
The system will download and run all the available updates to the system.
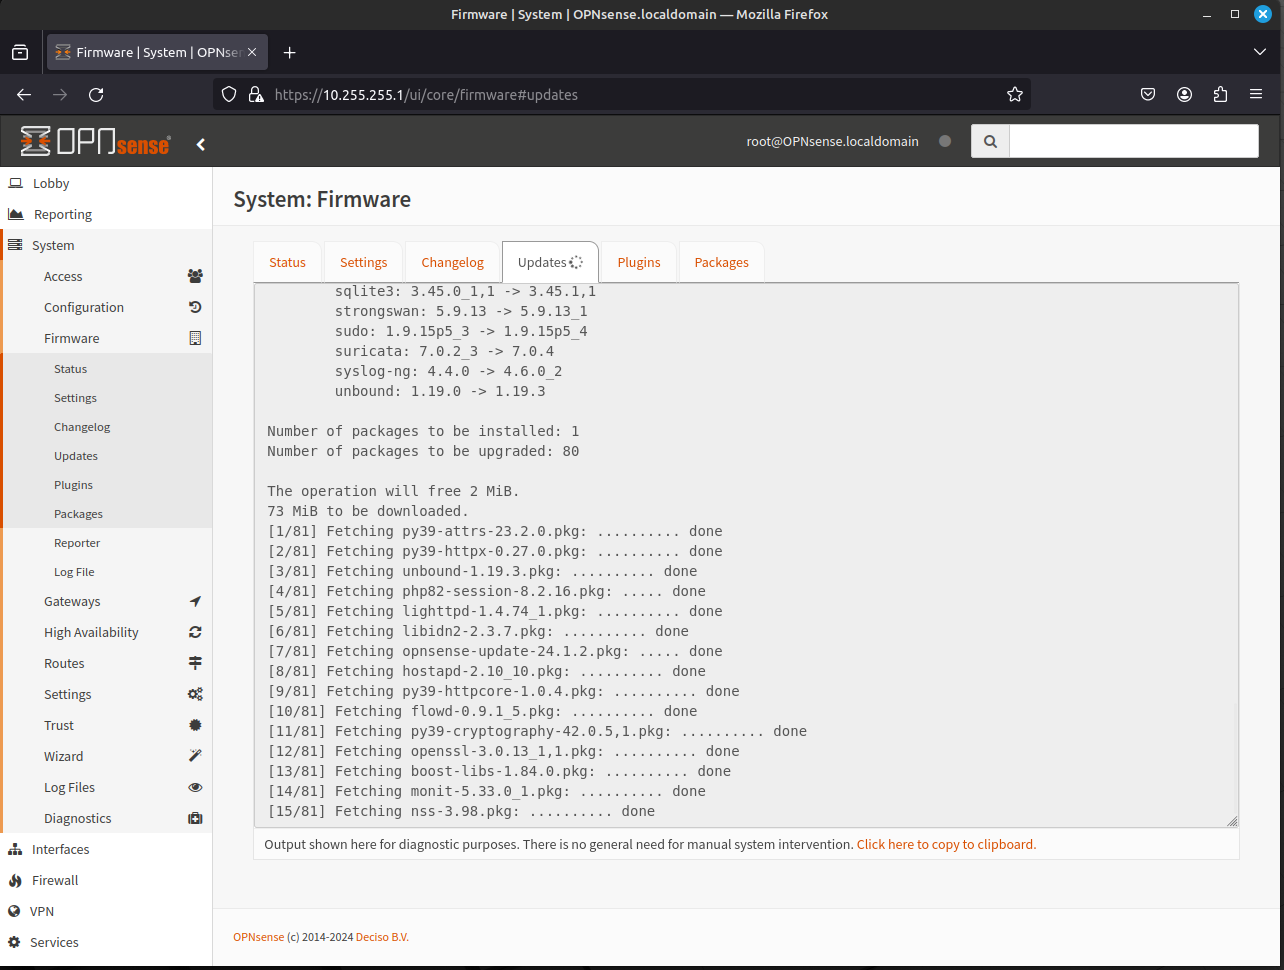
When you are done, go back to the Dashboard. From here you should notice the changed in OPNsense version based on the update. If your system required a reboot, once you log in the default landing page will be the Dashboard.
- Now that everything is updated, it is now possible to add additional plugins to increase the security controls/options for securing your environment. In the menu, click System then Firmware.
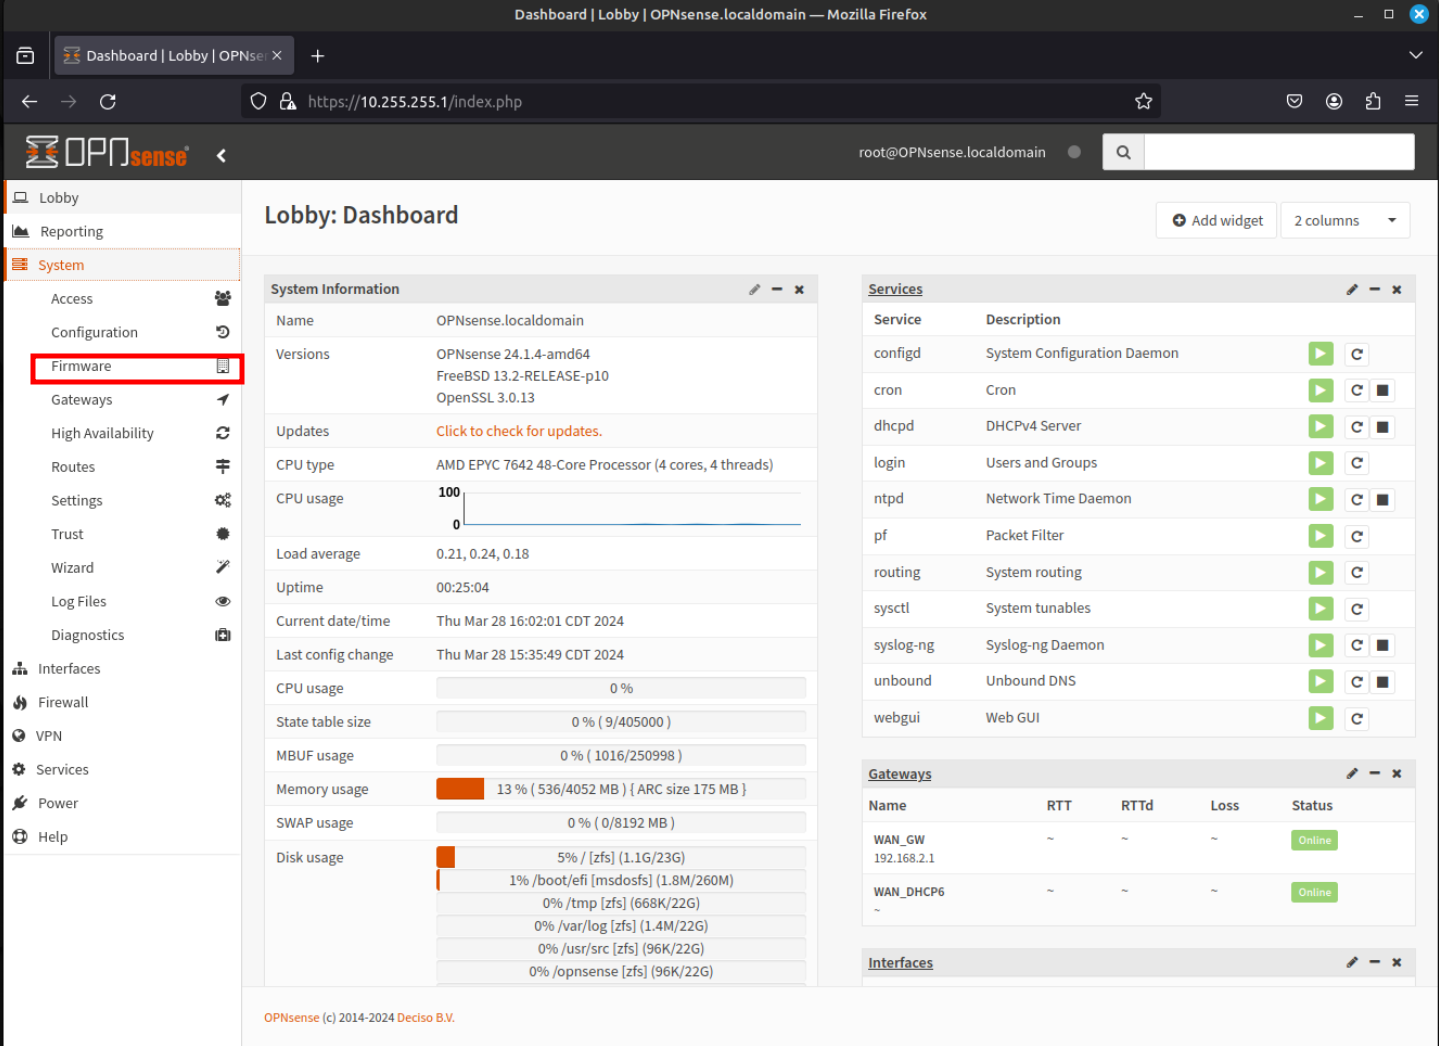
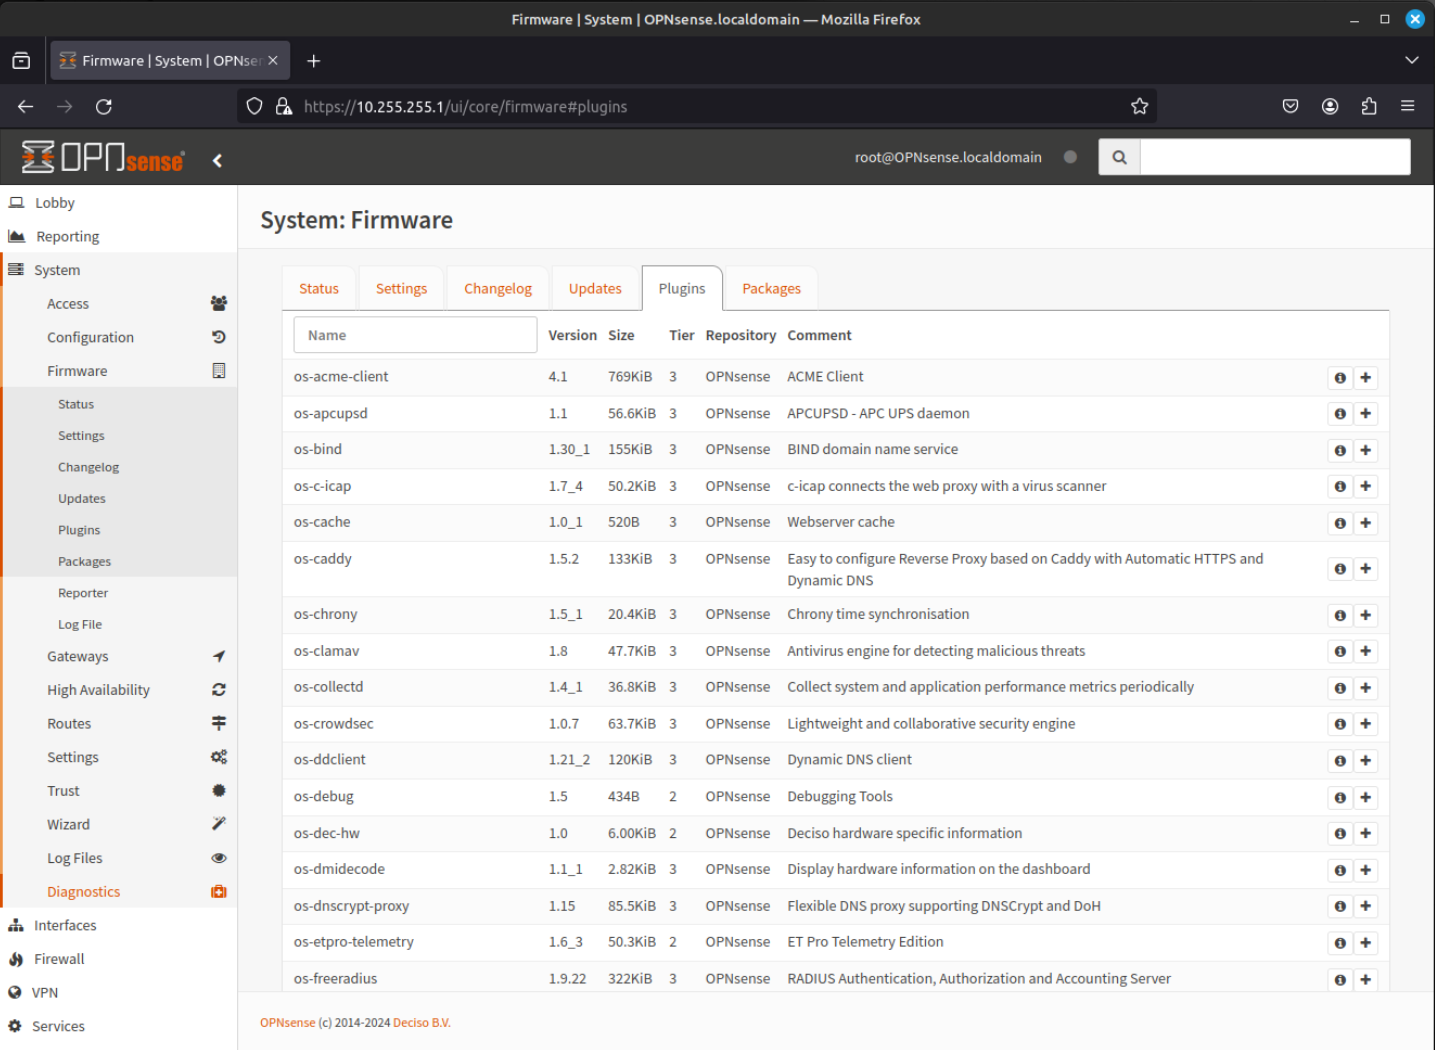
Finally click Plugins.
- This is the section we were in earlier when running the system update. Now we can select to install the various available plugins. You can find more information about the plugins by clicking on the "i" icon for each plugin.
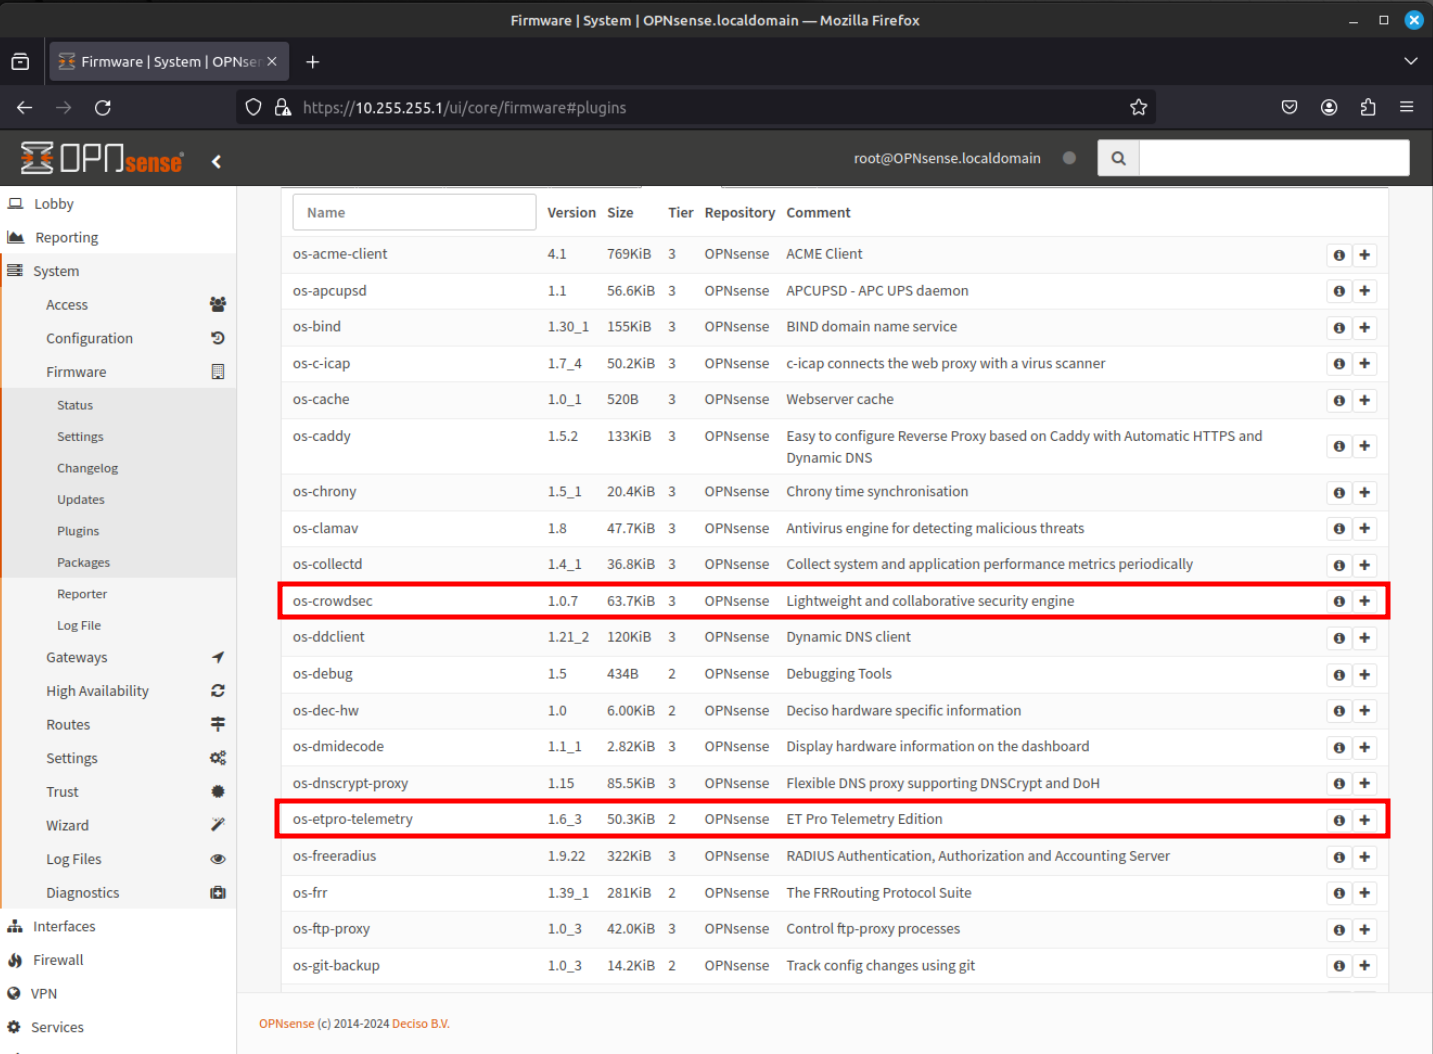
Select os-crowdsec and os-etpro-telemetry by clicking on the "+" icon.
NOTE: The ET Pro Telemetry set requires a license. You can get a free license at the OPNsense Store. This provides you with the full ET-Pro signature set for free with simple telemetry data provided to Proofpoint. You can read more here.
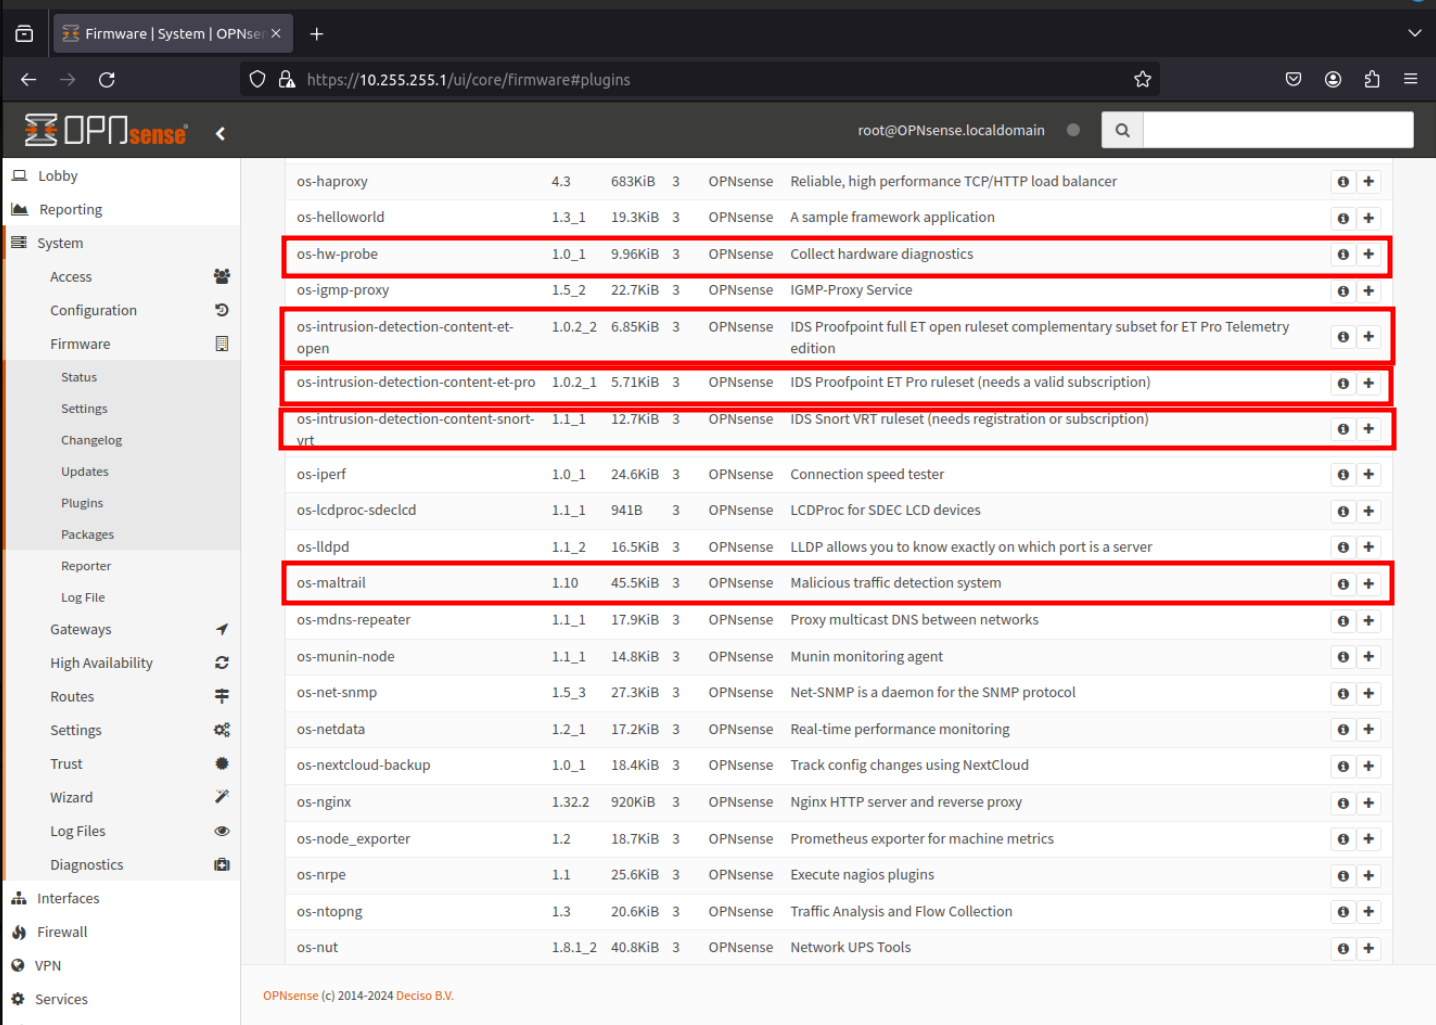
Select os-fw-probe, os-intrusion-detection-content-et-open, os-intrusion-detection-content-et-pro, os-intrusion-detection-content-snort-vrt, and os-maltrail by clicking on the "+" icon.
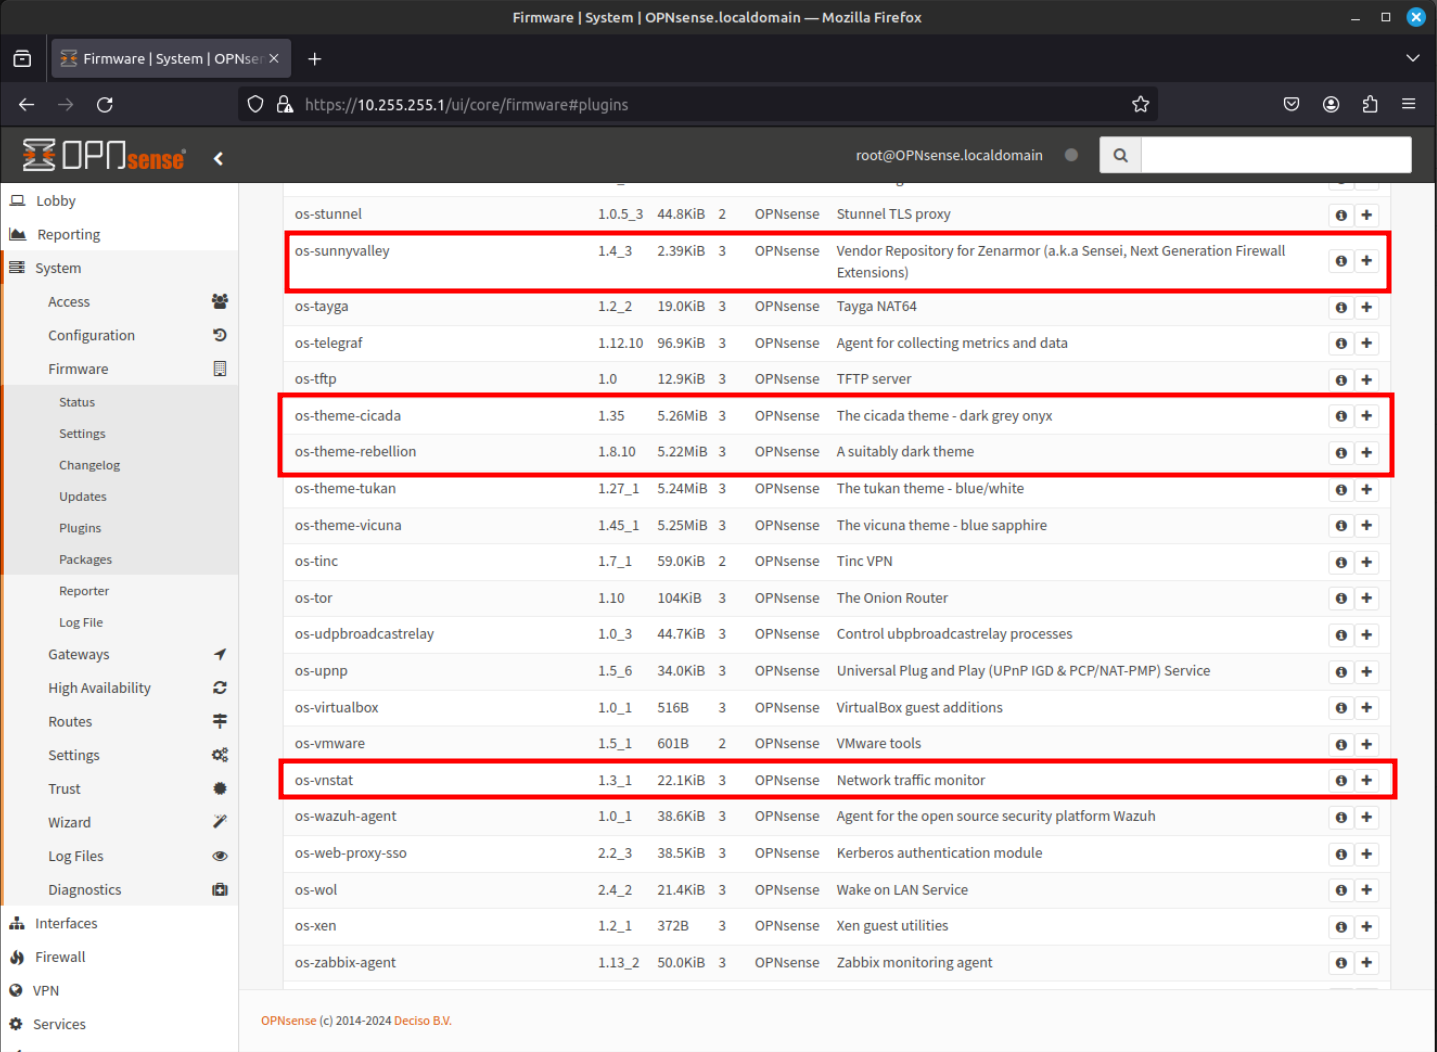
Select os-sunnyvalley, os-theme-cicada, os-themse-rebellion, and os-vnstat by clicking on the "+" icon.
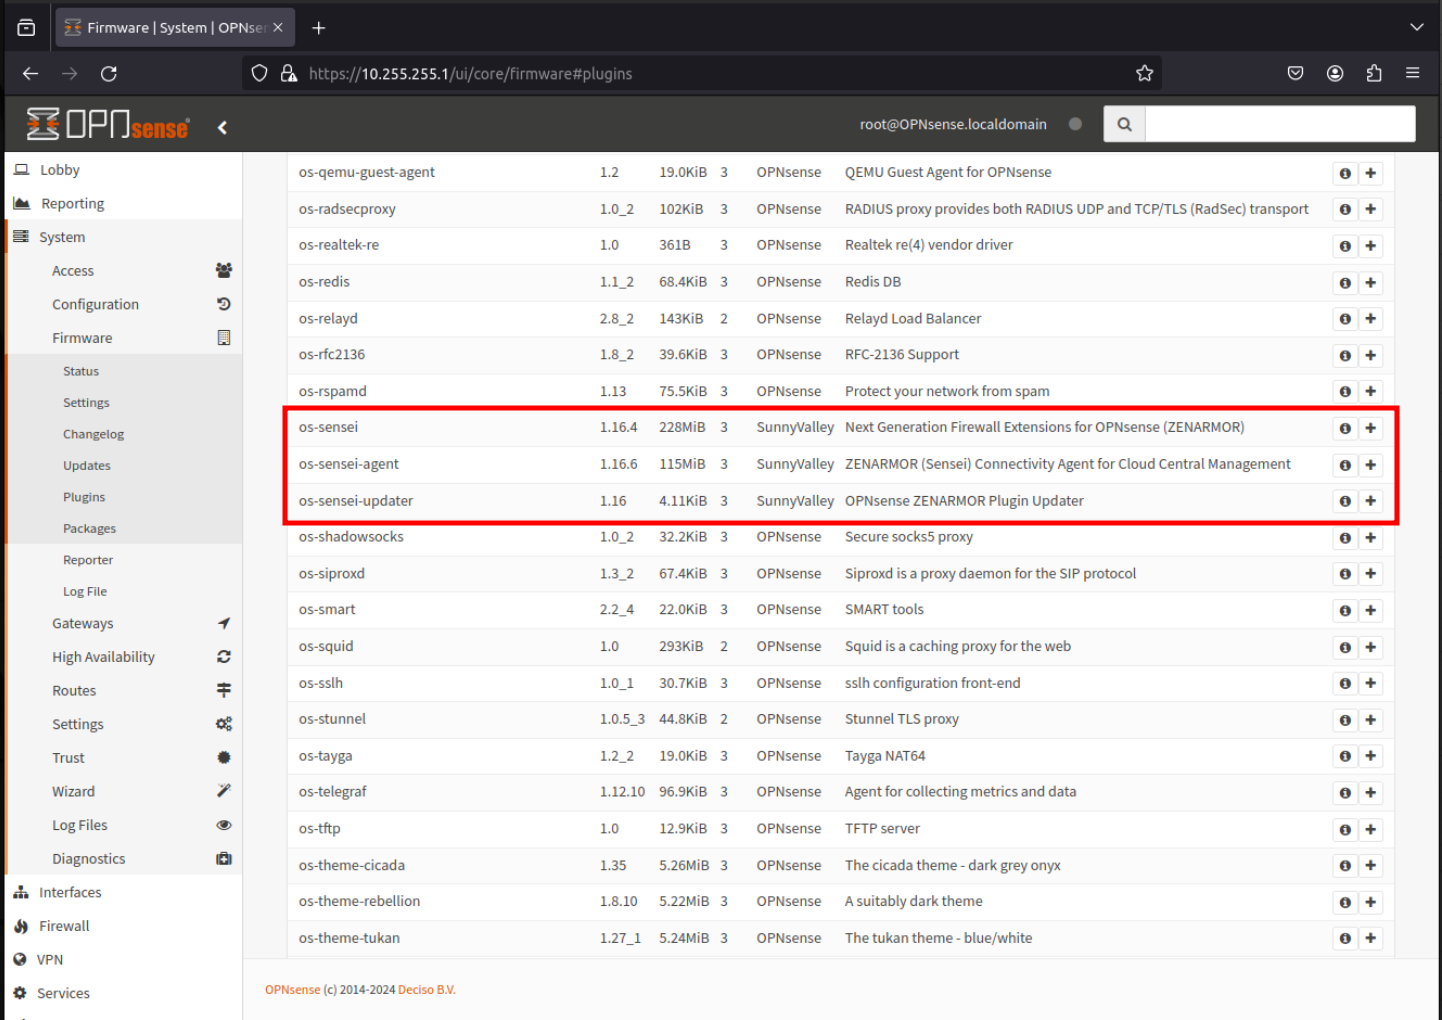
Finally click on os-sensei, os-sensei-agent, and os-sensei-updater by clicking on the "+" icon.
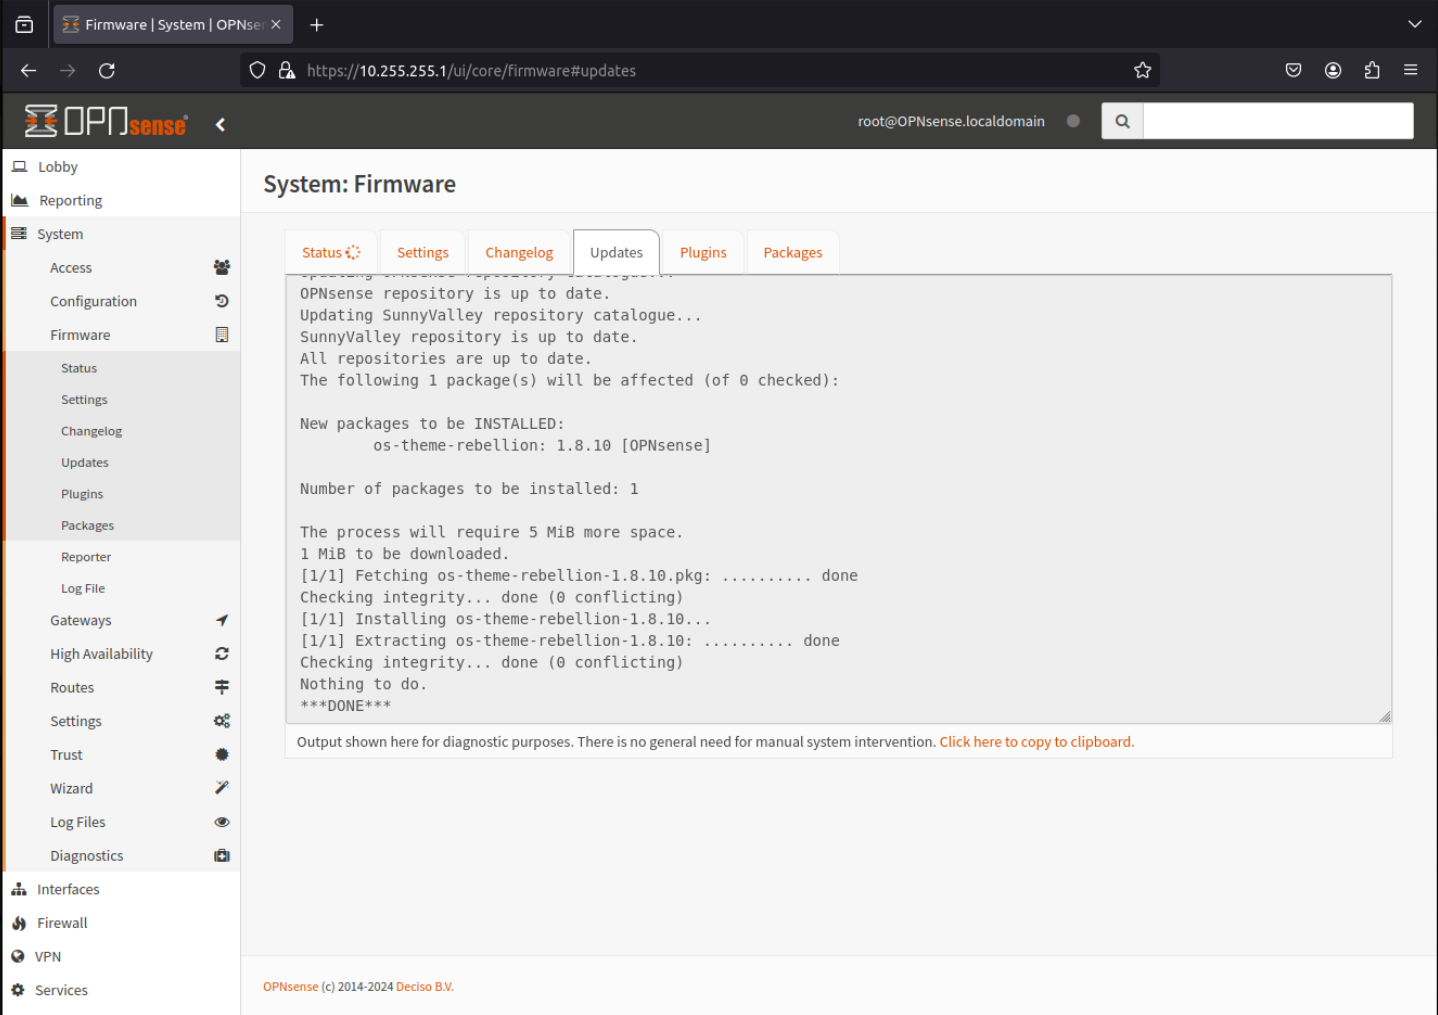
Each time you select a plugin it will install and you will see an installation windows like the one below.
- After all the plugins have been installed, navigate to System - Setting - General using the menu at the left of the window. If you do not like the default "Light" OPNsense theme, it can be changed to one of the other themes just install such as Rebellion.
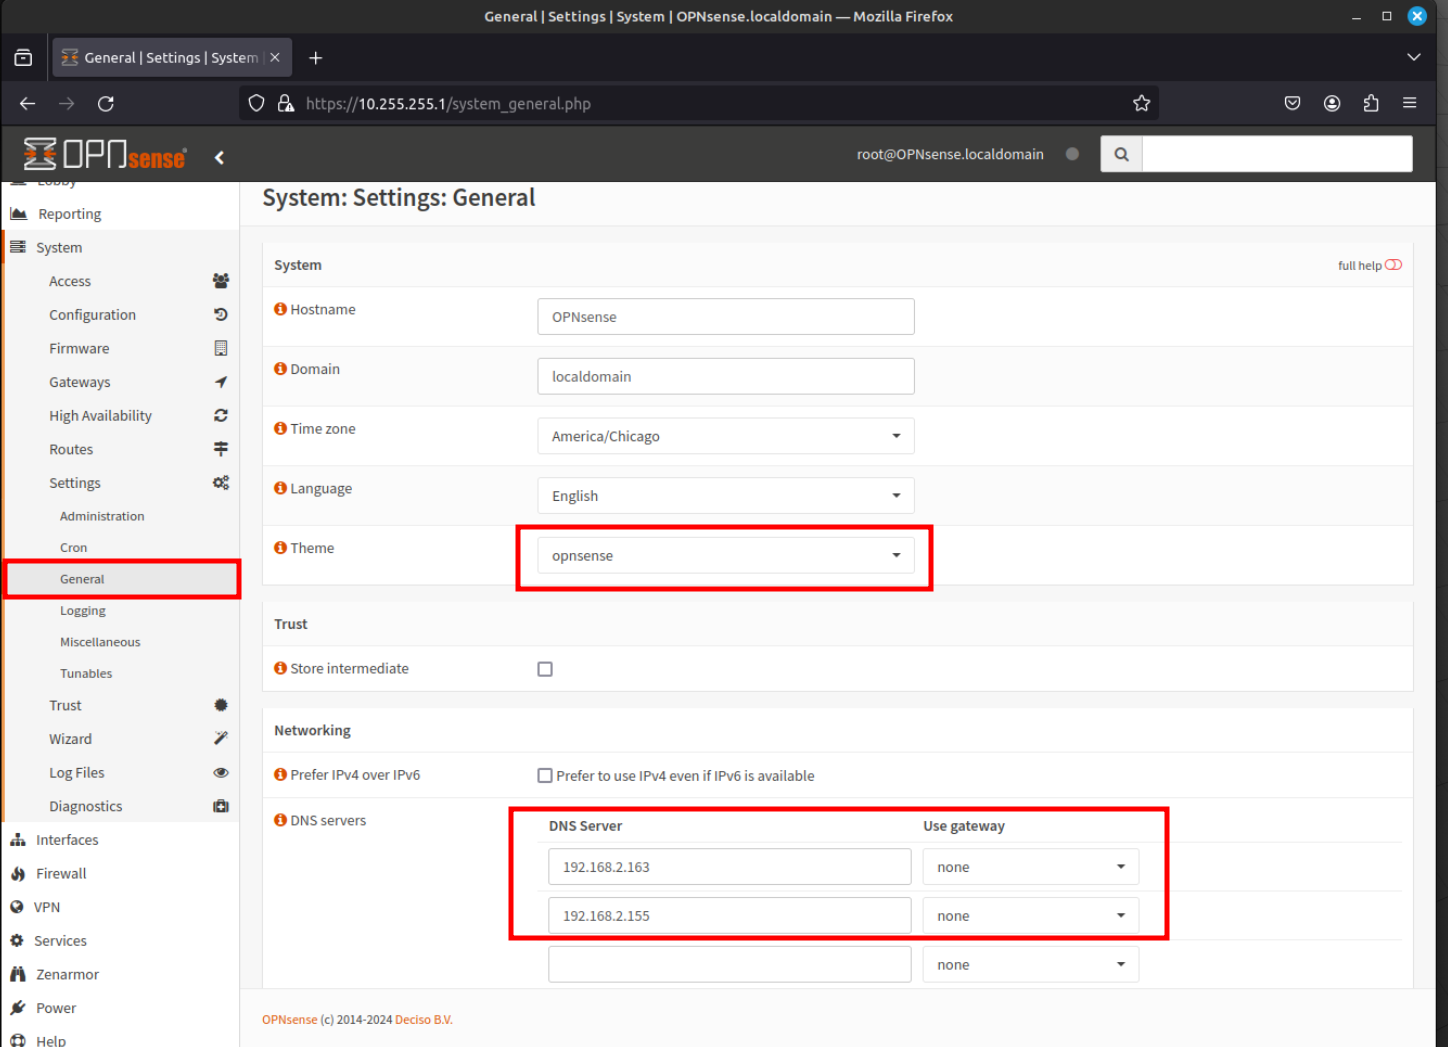
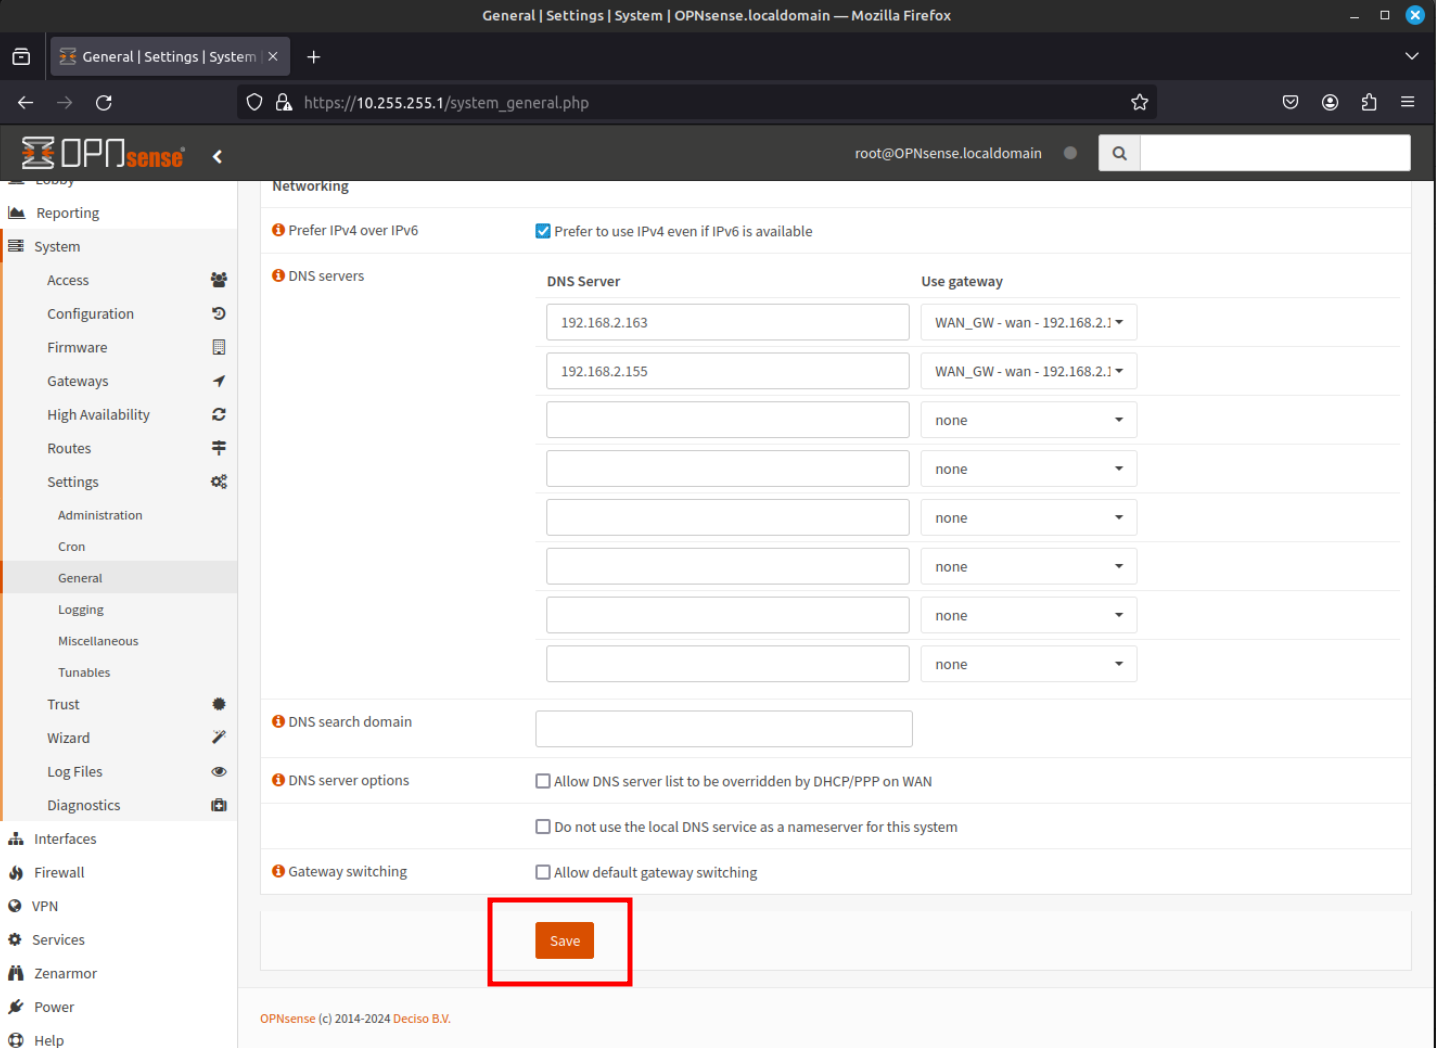
You can also adjust or specify new DNS servers and also choose to prefer IPv4 over IPv6 for networking within this page.
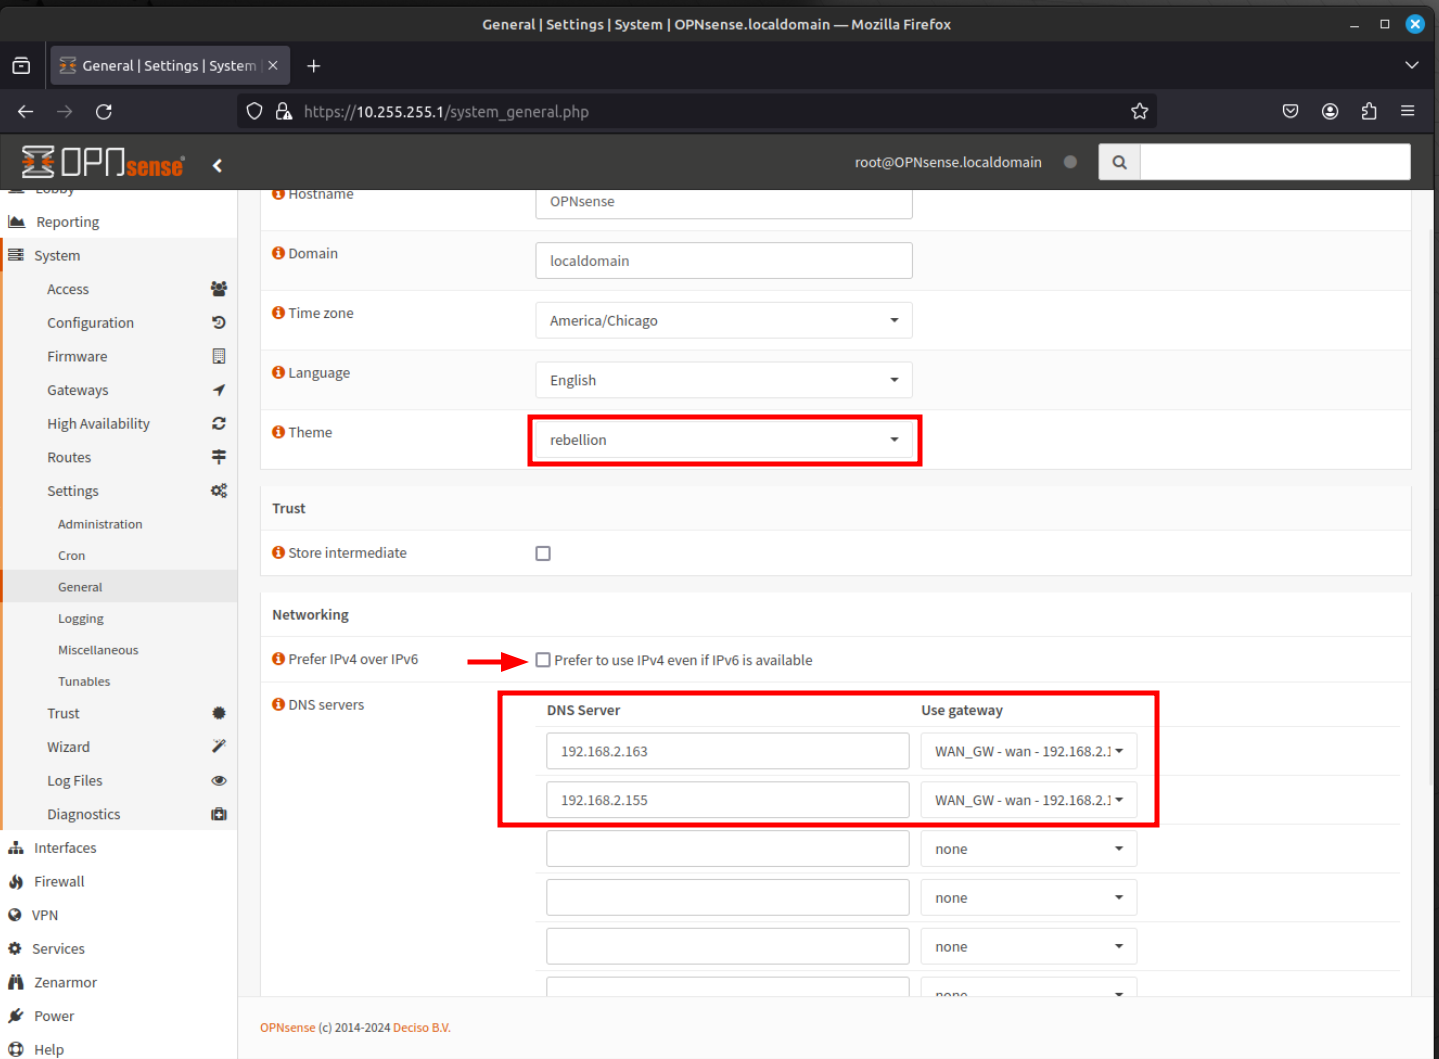
Once you ave completed any edits, click Save.
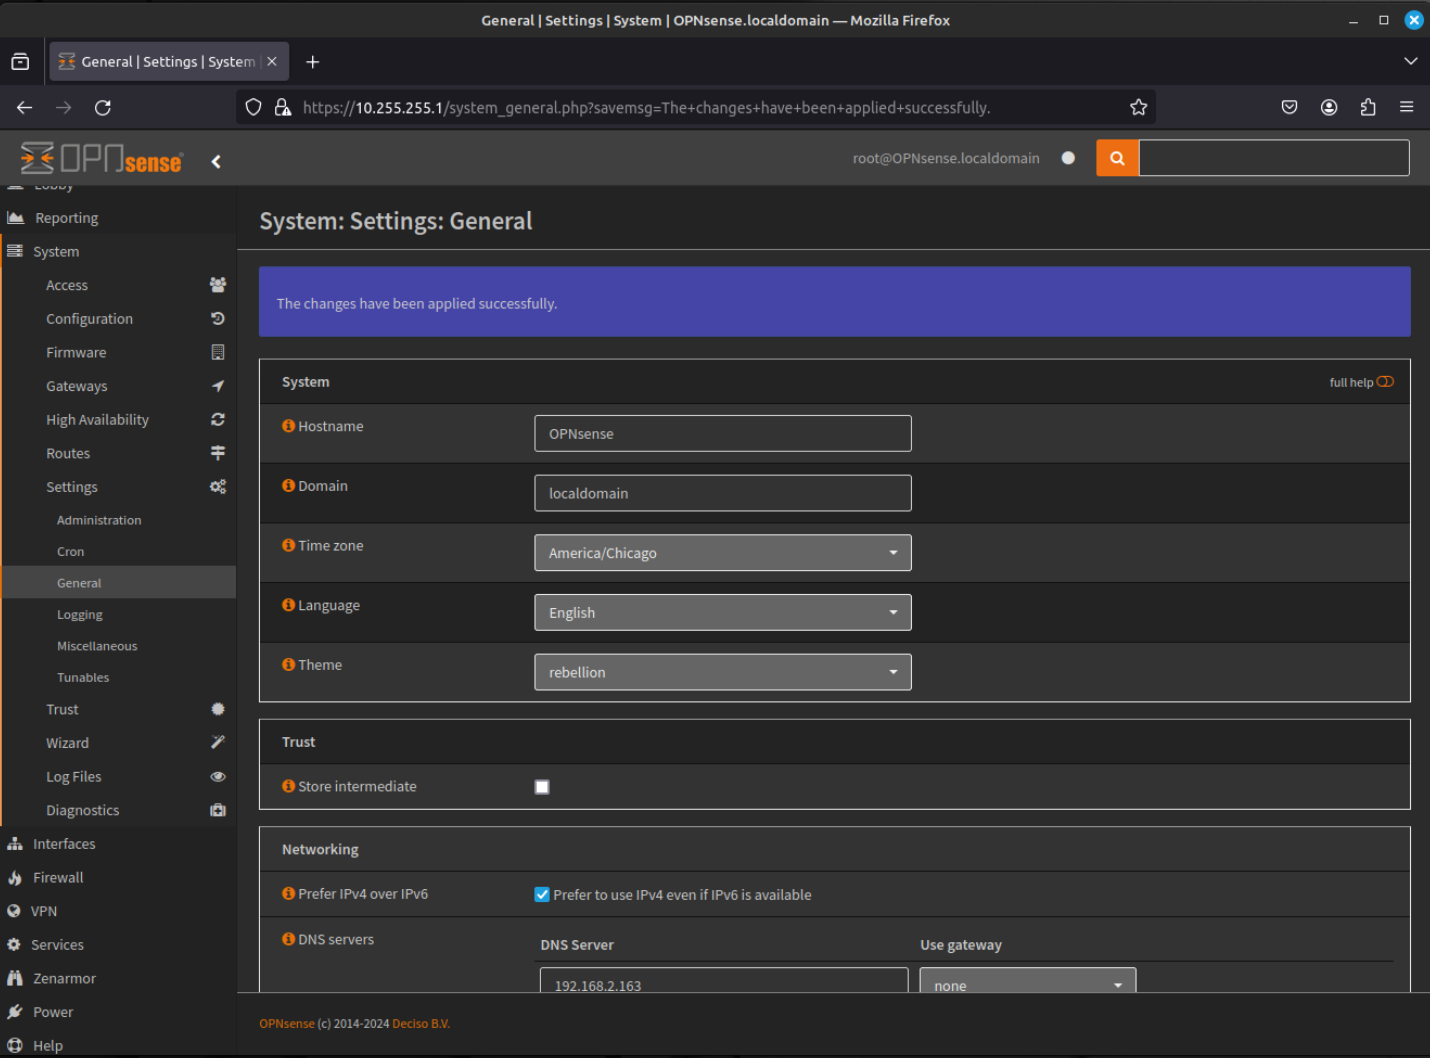
Once save, the new theme should be now changed to a dark theme as shown in the image below.
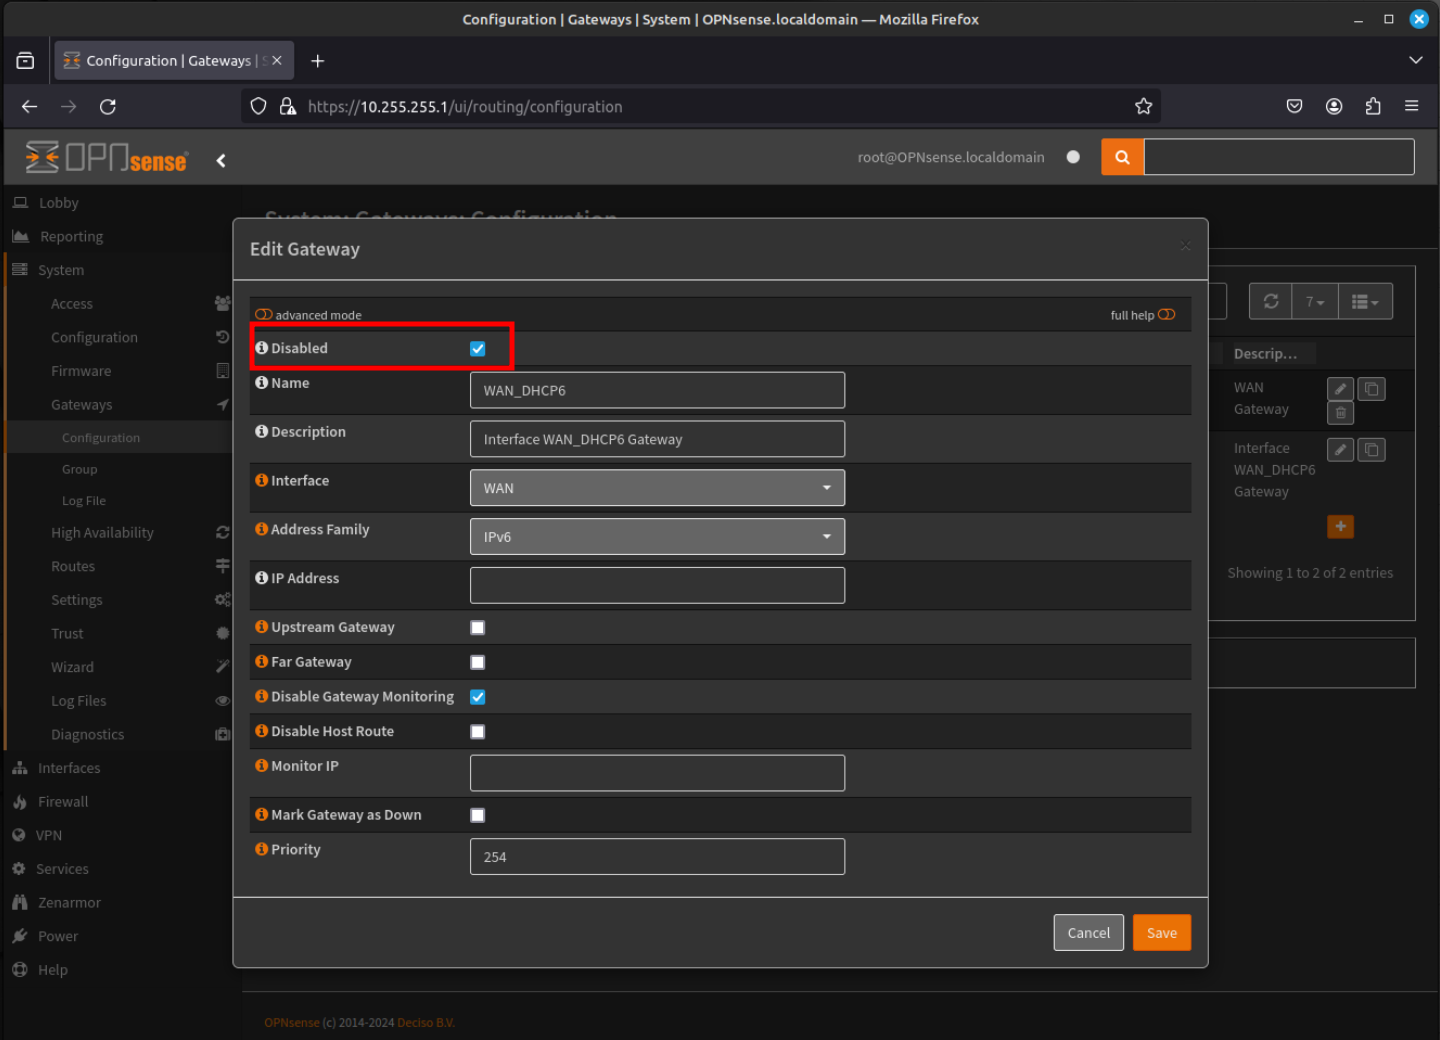
- Navigate to System - Gateways - Configuration using the menu at the left of the window. This will allow to add/remove/edit gateways. By default, the WAN Interface will have an IPv4 Gateway and an IPv6 Gateway. Click the "pencil" icon to edit the WAN IPv6 Gateway.
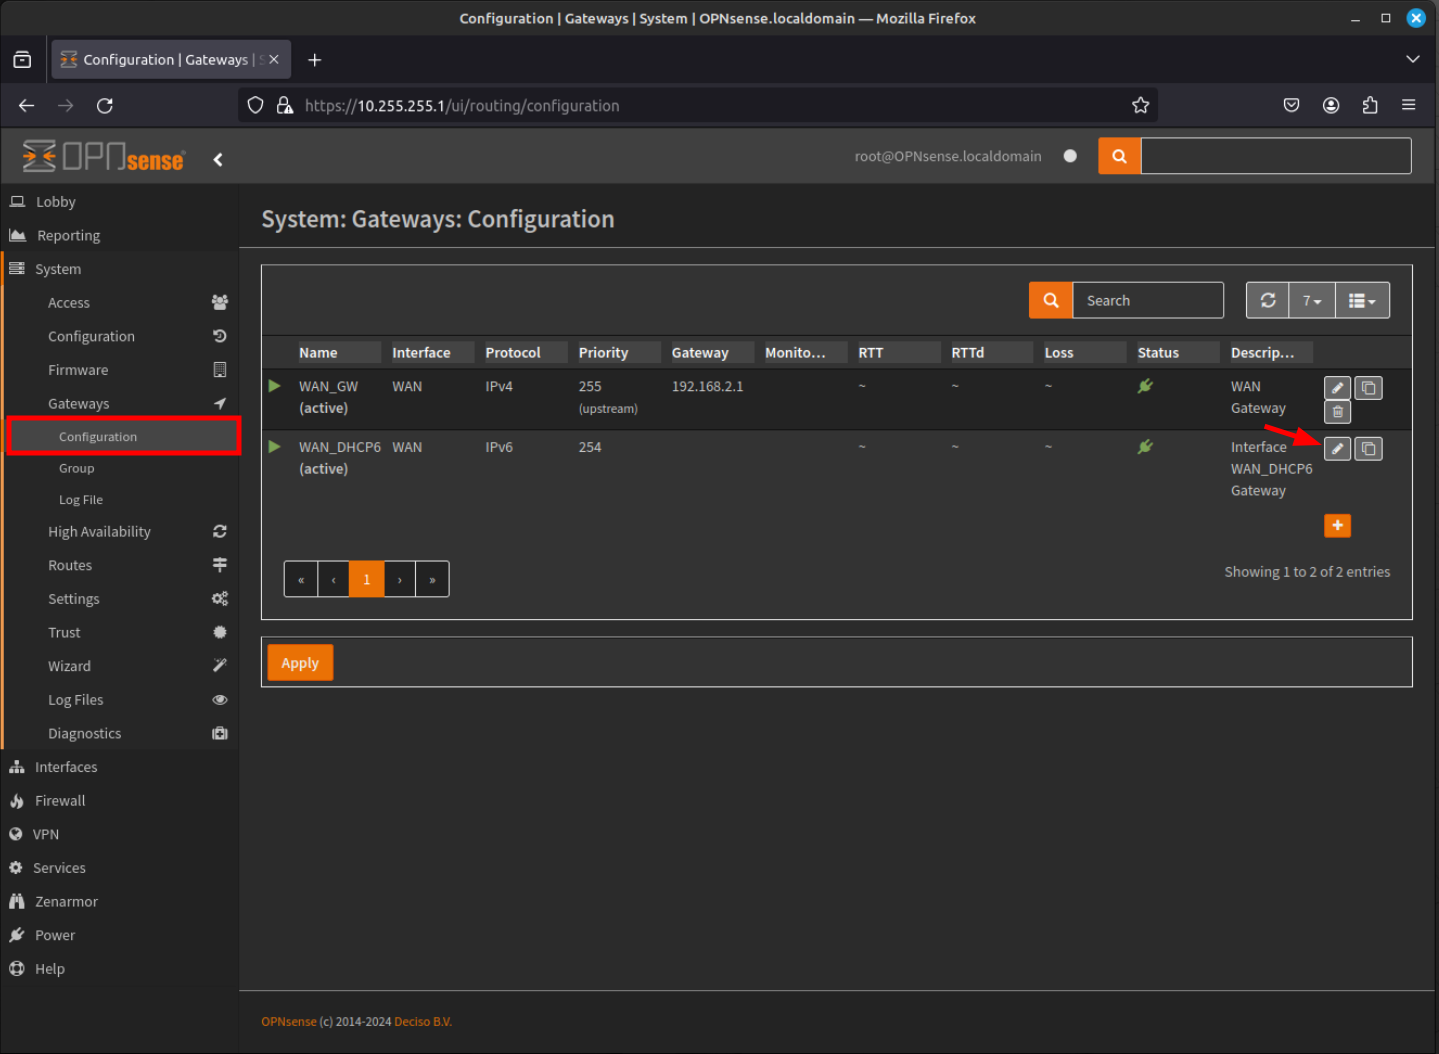
- The Edit Gateway dialog box will be shown. Click the Disabled check box to disable the gateway.
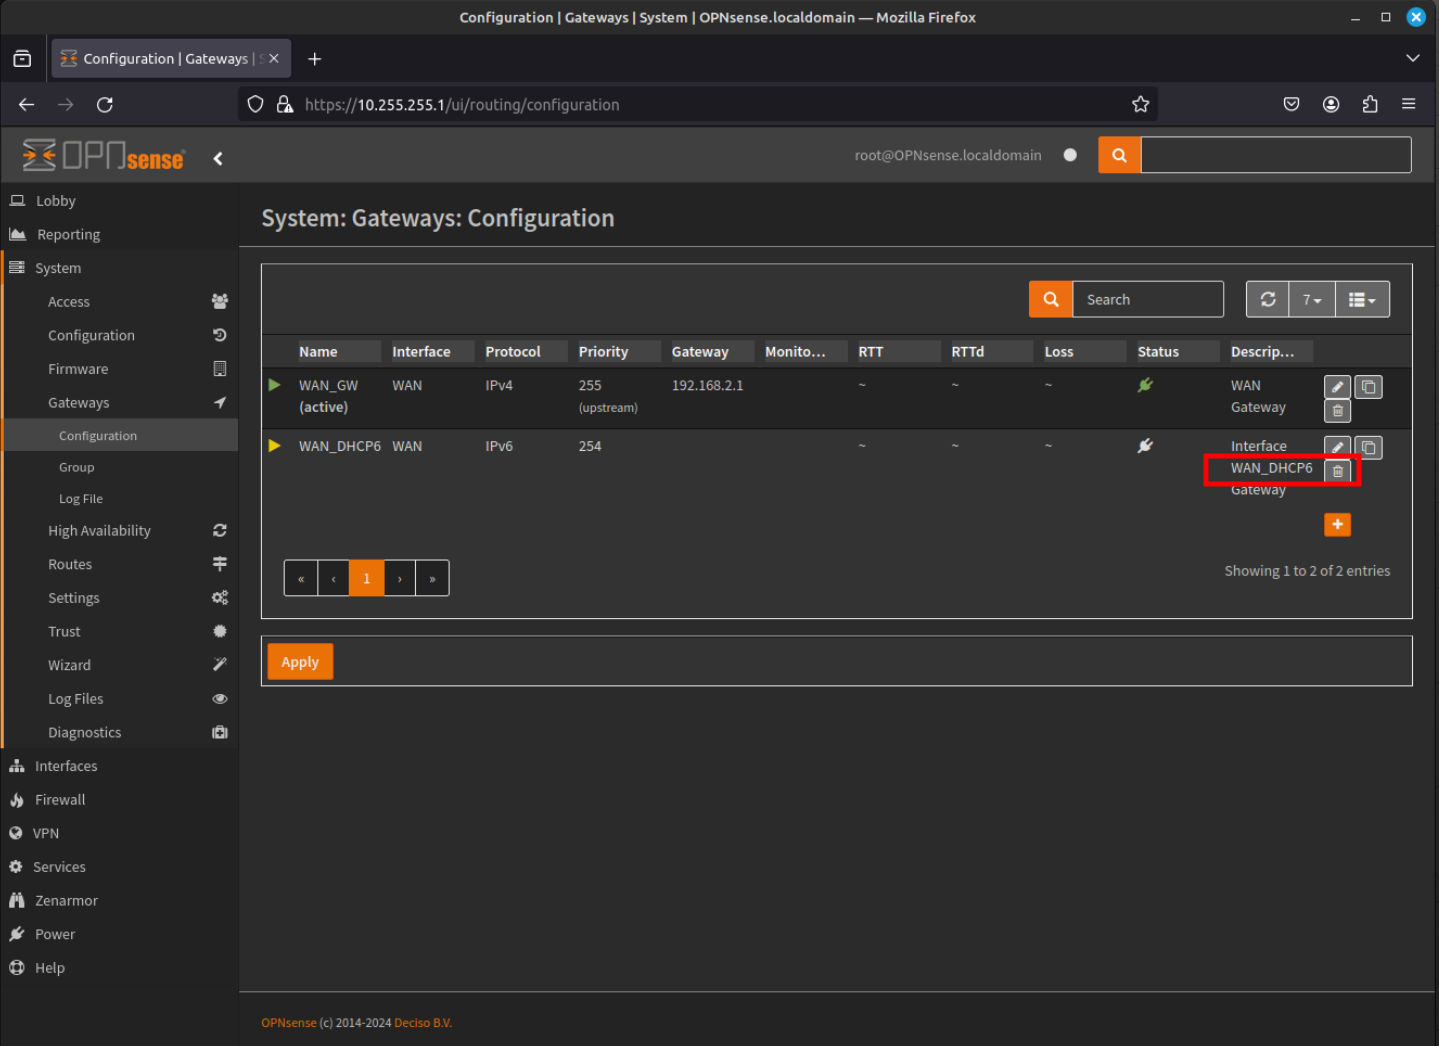
- Now back at the Gateway Configuration screen, you can now delete the IPv6 Gateway. Click the "trash can" icon to delete the gateway.
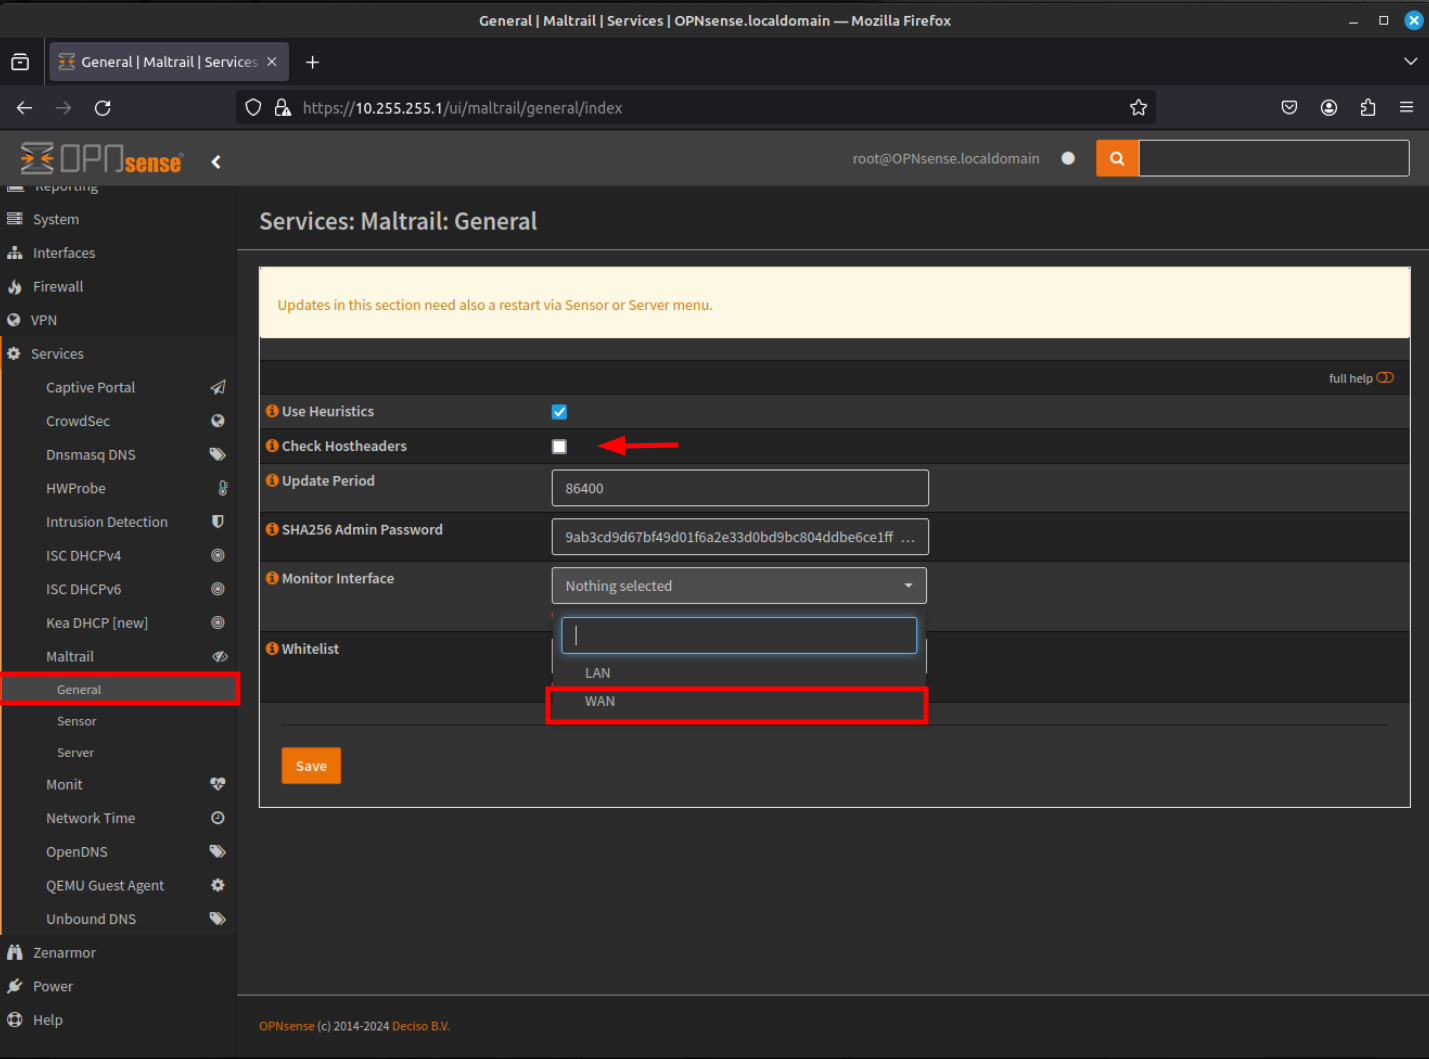
- We will now configure the maltrail service. Navigate to Services - Maltrail - General using the menu at the left of the window. Click on the "Check Hostheaders" check box and select WAN for the "Monitor Interface".
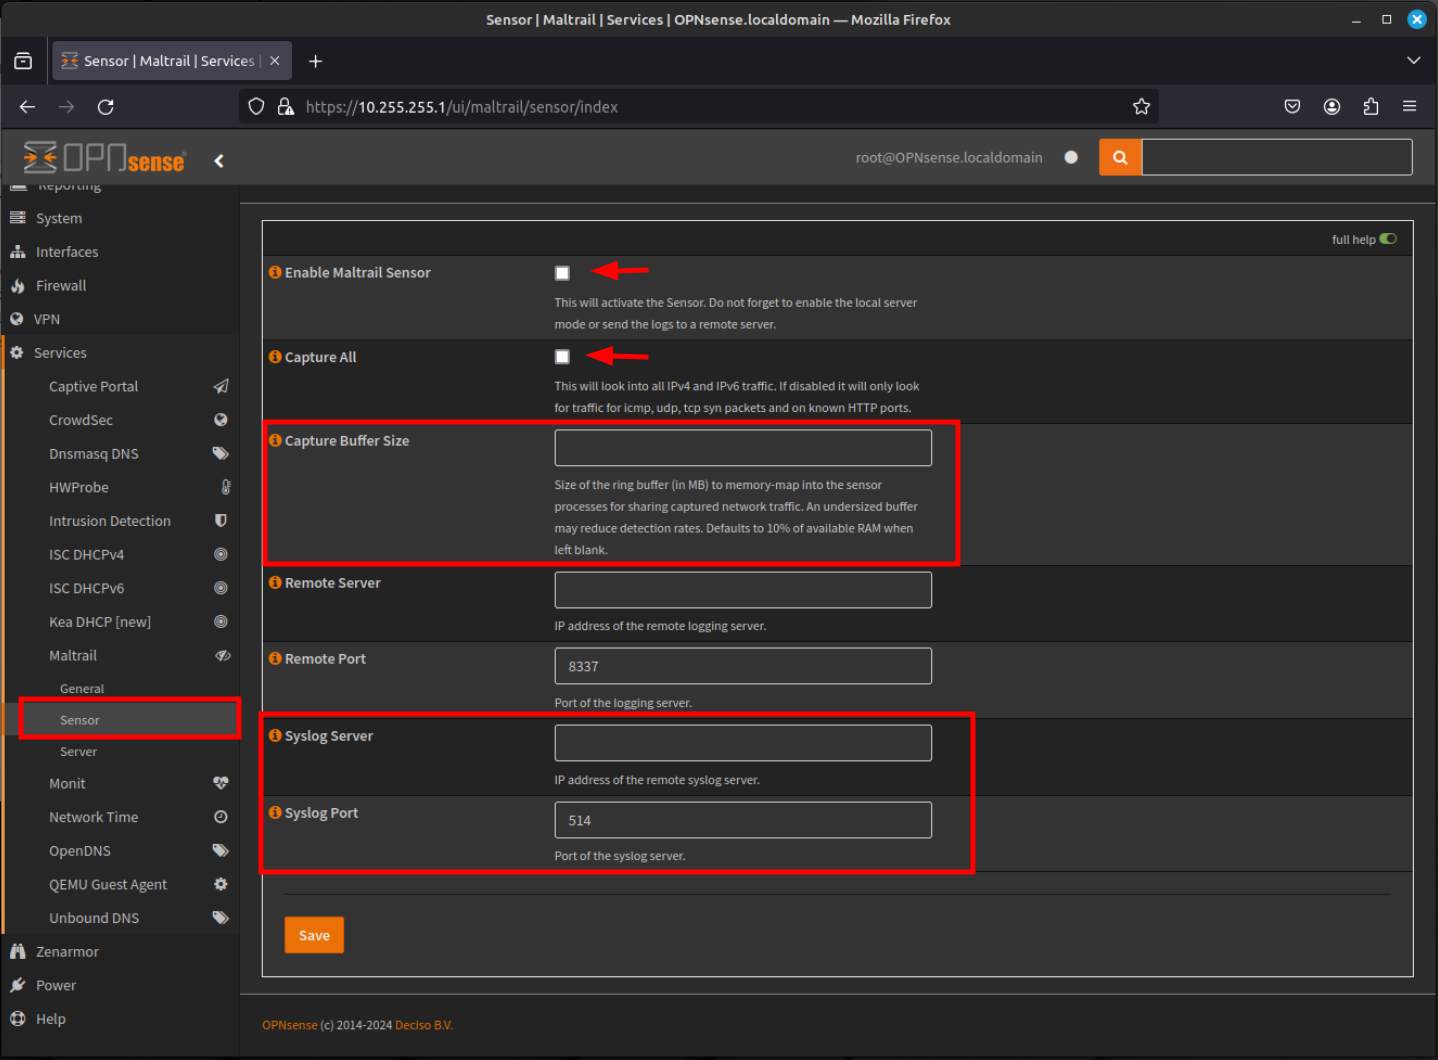
- Now click on Sensor in the menu list to configure the Maltrail sensor options. Click the Enable Maltrail Sensor checkbox. Click the Capture All checkbox to all all traffic to be seen by the sensor. Specify the Capture Buffer Size. Finally, if you have established a syslog or logging destination, specify the Syslog Server IPv4 address and Syslog Port to send and offload the syslog feeds to your desired system. Finally click Save.
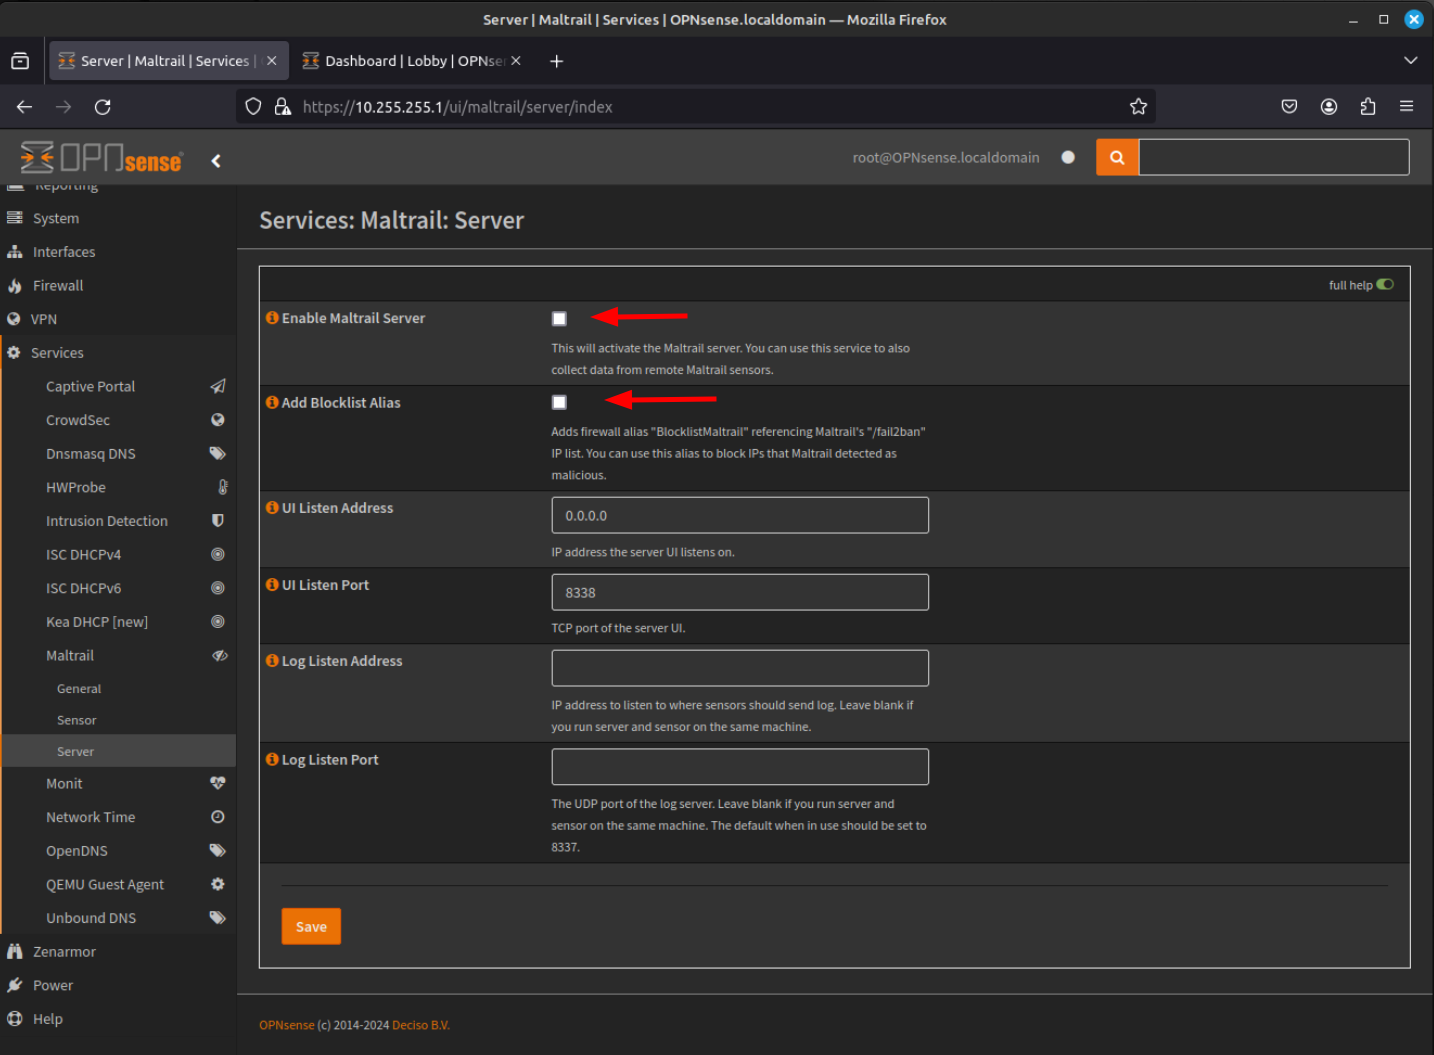
- Finally, to complete the Maltrail configuration, you must configure the Server component. Click on the Server menu item to the left of the screen. Once in the Maltrail Server configuration menu, click the Enable Maltrail Server checkbox and Add Blocklist Alias checkbox. The remaining fields should not need any modification. To complete, click Save.
Conclusion
In this comprehensive guide, we have walked through the step-by-step process of installing and configuring OPNsense, a powerful open-source firewall solution. We began by ensuring that the hardware requirements were met, including a compatible CPU, sufficient RAM, storage, and network interface cards. Next, we downloaded the OPNsense installation image and prepared a bootable USB drive using a tool like Ventoy or Etcher.
By booting from the USB drive and following the intuitive installation wizard, we successfully installed OPNsense on the target machine. During the installation process, we partitioned the disk using the auto ZFS scheme, set up a strong root password, and completed the installation with a reboot.
Upon the initial boot, OPNsense launched its initial configuration wizard, guiding us through the setup of essential network settings. We configured the LAN and WAN interfaces, assigned IP addresses, and specified the hostname, DNS, and time settings. After applying the configuration, we accessed the OPNsense web interface using a web browser and logged in with the root credentials set during installation.
With the initial setup complete, OPNsense is now ready to be further customized to meet specific network requirements and security needs. The web interface provides a user-friendly platform to configure advanced features, such as firewall rules, VPN, intrusion detection, and more.
Looking ahead, the next steps in the Basics Series #4 will delve into the comparison between traditional firewalls and transparent firewalls. We will explore the advantages and use cases of each type, helping you make an informed decision based on your network architecture and security goals.
Furthermore, we will dive into the configuration of additional security tools and plugins that enhance OPNsense's capabilities. Zenarmor, a powerful firewall and security plugin, will be discussed in detail, showcasing its features and how to integrate it effectively with OPNsense. We will also explore Crowdsec, a collaborative security platform that leverages crowdsourced threat intelligence to strengthen your firewall's defenses.
Moreover, the Basics Series #4 will cover the remaining plugins that were not initially configured during the installation process. These plugins extend the functionality of OPNsense, providing additional security measures, reporting capabilities, and integration with external services. By configuring these plugins, you can tailor your OPNsense deployment to your specific requirements and optimize its performance.
As we conclude this guide on installing and configuring OPNsense, it is important to emphasize the significance of regular maintenance and updates. Keeping your OPNsense system up to date with the latest security patches and firmware is crucial to ensure the ongoing protection of your network against evolving threats.
In the upcoming Basics Series #4, we will continue our journey with OPNsense, exploring advanced concepts and configurations that will empower you to build a robust and secure network infrastructure. Stay tuned for the next installment, where we will dive deeper into the world of firewalls, security plugins, and optimizing your OPNsense deployment for maximum effectiveness.


